How to Reduce MOV File Size Without Losing Quality
Learn how to reduce MOV file size using free tools like HandBrake, FFmpeg, and QuickTime. Our guide covers codecs, bitrate, and preserving quality for tributes.
You’re probably here because a MOV file that looked fine on your phone or camera has become a problem everywhere else. It won’t email. It crawls through uploads. Your editing app stutters. And if the clip came from an old family photo, a memorial montage, or a scanned print you animated, the usual advice to “just compress it” doesn’t feel safe.
That hesitation is justified. Reducing file size always means making choices about how video data gets stored. The good news is that good compression doesn’t have to flatten faces, smear film grain, or strip the photographic character out of an irreplaceable image. The trick is knowing which settings matter, and which shortcuts tend to do damage.
Table of Contents
- Why Your MOV File is So Large and What to Do
- The Key Levers for Video Compression
- Compressing MOV Files with HandBrake
- The Power User Method with FFmpeg
- Using QuickTime and Online Tools for Fast Reductions
- Special Focus on Preserving Photographic Texture
- FAQ and Final Recommendations
Why Your MOV File is So Large and What to Do
A MOV file gets large for a few common reasons. The video may use a less efficient codec, keep a high bitrate, store more resolution than you need, or preserve a frame rate that matters more for sports than for family slideshows. Sometimes all four are happening at once.
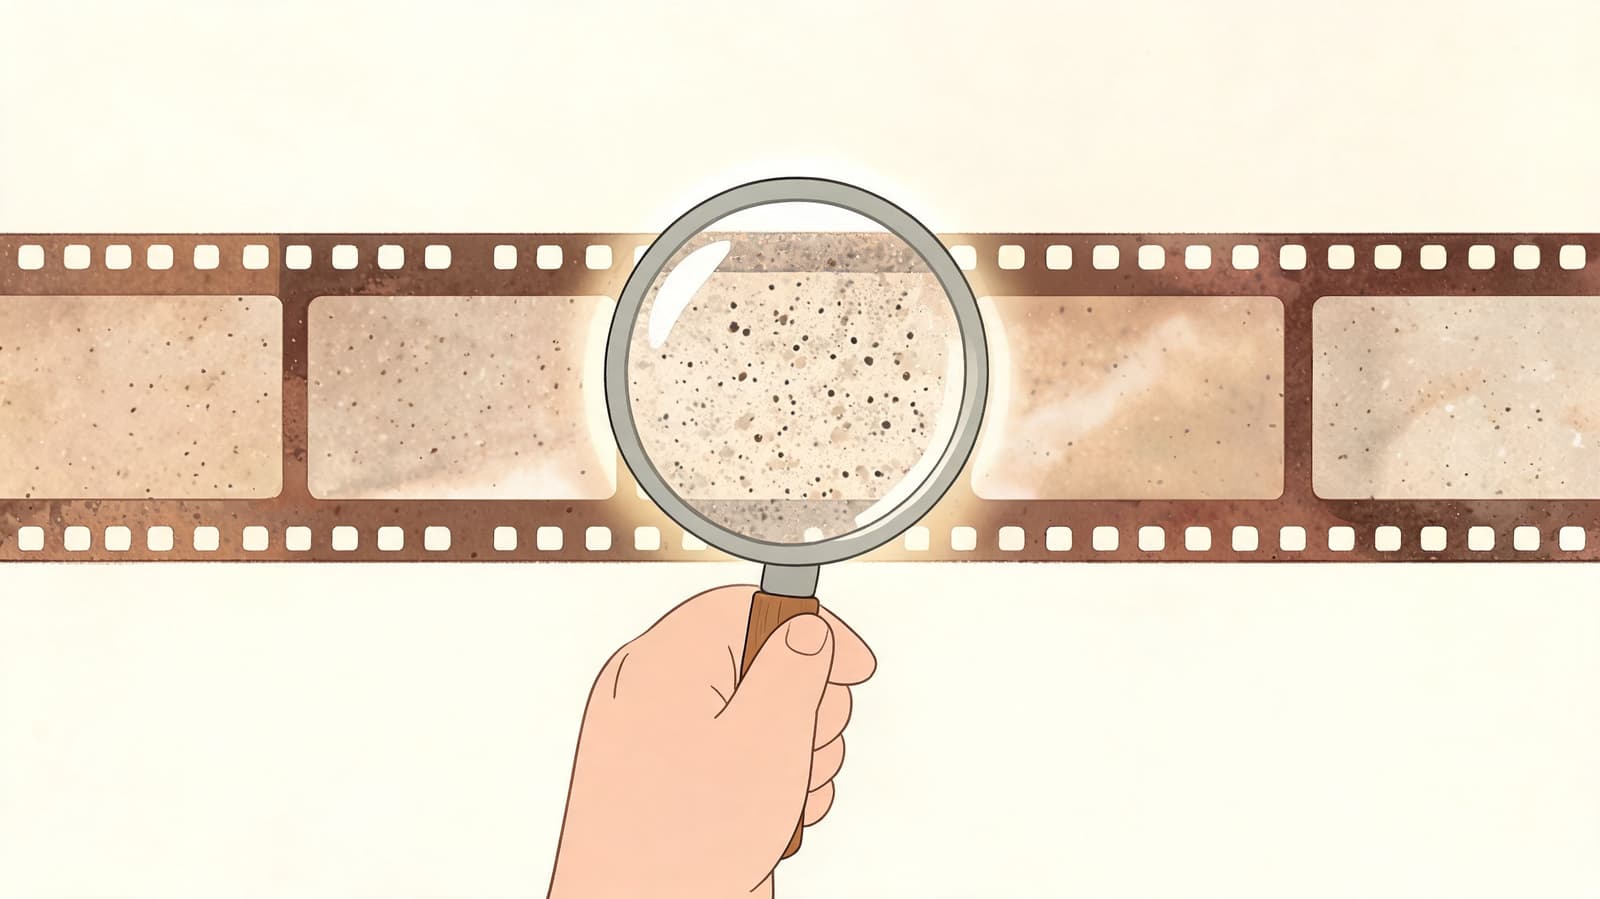
MOV itself also confuses people. It sounds like the problem, but it usually isn’t. MOV is a container, which means it wraps the video and audio streams. Actual size drivers sit inside that wrapper.
If you’re trying to reduce mov file size, the goal isn’t “make it tiny at any cost.” The primary goal is more practical:
- Keep the moments that matter: faces, skin tones, subtle motion, grain, and photo texture.
- Cut waste first: oversized bitrate, unnecessary resolution, bloated audio, or inefficient encoding.
- Match the output to the job: email, cloud backup, social upload, slideshow playback, or archive master.
Practical rule: Make a smaller delivery copy, but keep your original MOV untouched.
That last point matters most with sentimental footage. If the source is an old phone transfer, a scan of a print, or the only surviving family clip, never overwrite it. Compression is for sharing and editing convenience. Preservation is a separate job.
What works best is a measured approach. Start with the most efficient codec your target devices can play. Then use quality-based compression instead of guessing a random tiny file size. If needed, lower resolution or frame rate only after you’ve tested the codec and bitrate approach first.
Here’s the reassuring part. You can usually get a much smaller file while keeping the image looking the same to most viewers. The sections below focus on the settings that do the heavy lifting, then show how to apply them in HandBrake, FFmpeg, QuickTime, and browser tools without wrecking delicate photo details.
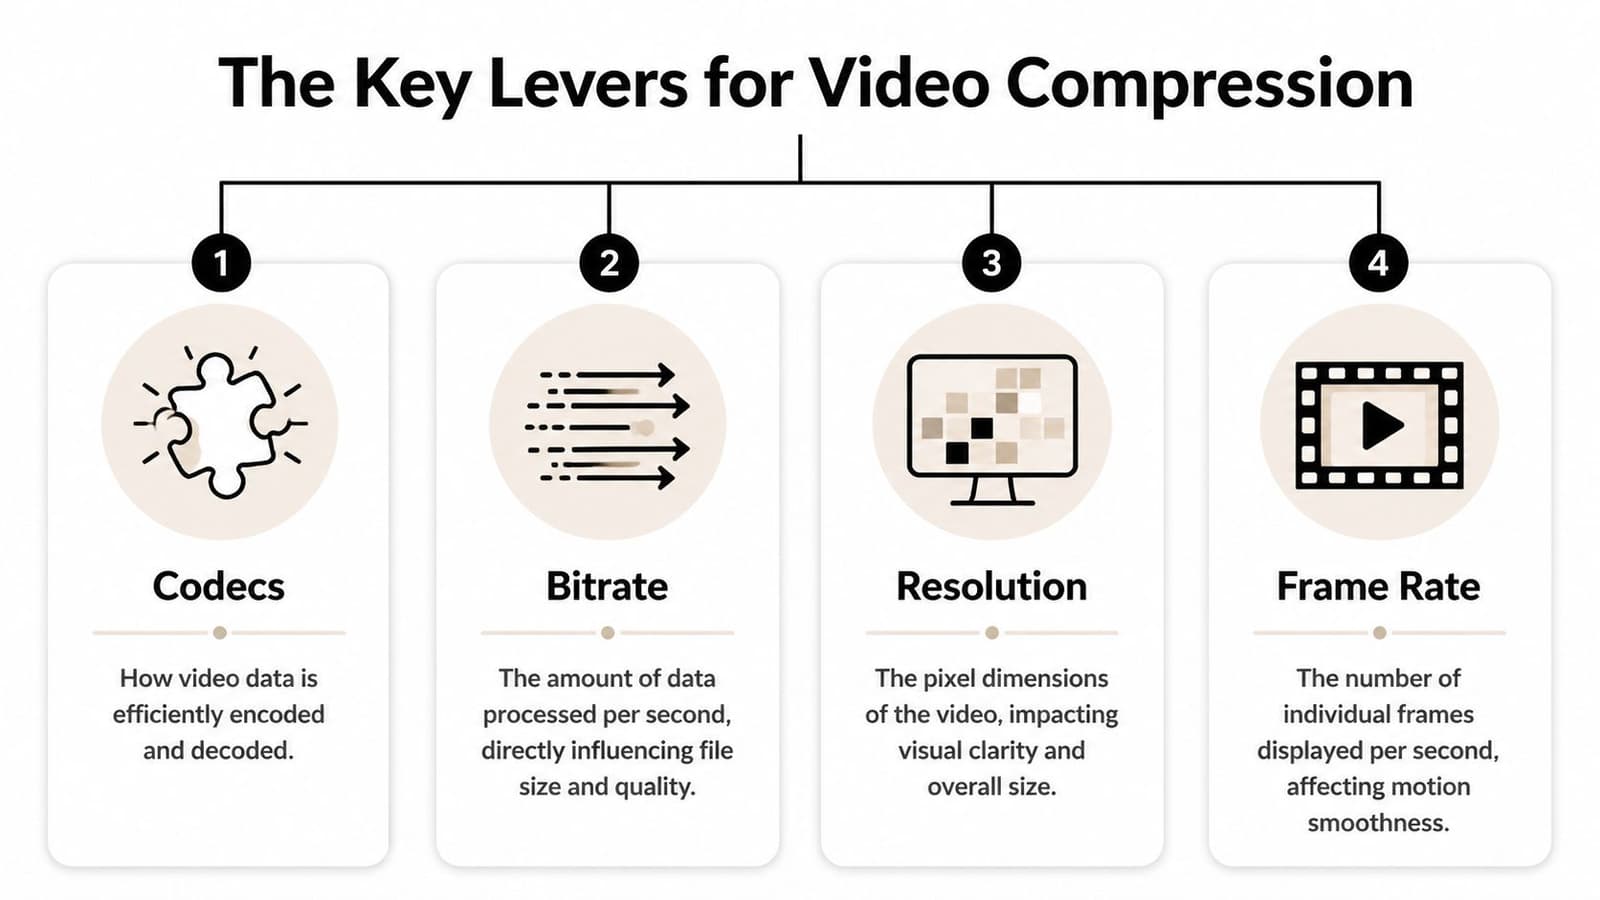
The Key Levers for Video Compression
A smaller MOV usually comes from four settings, not from a miracle app. If you understand those settings, you can cut size hard without flattening the film grain, paper texture, and soft detail that make family-photo videos feel real.
MOV is a container, not the whole story
Two MOV files can have the same running time and wildly different sizes because MOV only holds the streams inside it. The file's size usually comes from the video codec, the bitrate, the frame size, and sometimes bloated audio.
Codec choice usually has the biggest effect. H.264 remains the safe option for older devices and broad compatibility. H.265, also called HEVC, usually gives you a noticeably smaller file at similar visual quality, especially for longer clips. The trade-off is simple. Encoding can take longer, and some older hardware still handles H.264 more reliably.
If your project is built from scanned prints, Ken Burns moves, old camcorder clips, or animated memorial photos, codec changes need a careful eye. A more efficient codec can save a lot of space, but poor settings can smear fine grain, soften eyelashes, or turn subtle paper texture into waxy noise. For broader help with photo-based editing and export choices, see the Photo for Video guides.
The four settings that change file size most
I’d rank the controls in this order:
| Lever | What it affects | When to change it |
|---|---|---|
| Codec | Compression efficiency | First |
| Bitrate | Data allocated to picture quality | Second |
| Resolution | Pixel dimensions | Third |
| Frame rate | Motion smoothness | Last |
Here’s how those levers behave in real projects.
- Codec: Use H.264 when compatibility matters most. Use H.265 when smaller delivery files matter more and your viewers are on recent phones, tablets, laptops, or TVs.
- Bitrate: Quality is usually won or lost. Lower it too far and the first damage often shows up in faces, skies, shadows, and photo texture.
- Resolution: Downscaling helps if the source is larger than the viewing context demands. It is less helpful if the frame contains tiny printed details, handwriting, or delicate texture you want to preserve.
- Frame rate: Photo slideshows, slow zooms, and gentle pans often tolerate lower frame rates well. Footage with fast motion does not.
Bitrate deserves extra attention because it causes the most regret. People often cut resolution first because it feels obvious. In practice, I usually test bitrate before touching dimensions. A 1080p file with sane bitrate settings often looks better than a heavily starved 720p export, especially on tribute videos where viewers linger on one face or one old photograph.
One more setting affects how clean the result looks. Variable Bitrate, or VBR, lets the encoder spend more data on difficult moments and less on simple ones. That matters for family-video work. A still black title card needs very little data. A slow push into an old printed photo with visible grain, fabric, and hair detail needs more.
The safest order is codec first, bitrate second, resolution third, frame rate last.
That sequence protects image character better than slashing everything at once.
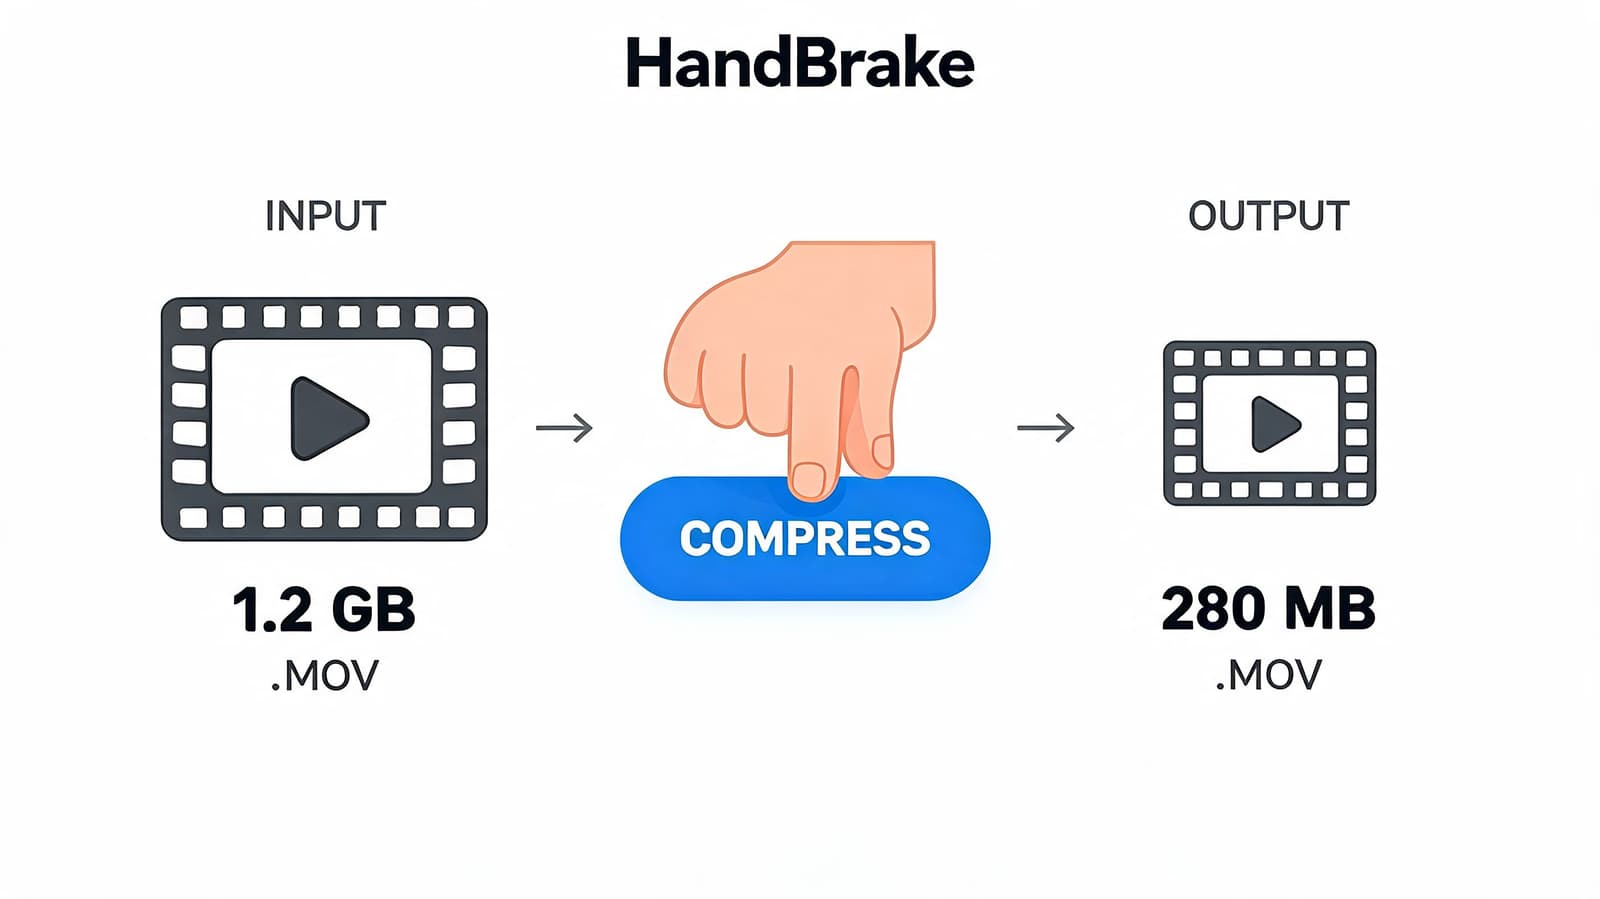
Compressing MOV Files with HandBrake
You finally built a tribute video from old scans, family photos, and a few phone clips, then the export lands at well over a gigabyte. That is the moment HandBrake earns its keep. It is free, dependable, and flexible enough to shrink a MOV file without stripping away the photographic character that made the piece worth saving.
A practical HandBrake workflow
Start with a duplicate of your MOV, not the only copy. For family archives, that habit matters more than any encoder setting.
Open HandBrake, drag in the file, and choose a general 1080p30 preset as your starting point. Presets save time, but they are only a baseline. The real work is checking whether your photos still look like photos after compression.
Move through the tabs in this order:
- Summary: Choose the output container. MP4 is usually easier to share and play back than MOV.
- Dimensions: Keep the original frame size unless the source is clearly larger than you need.
- Video: Set the codec, quality method, and encoder speed.
- Audio: Keep one good track unless you need alternates.
- Save As: Export under a new file name so the source stays untouched.
That order keeps you from chasing file size too early and damaging the image before you even run a test.
Settings worth changing by hand
The Video tab is where HandBrake becomes useful instead of merely convenient.
- Video codec: Choose H.265 if the file is for newer phones, TVs, and computers, and file size matters. Choose H.264 if you need broader compatibility.
- Quality mode: Use Constant Quality instead of guessing a target size on the first pass.
- Encoder preset: A slower preset usually gets a smaller file at similar quality, but export time goes up.
- Frame rate: Keep the source frame rate unless you need to standardize delivery.
For tribute videos and animated family photos, I usually leave resolution alone first and test quality settings before I shrink dimensions. Old prints, paper grain, skin texture, and handwriting often survive bitrate changes better than careless downscaling.
A practical starting point is simple:
Choose H.265 if playback support is not a problem, keep the original resolution, use Constant Quality in a moderate range, and export a short sample before you process the full piece.
That short sample should include the hardest material in your project. Use a section with a slow push into an old print, a face in soft light, and any area with visible grain or fabric detail. If the sample holds up there, the rest of the export usually follows.
What to check before you commit
Do not judge the result by file size alone. Open the original and the compressed version side by side at full size and scrub through problem areas.
Check these specific details:
- Faces: Watch for skin turning waxy or flat.
- Hair and fabric: Look for shimmer, crawling edges, or smeared detail.
- Scanned prints: Make sure paper texture and fine grain do not dissolve into mush.
- Slow pans and zooms: Watch for jitter, stutter, or breakup around edges.
- Shadow areas: Compression damage often shows up there first.
This matters more with memorial pieces than with ordinary social clips. A clean digital frame can tolerate heavier compression. A faded photograph with film grain, soft focus, and print texture can fall apart fast if the encoder is pushed too hard.
If your test looks slightly too processed, raise quality before you change anything else. In my experience, that fixes more regret than dropping resolution or forcing a smaller target file.
This walkthrough is a useful visual companion before you export your own test:
HandBrake works well because it makes careful testing practical. One short sample, one sensible preset, and one honest side by side review will get you much closer to a smaller MOV that still keeps the texture, warmth, and memory in the original images.
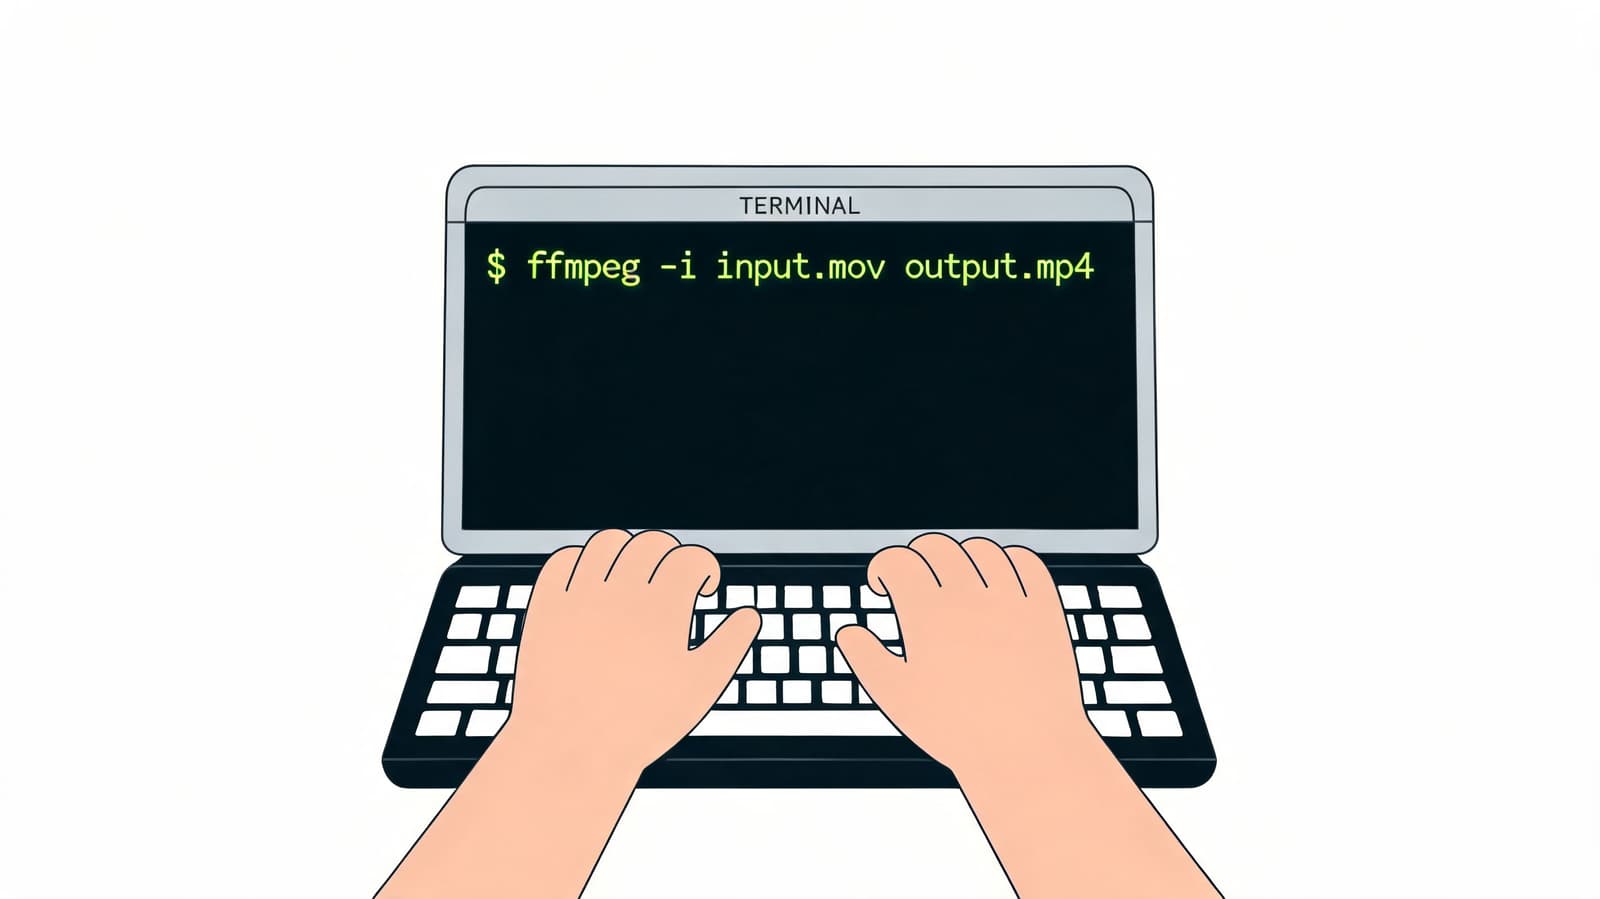
The Power User Method with FFmpeg
FFmpeg earns its place when you want the same result every time. If you are compressing several MOV files for sharing, backup copies, or a tribute project built from scanned photos, a saved command is often more reliable than clicking through export menus and hoping you matched the last settings.
A copy and paste command that works
Start with this:
ffmpeg -i input.mov -c:v libx264 -preset medium -crf 22 -c:a aac -b:a 128k output.mov
Here is what each part controls:
-i input.movloads the source video.-c:v libx264encodes the video as H.264, which is widely supported and usually much smaller than a large MOV export from a phone or camera.-preset mediumsets encoding speed and efficiency. Slower presets usually save more space, but they take longer.-crf 22sets quality. Lower numbers keep more detail and create larger files. Higher numbers shrink the file faster and risk more visible damage.-c:a aac -b:a 128kcompresses audio to a practical format for playback and sharing.
That command is a good baseline because it targets visual quality instead of chasing an exact file size. For family slideshows and animated photo sequences, that usually leads to fewer regrets.
Why FFmpeg suits repeatable work
HandBrake is easier to learn. FFmpeg is easier to repeat.
Once you find settings that keep faces natural, protect fine print texture, and avoid turning film grain into ugly noise, you can reuse them across a whole batch. That matters if you are producing several memorial videos, archive copies, or exports from a project created with a tool for turning pictures into video online.
I use that approach when the source includes old prints, gentle zooms, and slow dissolves. Those details compress differently from ordinary phone footage. A command that works beautifully on a talking-head clip can make a scanned wedding portrait look plasticky.
When two-pass encoding is worth using
Two-pass encoding helps when you must hit a tighter delivery size. The first pass analyzes the footage. The second pass assigns bitrate with more precision.
That extra control can help on videos that mix still photos, text cards, pans across prints, and short motion clips. It is slower, and for many home projects CRF alone is the better starting point, but two-pass is useful when an upload limit forces your hand.
A few practical rules make FFmpeg much less intimidating:
- Start with a short sample. Test twenty to thirty seconds that includes faces, shadows, and any slow movement across photos.
- Change one variable at a time. If quality slips, adjust CRF before changing frame size or frame rate.
- Be careful with old photos. Grain, paper texture, and soft focus are easy to flatten if you push compression too far.
- Label exports clearly. Names like
family-tribute-web.movandfamily-tribute-master.movprevent painful mix-ups later.
FFmpeg is not the first tool I hand to a beginner. It is the tool I trust when I need consistency. Once you have a tested command, reducing MOV file size becomes predictable, and that matters when the footage is personal and you do not get a second chance to protect it.
Using QuickTime and Online Tools for Fast Reductions
Sometimes you don’t want a full compression workflow. You just need the file smaller before a service starts, a family group asks for it, or an upload deadline arrives. That’s where QuickTime and online compressors earn their keep.
QuickTime for the fastest Mac workflow
On a Mac, QuickTime Player is the easiest no-install option. Open the MOV, go to File, then use Export As to create a smaller version at a lower resolution. It’s built in, it’s familiar, and it’s fast.
That convenience comes with a trade-off. QuickTime doesn’t give you the same codec, bitrate, and quality control you get in HandBrake or FFmpeg. If the footage is disposable, that may be fine. If it contains old photos, soft lighting, or subtle textures, QuickTime can feel a little blindfolded.
A simple rule helps here:
| Tool | Best for | Main limitation |
|---|---|---|
| QuickTime | Fast Mac exports | Limited control |
| Online compressor | One-off convenience | Privacy and quality uncertainty |
| HandBrake | Balanced control | Needs installation |
| FFmpeg | Repeatable advanced workflows | Steeper learning curve |
When online compressors make sense
Online tools are useful when the video is non-sensitive and you don’t want to install anything. Drop the file in, wait for processing, download the result. That’s attractive, especially for short clips.
But there are real trade-offs:
- Privacy: Uploading family videos or memorial material to a web service isn’t always comfortable.
- Limits: Some tools restrict file size, export quality, or duration.
- Watermarks or forced settings: You may get less control than you expect.
- Inconsistent output: One service may preserve detail well. Another may over-sharpen or blur.
If you’re specifically working from still images and want a browser-based route for turning photos into motion before delivery, this guide on turning a picture into video online is useful context for what browser workflows do well and where they fall short.
Convenience is a real feature. It just shouldn’t outrank privacy or image fidelity when the source is irreplaceable.
My practical split is simple. Use QuickTime or an online tool when speed matters more than precision. Use HandBrake or FFmpeg when the clip is important.
Special Focus on Preserving Photographic Texture
Generic compression advice usually breaks down at this point. Old scans, printed portraits, faded snapshots, and animated stills don’t behave like modern footage. They carry paper grain, lens softness, dust, low-contrast edges, and tiny tonal transitions that standard presets often misread as disposable noise.
Why old photos break generic compression advice
When you push compression hard, the image may still look “clean,” but it stops feeling real. Skin loses fine transitions. Hair turns brittle. Film grain gets scrubbed into flat patches. The result can look more digital and less human.
One of the best warnings on this point is from VideoProc’s MOV compression discussion, which notes that aggressive settings that take a 500MB file down to 90MB often soften the grainy textures and facial nuances that create a “living memory” effect. That same guidance recommends prioritizing perceptually lossless encoding and using a lower CRF value such as 18 to 20 instead of 23+ when you need to protect subtle detail.
If your export already looks soft before compression, this guide on fixing resolution problems helps separate source-quality issues from compression damage.
Safer settings for tribute and heritage footage
For old-photo videos, I’d rather keep a file slightly larger than erase the character that made the image worth animating in the first place.
A safer workflow looks like this:
- Use a gentler quality setting: Stay closer to perceptually lossless territory instead of chasing the smallest possible output.
- Prefer slower, careful encoding: Faster presets can be fine, but sentimental material benefits from patience.
- Test the most fragile shot first: Export the segment with the most facial detail, grain, or shadow.
- Judge at full size: Don’t approve a file from a tiny preview window.
- Keep an archive version: Make one sharing copy and one higher-quality preservation copy.
Grain isn’t always noise. In old family imagery, it’s often part of the memory.
This is especially true with animated stills. Small camera moves can expose compression weaknesses that aren’t obvious in a frozen frame. A pan across a scanned portrait, for example, can turn edge detail and paper texture into the very artifacts you were trying to avoid. That’s why cautious settings beat aggressive ones on tribute work almost every time.
FAQ and Final Recommendations
The most advanced tool isn’t always necessary. What's needed is a tool that assists in making good decisions, one at a time. For that, HandBrake is usually the best starting point. It gives you meaningful control without asking you to learn command-line syntax.
FFmpeg is the better choice if you want consistency across many exports. QuickTime and online tools are fine for speed, but they’re not the best options when detail preservation matters.
Common questions
Is MOV better than MP4?
Neither is automatically “better.” MOV and MP4 are containers. What matters more is the codec, bitrate, and export settings inside the file.
Can I reduce mov file size on both Windows and Mac?
Yes. HandBrake and FFmpeg work across platforms. QuickTime is the Mac-specific quick option.
Should I always switch to H.265?
Not always. It’s often the most efficient option for smaller delivery files, but older devices or workflows may still prefer H.264 for compatibility.
Can I undo compression later?
No. Once detail is thrown away in a compressed export, you can’t reliably restore it. Keep the original and treat compressed files as delivery copies.
What should I test first?
Pick the most sensitive part of the video. Faces, shadows, hair, fabric, and grain reveal bad settings quickly.
What’s the safest overall approach?
Use a short test export, compare it side by side with the original, and only then run the full file. That single habit prevents most compression mistakes.
If you’re creating tribute clips, memorial montages, or animated keepsakes from old photos, Photo for Video is built for that exact workflow. It turns a single still image into a short moving memory while preserving the analog character people care about, which makes it a strong starting point before you export, edit, and compress your final delivery files.