How to Fix Resolution: A Guide for Photos & Video
Learn how to fix resolution on blurry images and videos. Our guide covers AI upscaling, scanning old photos, and export settings for crystal-clear results.
You’re probably here because one photo matters more than the rest.
It’s the only decent picture from an anniversary, a birthday, or a memorial. You pull it into your editor, stretch it to fit the frame, and it falls apart. Faces turn soft. Edges break into blocks. The finished video looks less like a keepsake and more like a screen capture from an old phone.
That’s a rough moment, especially when the image isn’t replaceable.
Most guides on how to fix resolution stop at monitor settings or general photo tips. That helps if your screen is misconfigured, but it doesn’t solve the specific family-archive problem: faded prints, low-quality scans, old texted images, and mixed media that all need to sit together in one finished video. The fix isn’t one button. It’s a workflow. You preserve what detail still exists, rebuild what can be improved, and avoid damaging it again at export.
Table of Contents
- Introduction How to Fix Your Blurry Memories
- Understanding Why Your Media Looks Blurry
- Quick Fixes for Common Resolution Issues
- The Modern Workflow for AI Image Upscaling
- Preparing Old Scanned Photos for Animation
- Finalizing Your Video With the Right Export Settings
Introduction How to Fix Your Blurry Memories
A family tribute project usually starts with optimism. You gather the photos, pick the music, and begin laying out the story. Then the trouble shows up. The oldest images, often the most meaningful ones, are the weakest files in the folder.
A wedding portrait scanned years ago might be too small. A phone snapshot of a print might have glare. A picture sent through multiple group chats might look soft before you even touch it. By the time you enlarge it for video, every flaw gets louder.
That’s why how to fix resolution isn’t just a technical question. It’s a preservation question. You’re trying to protect expression, clothing texture, handwriting on a card, the shape of a smile. Those details carry memory.
The best results come from doing less damage at each stage, not from trying to rescue everything at the end.
The practical path is straightforward. First, figure out whether the blur is coming from the file itself, your display, or your export settings. Then apply the lightest fix that solves the actual problem. For some images, a crop and careful resize are enough. For older prints and tiny digital files, AI upscaling becomes the useful tool. For final video, export settings decide whether all that work survives.
Understanding Why Your Media Looks Blurry
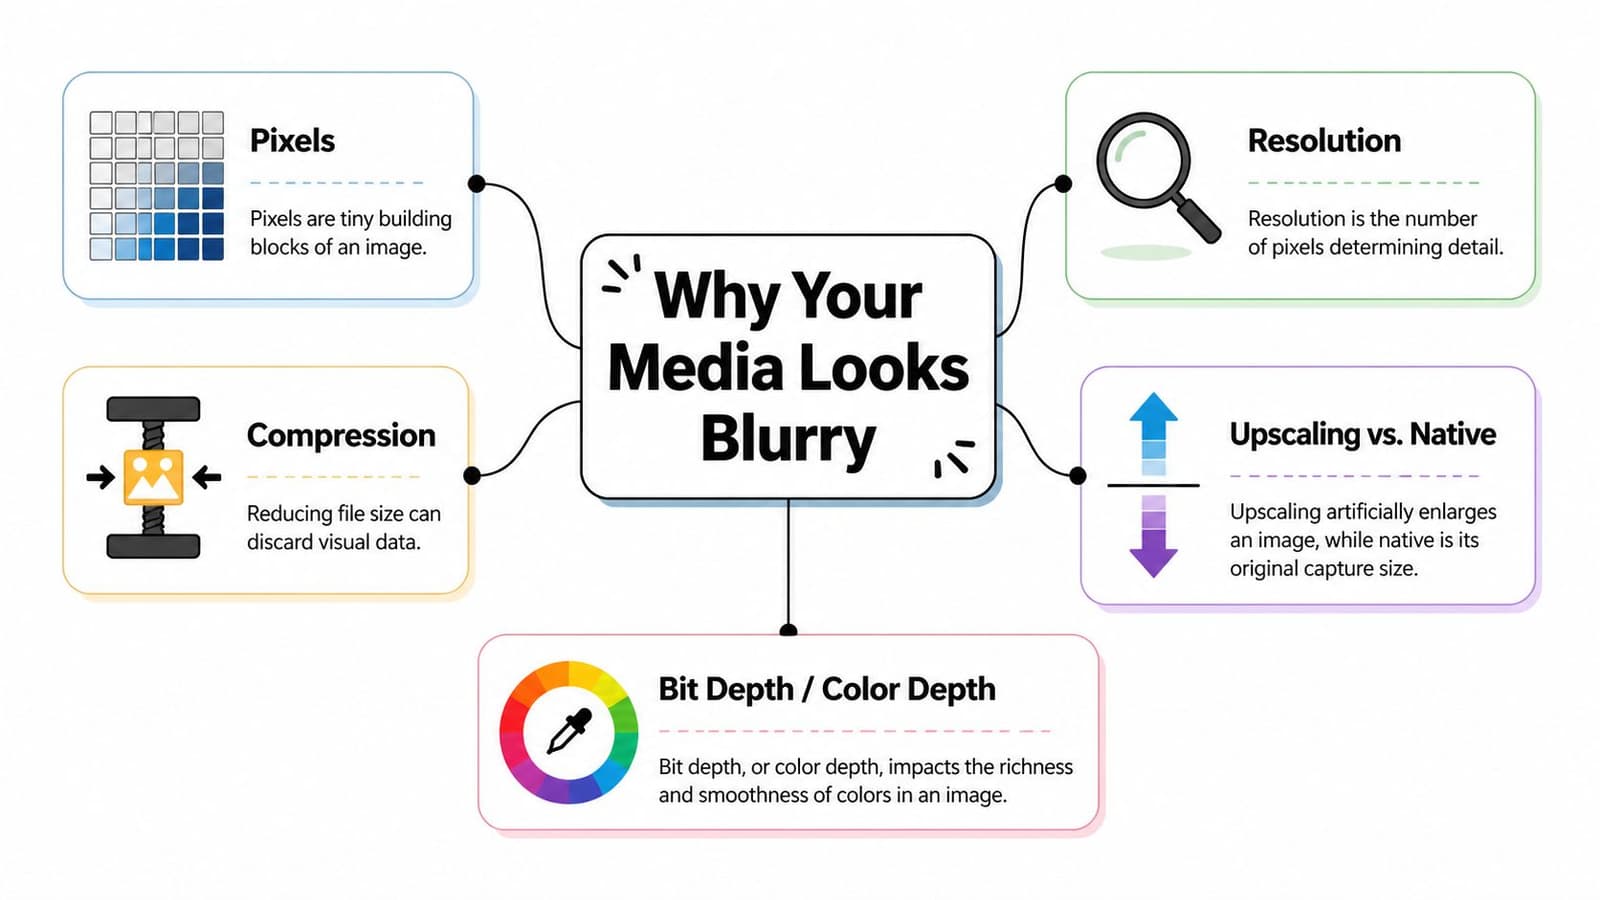
Blur usually comes from one of three places: the image never had much detail, the file lost detail during compression, or the screen is showing it at the wrong settings.
What resolution actually means
Resolution is about how much picture information you have to work with. An easy way to think about it is a mosaic. If the mosaic has enough tiles, you can see eyes, hair, and fabric. If it has too few, enlarging it doesn’t add detail. It only makes each tile easier to notice.
That’s why a small photo looks acceptable as a thumbnail but falls apart when it fills a video frame. The image isn’t suddenly worse. You’ve asked too little information to cover too much space.
Compression makes this harder. Many old family images have been saved, texted, reposted, downloaded, and re-saved. Every one of those steps can flatten fine detail and create fuzzy edges or smeared skin texture. Once that happens, basic enlargement often magnifies the damage.
A few terms matter:
- Pixel dimensions tell you the actual size of the image in pixels.
- DPI or PPI matters mainly in scanning and print contexts, not as a magic quality switch for video.
- Native resolution means the original capture or display size the image or monitor is designed for.
- Upscaling enlarges the image by inventing or reconstructing missing detail.
Practical rule: If the original file is tiny, changing labels or metadata won’t save it. You need a better source file or a careful upscale.
A blurry file and a blurry screen are different problems
Sometimes the media is fine and the display is the issue. On Windows 10, one common fix is to right-click the desktop, open Display settings, and choose the marked Recommended resolution. Microsoft recommends sticking to that setting because lower resolutions can cause blurry text and softer display output. This simple adjustment solves up to 75% of basic resolution problems based on support benchmarks cited in this Windows 10 resolution walkthrough.
That matters because people often start editing while their monitor is set wrong. Then they over-sharpen an image that wasn’t that soft.
A useful check is this short table:
| What you see | Likely cause | First move |
|---|---|---|
| Everything on screen looks soft | Display setting mismatch | Check monitor resolution |
| Only one old photo looks bad | Weak source file | Find a better scan or upscale |
| File looked fine until export | Export compression or mismatch | Recheck output settings |
If you remember one thing, remember this: you can’t recover detail that never existed in the file, but you can often preserve and reconstruct more than you think if you start with the right diagnosis.
Quick Fixes for Common Resolution Issues
Before you open an AI tool, try the fixes that cost nothing and don’t permanently damage the image. For ordinary screenshots, modern phone photos, and casual family pictures, these are often enough.
Start with framing before enlargement
A weak image gets worse when you enlarge empty space. If the subject occupies only a small part of the frame, crop first. A tighter crop can improve perceived quality because the viewer focuses on the face or gesture that matters instead of background blur.
Use this order:
- Trim dead space so the subject fills more of the frame.
- Straighten the horizon or photo edges if the image was captured at an angle.
- Correct exposure gently before sharpening. Dark, muddy files often look lower resolution than they are.
- Add only light sharpening after sizing, not before.
In Photoshop, Preview, Affinity Photo, or similar editors, a small crop plus tonal cleanup can do more than an aggressive “enhance” button. The reason is simple. Sharpness is easier to believe when contrast and composition are working.
Use simple resizing carefully
If you do need to resize, keep expectations realistic. Traditional resampling can help smooth an enlargement or preserve a reduction, but it won’t perform restoration. For standard editing tools:
- For enlarging, use a smoother method meant for upscale work.
- For shrinking, use a sharper method so details don’t go mushy.
- Avoid repeated resizing up, down, and up again. Every cycle can make the file worse.
- Save a master copy before experimenting so you can undo bad edits cleanly.
Many generic guides stop here, and that’s the gap. Existing “how to fix resolution” content often focuses on projectors and monitors while underserving people working with old family images for AI video generation. That matters because inputs below 720p often lead to blurry MP4 output in image-to-video tools, and complaints about “AI animation blurry old photo” are rising, with a 40% year-over-year increase cited in this coverage of the trend and search gap.
If the image is a faded print, a tiny messenger download, or a photo of a photo, quick fixes usually improve presentation, not true detail.
That’s the point where restoration workflow matters more than basic editing.
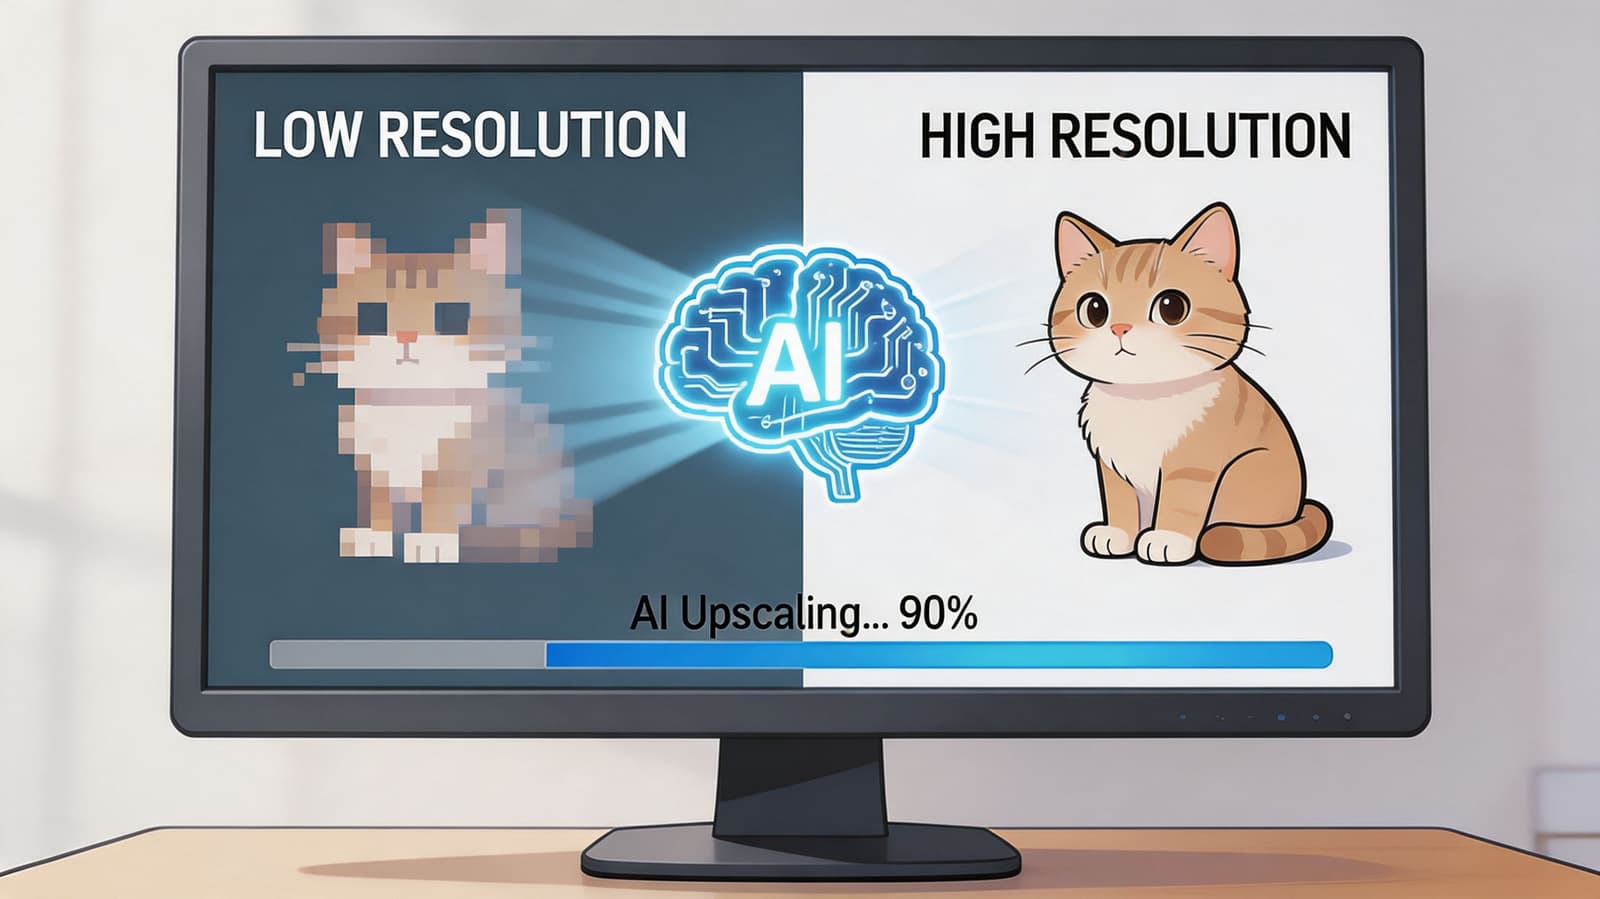
The Modern Workflow for AI Image Upscaling
Once a photo is too small or too damaged for ordinary resizing, AI upscaling becomes the practical option. Used well, it can rebuild believable detail for faces, clothing, and edges. Used badly, it creates waxy skin, fake eyelashes, and plastic-looking surfaces.
Treat upscaling like restoration, not magic
The first rule is to inspect the source before touching any settings. Ask three questions. Is the image soft because it’s out of focus, because it’s too small, or because it has compression damage? Different flaws respond differently.
A practical workflow looks like this:
- Choose the best source first. Use the original scan or earliest file you can find, not the version someone sent in a chat.
- Clean before enlarging. Remove dust, heavy color casts, and obvious scanner streaks first.
- Pick the right model type. In tools such as Topaz Gigapixel AI or built-in AI enlargers in modern editors, photo models usually work better for portraits than generic modes.
- Start with a modest upscale. Test a smaller increase before jumping to the largest one available.
- Use face enhancement cautiously. It can rescue eyes and mouths, but it can also invent a different person if pushed too far.
- Compare at actual viewing size. Don’t judge the image only while zoomed in excessively.
A lot of editors make the same mistake here. They evaluate the upscale at a punishing zoom level, then keep pushing detail until the image looks brittle. Family videos are watched in motion, often on TVs or phones. The image needs to look natural there first.
Good upscaling restores credibility. Bad upscaling draws attention to itself.
If you want to carry a restored still into motion afterward, this guide to an AI image to video generator is useful for understanding how a stronger source image helps downstream animation.
Here’s a quick decision view:
| Source problem | Better move | What usually fails |
|---|---|---|
| Tiny but fairly clean photo | Moderate AI upscale | Oversharpening first |
| Dusty, faded scan | Cleanup, then upscale | Enlarging dust and scratches |
| Blocky compressed image | Denoise lightly, then upscale | Re-saving as JPEG repeatedly |
A brief demo can help you visualize the process in practice:
How to handle mixed-resolution tribute edits
The harder problem isn’t one weak photo. It’s a montage where old scans, phone pictures, and newer HD clips all need to sit together without one panel looking muddy.
That mismatch is common and poorly addressed. In tribute edits from mixed sources, 72% of montage failures stem from resolution loss, according to the 2025 Creator Economy Report reference discussed here. In practice, that means side-by-side layouts and split-screen memorial sequences often break down because one asset was enlarged too far without proper prep.
What works better is normalization before editing:
- Prepare each old photo individually instead of dropping everything straight into the timeline.
- Upscale weaker stills first so they’re closer in strength to your modern footage.
- Match framing style across assets. A carefully cropped old portrait can sit beside HD footage better than a wide, weak scan.
- Add motion conservatively on fragile images. Fast zooms reveal flaws.
If one image remains visibly weaker, don’t force it to fill the whole screen. Use it as an inset, pair it with text, or present it for a shorter beat. The viewer will accept tonal difference. They won’t ignore obvious blur.
Preparing Old Scanned Photos for Animation
Old prints deserve more care than ordinary digital photos because every flaw in the scan becomes part of the file forever. If the first digital copy is poor, every later “fix” has to fight that weak starting point.
Get the scan right before you edit anything
Clean the scanner bed. Clean the print gently. Make sure the photo lies flat. Those steps sound small, but dust, glare, and curled edges confuse later restoration.
Use this scanning mindset:
- Scan once, scan well. Don’t rely on a quick phone snapshot if you have access to a proper flatbed scanner.
- Keep a loss-friendly master. Save a clean archival version before making cropped or edited copies.
- Preserve the full border first. You can crop later, but you can’t recover a cut-off hand or handwritten note once it’s gone.
- Watch the texture. Some old prints have grain, paper pattern, or tonal softness that belongs to the memory. Don’t scrub it all away.
For animation, the scan has to survive movement. A still image can hide weak corners or light banding if the frame never shifts. Once you add pan, zoom, or subtle motion, those problems become easier to notice. Better scans give motion tools more stable material to work with.
A respectful restoration keeps the age of the photo while removing the distractions that make viewers fight the image.
If your end goal is movement from vintage family prints, this guide on how to animate old photos gives a useful sense of how strong preparation affects the final look.
Build a repeatable family archive workflow
The emotional mistake is trying to digitize and restore everything in one weekend. That’s when people rush, overprocess, and burn out. A steadier approach works better.
The change model framework describes five behavioral stages, and for tribute makers the useful part is the preparation stage. People who break large projects into smaller steps, such as handling one photo per week instead of a 50-photo montage at once, see 65-75% higher completion rates, and pairing sessions with an existing routine helps sustain progress, as described in this behavior change guidance on resolution success.
That advice fits family archiving almost perfectly. Try a simple rhythm:
| Weekly session | Task |
|---|---|
| Session one | Scan and label a small batch |
| Session two | Clean and crop only the best candidates |
| Session three | Upscale the few images that need it |
| Session four | Review for animation or tribute use |
This approach also improves judgment. When you work on fewer photos, you’re less likely to apply the same heavy-handed fix to every image. Some old pictures need repair. Others just need respect.
A good naming habit helps too. Include names, rough dates, and event labels in the filenames or folders. Six months later, that organization matters as much as the restoration itself.
Finalizing Your Video With the Right Export Settings
A clean scan and a careful upscale can still be ruined in the last minute of the process. Export settings decide whether your final file preserves what you repaired or throws it away.
Match the project before you export
The first rule is simple. Export at the same resolution as your project unless you have a clear reason not to. If your timeline is set one way and your output another, the software has to resize again. That can soften images, especially older ones that were already near the edge.
For a final MP4, keep your decisions boring and consistent:
- Match resolution to the timeline. Avoid surprise resizing on export.
- Use high enough quality settings for the final destination. Social delivery and archive copies can be separate exports.
- Watch for aggressive compression. Small files are convenient, but they can chew up faces and texture.
- Review the export on the device type people will use. A file that looks acceptable on a laptop may reveal problems on a TV.
If you need a practical companion for preparing visuals for motion workflows, this guide on how to scale image to video content is a useful reference.
Track what actually looks good
Editors often trust memory too much. They remember that one export “looked better” but forget the exact settings. That slows improvement.
A stronger habit is to create a simple quality log for your own projects. The reason goes beyond neatness. Tracking outcomes and input quality together increases long-term adherence by 40-50%, according to this goal tracking and feedback framework. For video work, that means noting both what you exported and how carefully you prepared the source.
Keep a short checklist after each finished tribute:
- Outcome metric such as whether the video held up cleanly in final playback.
- Input metric such as source quality, upscale choice, and whether you applied too much sharpening.
- Review point once a week or after a few projects, so you can spot patterns.
- Personal spec library with your best settings for old prints, phone captures, and mixed montages.
The export isn’t the end of the job. The review after export is what improves the next one.
Experienced editors hone their craft. They don’t rely on luck. They keep a record of what preserved skin texture, what made text crawl, and what turned a sentimental photo into a file the family wants to replay.
If you’ve got one treasured image that deserves more than a static slide, Photo for Video turns a still photo into a short living-memory MP4 with gentle motion suited for birthdays, memorials, anniversaries, and family keepsakes. It’s built for the exact kind of images people struggle with most, including old scans, phone captures, and digitized prints, and it keeps the process simple enough for families while still fitting cleanly into an editor’s tribute workflow.