Face Cut Out from Photos: Step-by-Step Guide for 2026
Learn how to make a clean face cut out in Photoshop, GIMP, online tools and phone apps, fix hair edges, and prep it for animation.
You've found the photograph you want for a birthday montage or memorial tribute, but there's a distracting curtain behind the person and another relative overlapping their shoulder. An automatic tool removes the background, then takes half the curls and the arm of their glasses with it. Once you add movement, those small mistakes become hard to ignore.
A good face cut out preserves more than a recognizable face. It keeps the hairline, expression, glasses, and texture that make the photograph feel familiar. Start with permission and privacy, choose a tool suited to the photograph, and judge the result against its intended background rather than a checkerboard preview.
Table of Contents
- Check Privacy Before You Upload a Face
- Choose the Right Tool for Your Face Cut Out
- Cut Out a Face in Photoshop and GIMP Step by Step
- Quick Cutouts with Online and Phone Tools
- Fix Hair, Edges and Partial Profiles
- Export Settings That Keep a Cutout Ready for Animation
Check Privacy Before You Upload a Face
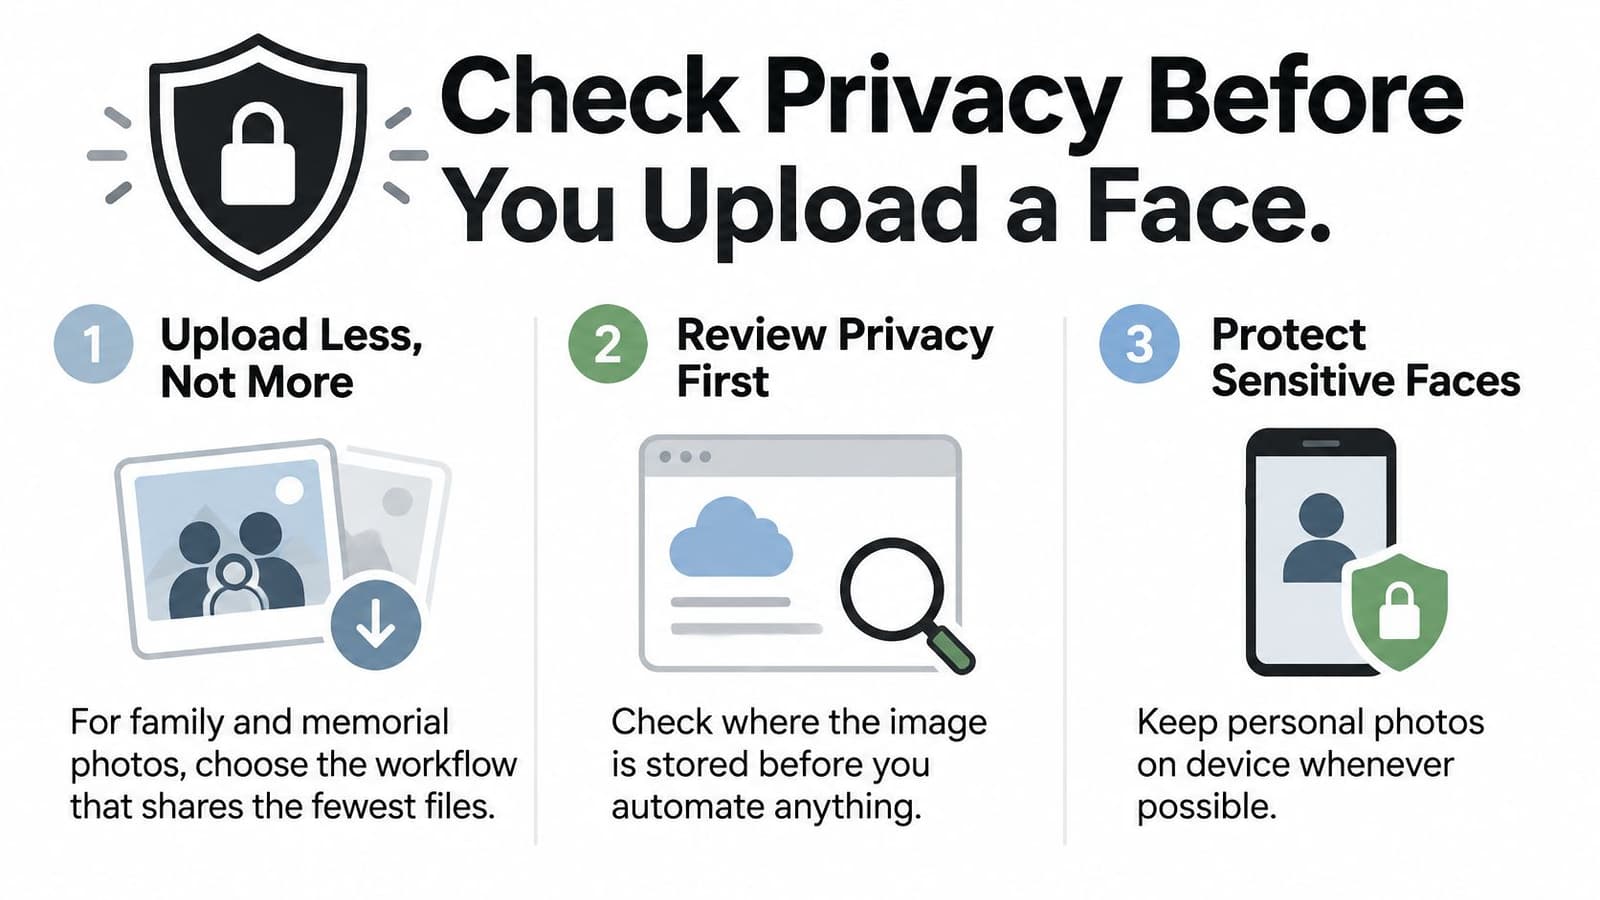
For family and memorial photographs, the best workflow uploads the least, not necessarily the one that automates the most. A desktop edit is often the better choice when the photograph includes a child, a private family setting, or someone who can't approve its use.
Privacy concerns aren't unusual. In its 2025 survey of 5,000 adults across the United States, United Kingdom, Canada, and Australia, Attest's Consumer Adoption of AI report found that 43% remained concerned about privacy or security weaknesses in AI, while 33% trusted companies with data collected through AI.
Complete the upload check
- Processing location: Confirm whether the editor works locally or sends the photograph to a server. A desktop interface doesn't automatically mean local processing.
- Retention and reuse: Find the deletion timeline and check whether uploads may be used for training or attribute inference.
- Minimum necessary image: Use a cropped working copy when the surrounding photograph isn't needed. Keep enough detail for the intended output.
- Masking options: Ask whether sensitive regions can be concealed, but don't assume masking makes a recognizable portrait anonymous.
- Permission: For children, seek approval from the appropriate parent or guardian. For deceased relatives, discuss the edit with the family member responsible for the tribute.
- Metadata: Inspect exported location and identifying information before sharing.
Use this checklist before choosing an automated service.
For Mac users comparing local workflows, RevelRaw's guide to a privacy-focused photo editor for Mac provides a useful starting point for evaluating processing choices. Before uploading an animation copy, check the destination's current privacy and retention policy, rather than relying on a deletion window you remember.
Choose the Right Tool for Your Face Cut Out
Your grandmother's faded scanned print needs different treatment from a sharply lit phone portrait.
Face cutout tools compared by control, output and processing
| Tool | Best for | Hair and edge control | Cost | Export | Processing |
|---|---|---|---|---|---|
| Photoshop Select Subject and Select and Mask | Detailed portraits and hair | Refine Edge Brush and Decontaminate Colors | Paid subscription | PSD, PNG, TIFF | Desktop editing; select device processing where available and verify cloud options |
| GIMP Foreground Select and layer masks | Free desktop work and scans | Manual mask refinement and Alpha to Selection | Free and open source | XCF, PNG, TIFF | Local desktop |
| Online background removers | Single quick portraits | Automatic with limited touch-up | Check free-download limits and paid full-resolution access | PNG; JPG without transparency | Uploaded to a server |
| iPhone Lift Subject in Photos | Quick phone photos | Automatic with little manual control | Included with supported iOS devices | Copy or share as an image | On device |
Choose automatic tools for clean, high-contrast portraits; choose desktop masking for faded scans, difficult profiles, and hair that blends into the background. Judge the tool by its hardest region, not by how quickly it removes the obvious background.
Choose control over unnecessary complexity
Photoshop is the practical choice when you need to separate curls, correct color contamination, and revisit the mask later. Select Subject gives you a starting point; Select and Mask supplies the controls that make the result usable.
GIMP is a capable alternative when you don't want a subscription. Foreground Select takes more guidance, but a layer mask lets you repair mistakes without deleting the original pixels.
For either desktop route, preserve a layered working file. A flattened export might look finished today, but it won't let you easily restore a clipped collar when the animation framing changes.
Selection rule: A clean cheek contour doesn't compensate for missing glasses or a damaged hairline.
Don't choose an editor solely because its demonstration uses an immaculate portrait. Faded monochrome, grain, overlapping people, and soft focus require judgment about what belongs to the subject. Automatic masks can mistake grain for boundary detail, so scan work often needs selective manual correction rather than stronger global cleanup.
Cut Out a Face in Photoshop and GIMP Step by Step
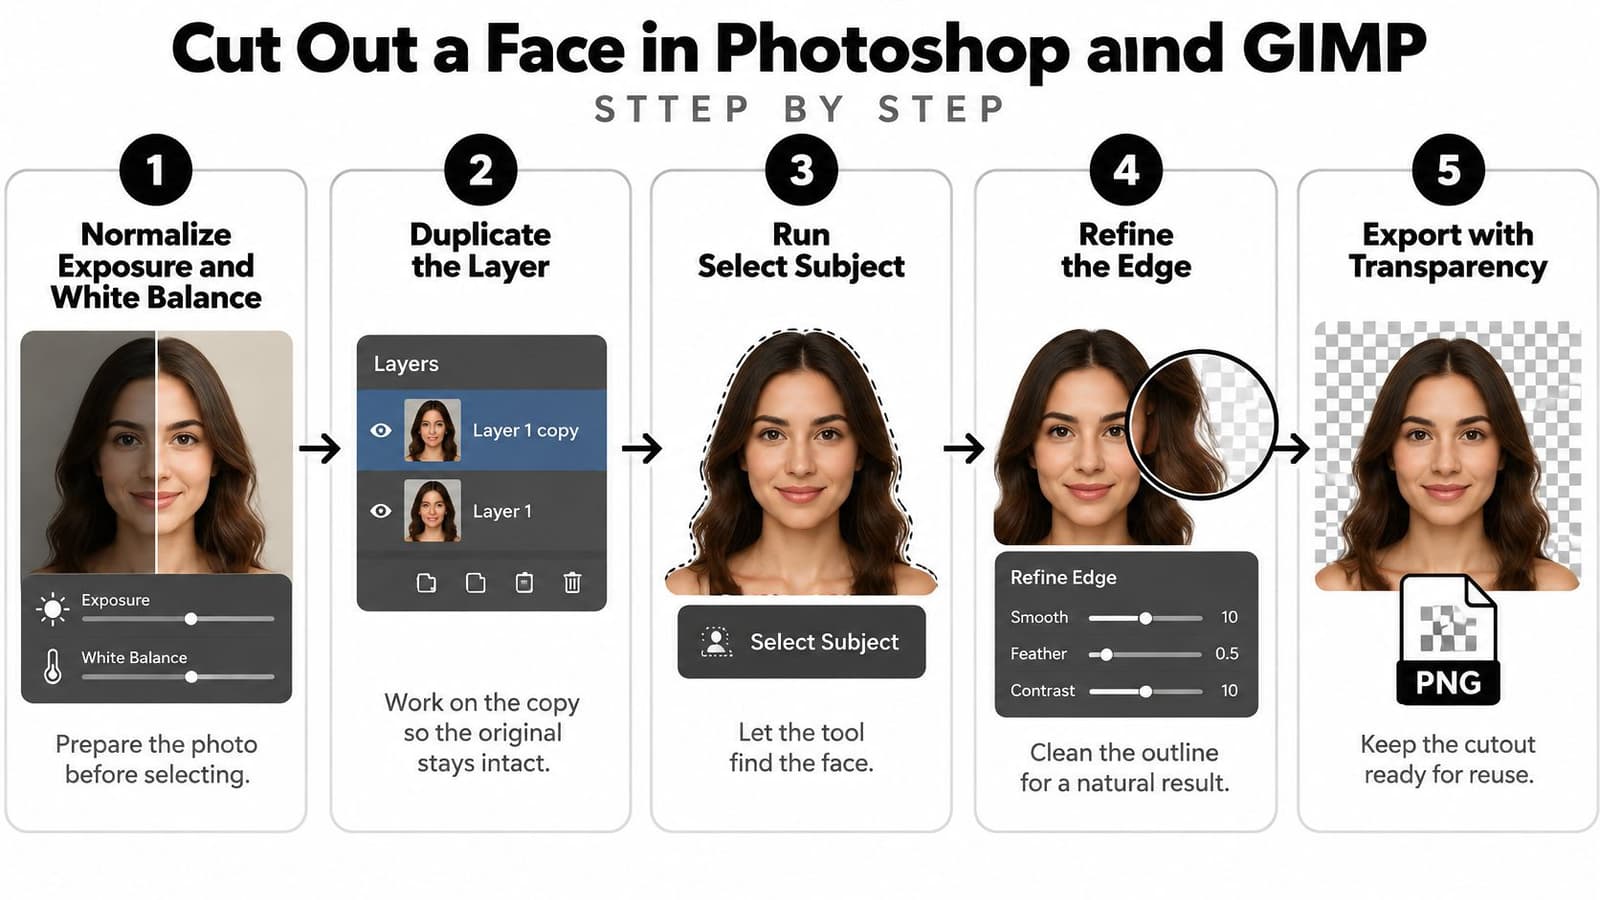
Normalize exposure and white balance before making the selection. You need enough visibility to distinguish the subject from the background, but brightening a photograph won't recover detail that the original never recorded.
The important distinction is between selection and alpha matting. The portrait-matting paper describes separating coarse foreground detection from uncertain boundary refinement, allowing hair and translucent edges to retain partial opacity instead of becoming a hard silhouette.
Build an editable mask
-
Duplicate the photograph layer. Keep the original untouched and name the working copy clearly. Apply restrained tonal corrections to the copy so you aren't selecting through a temporary display adjustment that disappears later.
-
In Photoshop, run Select Subject; in GIMP, use Foreground Select and mark representative foreground areas. Inspect skin, hair, facial hair, and clothing separately, because an acceptable overall selection can still exclude an ear or beard.
-
Turn the selection into a layer mask. Open Select and Mask in Photoshop; in GIMP, add a layer mask from the selection and edit its thumbnail. Leave uncertain areas around curls, glasses, and overlapping objects available for refinement instead of cutting tightly through them.
-
Work only along the transition. Use Photoshop's Refine Edge Brush for hair; in GIMP, use a soft, low-opacity brush on the mask and retain intermediate gray values where appropriate. Don't sweep a refinement brush across the whole face, which can introduce unwanted transparency into solid features.
The basic sequence keeps preparation, selection, and refinement separate.
Finish the transition without shrinking the subject
-
Correct background color contamination. Try Decontaminate Colors in Photoshop, outputting to a new layer with a mask so the correction stays reversible. In GIMP, use a separate retouch layer clipped or constrained to the subject to replace contaminated edge color without painting over the mask.
-
Feather only where the source needs a softer transition. A uniformly blurred mask makes a sharp chin look fuzzy while still failing to reconstruct missing curls. Keep the source resolution and avoid aggressive erosion, which shaves away thin features rather than separating them.
-
Export a transparent PNG, then reopen it to confirm the saved result matches the working document. Inspect the hairline, ears, neck, eyelashes, and glasses closely, and also judge the image at its intended display size.
Don't turn the face into a floating oval unless the project calls for that treatment. A memorial portrait generally benefits from the complete head, neck, and enough shoulder to give the subject a natural base.
Preserve the person's outline before polishing the presentation. A slightly imperfect curl is preferable to a conspicuously clipped head.
Physical keepsakes introduce a different constraint. If the portrait will guide a figurine as well as an animation, Sculpty's explanation of bobblehead spring and socket fit helps distinguish the visible head outline from the mechanical connection needed underneath it.
Quick Cutouts with Online and Phone Tools
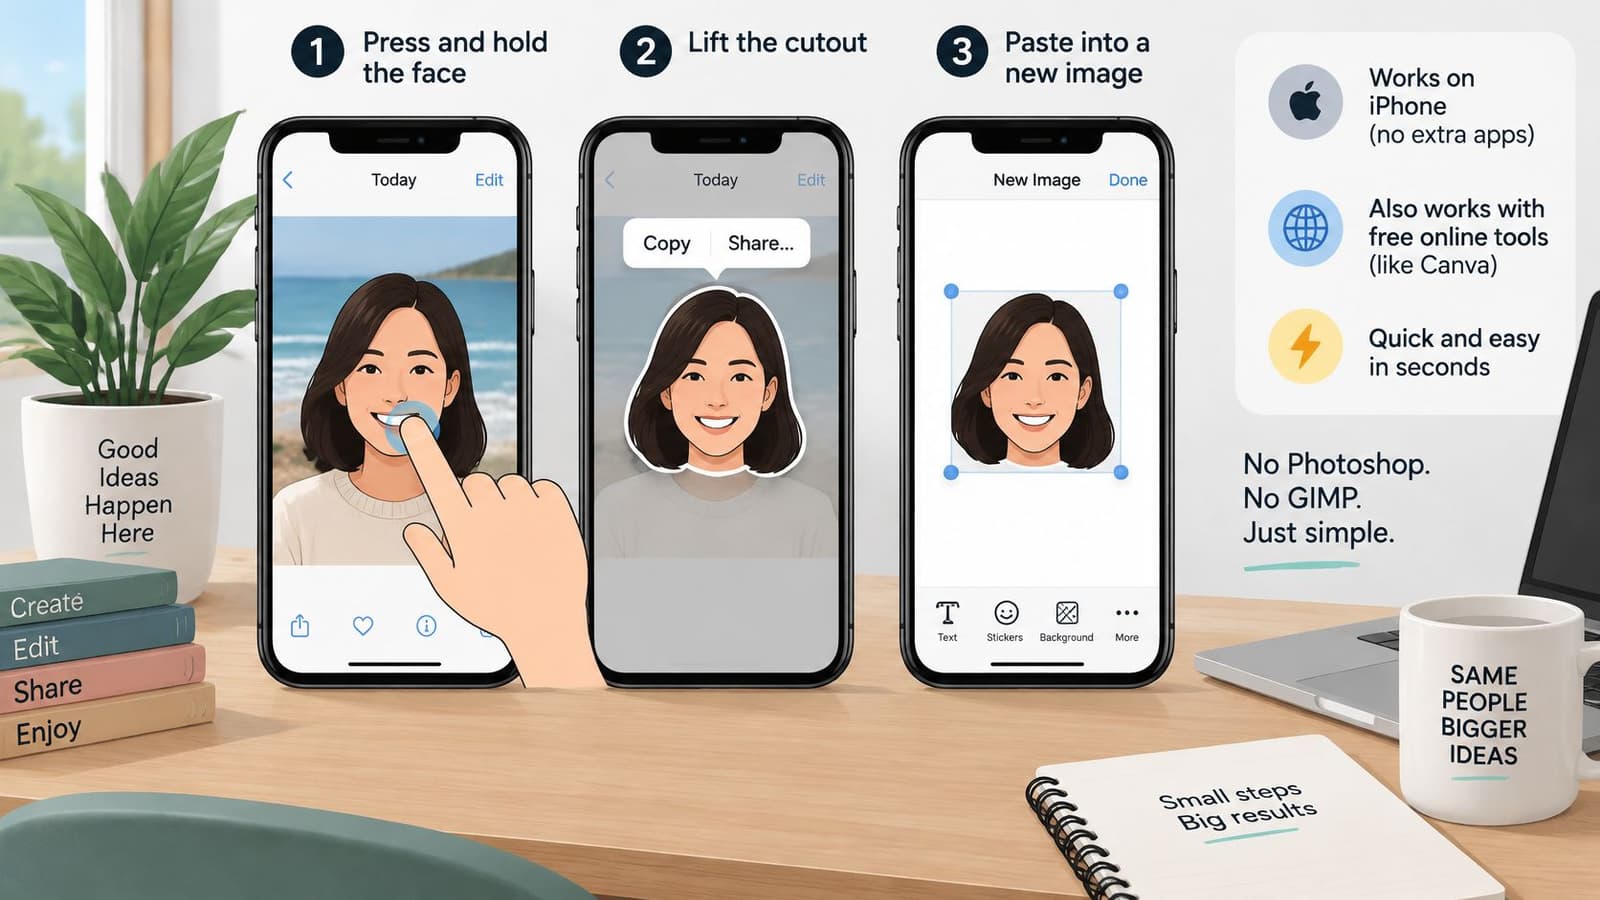
For a clear portrait, a phone cutout may be all you need. On a supported iPhone, open the photograph in Photos, press and hold the subject until the outline appears, then choose Copy or Share.
Save the lifted subject into a destination that supports transparency. Copying it into an app that adds a white canvas can flatten the result, so reopen the saved file before assuming you have a reusable cutout.
Take the phone route first
- Choose a simple source: Start with a single clearly separated person rather than a crowded group photograph.
- Inspect what was lifted: Check whether the phone included the whole person, omitted a hat, or joined the subject to someone standing nearby.
- Keep the source: Save the cutout as a separate file so you can return to the photograph if the selection is incomplete.
The phone gesture is straightforward, but the saved result still needs inspection.
A successful lift doesn't guarantee a suitable portrait crop. For a public-facing image, Vtry AI's guidance on recognizable profile photos for personal brands is useful for thinking about expression and framing before you remove anything.
Use an online remover selectively
Upload a working copy with even lighting and a clearly visible face. Choose a service that lets you inspect the generated result before committing to a download, and check whether the preview conceals export restrictions.
Look for transparent PNG output at the dimensions you need. Some services separate a free preview from a paid full-resolution download; establish that before preparing a batch. Avoid unnecessary downsampling and lossy recompression, rather than treating all compression as harmful: PNG compression itself doesn't discard image detail.
The two-background test is the quickest useful quality check. Place the saved cutout over a bright solid background, then a dark one, and inspect the hair, chin, ears, and glasses.
A checkerboard shows that transparency exists. Contrasting backgrounds show whether the edge is believable.
A pale rim suggests retained background color; disappearing hair suggests an incomplete mask. If the first pass loses curls, breaks a profile, or merges a hat with the background, move to desktop refinement. Repeating the same automatic removal usually gives you another version of the same underlying error.
Fix Hair, Edges and Partial Profiles
A cutout can look clean on white and reveal a pale fringe against charcoal. That usually calls for edge-color correction, not a tighter crop: shrinking the mask may hide the fringe while removing the hair you wanted to preserve.
Cutout symptoms, likely causes and fixes
| Symptom | Likely cause | Fix |
|---|---|---|
| Pale fringe on dark backgrounds | Edge color from the original background | Decontaminate Colors, then apply only the feathering the source needs |
| Missing wispy hair | Hard mask or aggressive erosion | Refine hair with a matte brush and skip erosion |
| Clipped ears or neck | Skin and background of similar tone | Widen the uncertain band and paint the transition by hand |
| Dark hair lost on dark background | Low hair-background contrast | Correct exposure first, then refine the band around the hair |
| Broken glasses or lips | Overlapping objects or extreme expression | Correct only that zone in the mask, not the whole outline |
| Halo on faded or grainy scan | Soft focus and grain interpreted as boundary noise | Use a softer transition and preserve the original grain |
The semantic face-segmentation benchmark identifies similar hair and background colors, along with mouth regions under extreme expressions, as failure cases. Treat these as inspection priorities rather than assuming every part of an automatic mask deserves equal correction.
Match the repair to the damage
A localized decontamination pass is a small repair. A mask that selected the wrong person, omitted a major head region, or was built from an unreadably dark source deserves a fresh selection.
For batch work, check representative difficult photographs: dark hair against dark surroundings, pale hair against bright surroundings, a profile, a hat, and motion blur. After editing each file, apply the contrasting-background check and assess it at the intended viewing size.
Memorial fidelity and commercial compositing aren't identical goals. Keep the source's soft focus and grain when they contribute to its character; don't blur a sharp portrait to disguise poor masking.
If you need to substitute a person's face rather than isolate the existing portrait, use a face-replacement workflow. Replacement involves alignment and lighting decisions that a background-removal mask can't solve.
Export Settings That Keep a Cutout Ready for Animation
Use PNG with transparency for a cutout that will move over a new background. JPG has no alpha channel, so it's suitable only after you deliberately place the portrait on a finished background.
The comparison below highlights why the transition matters before motion is added.
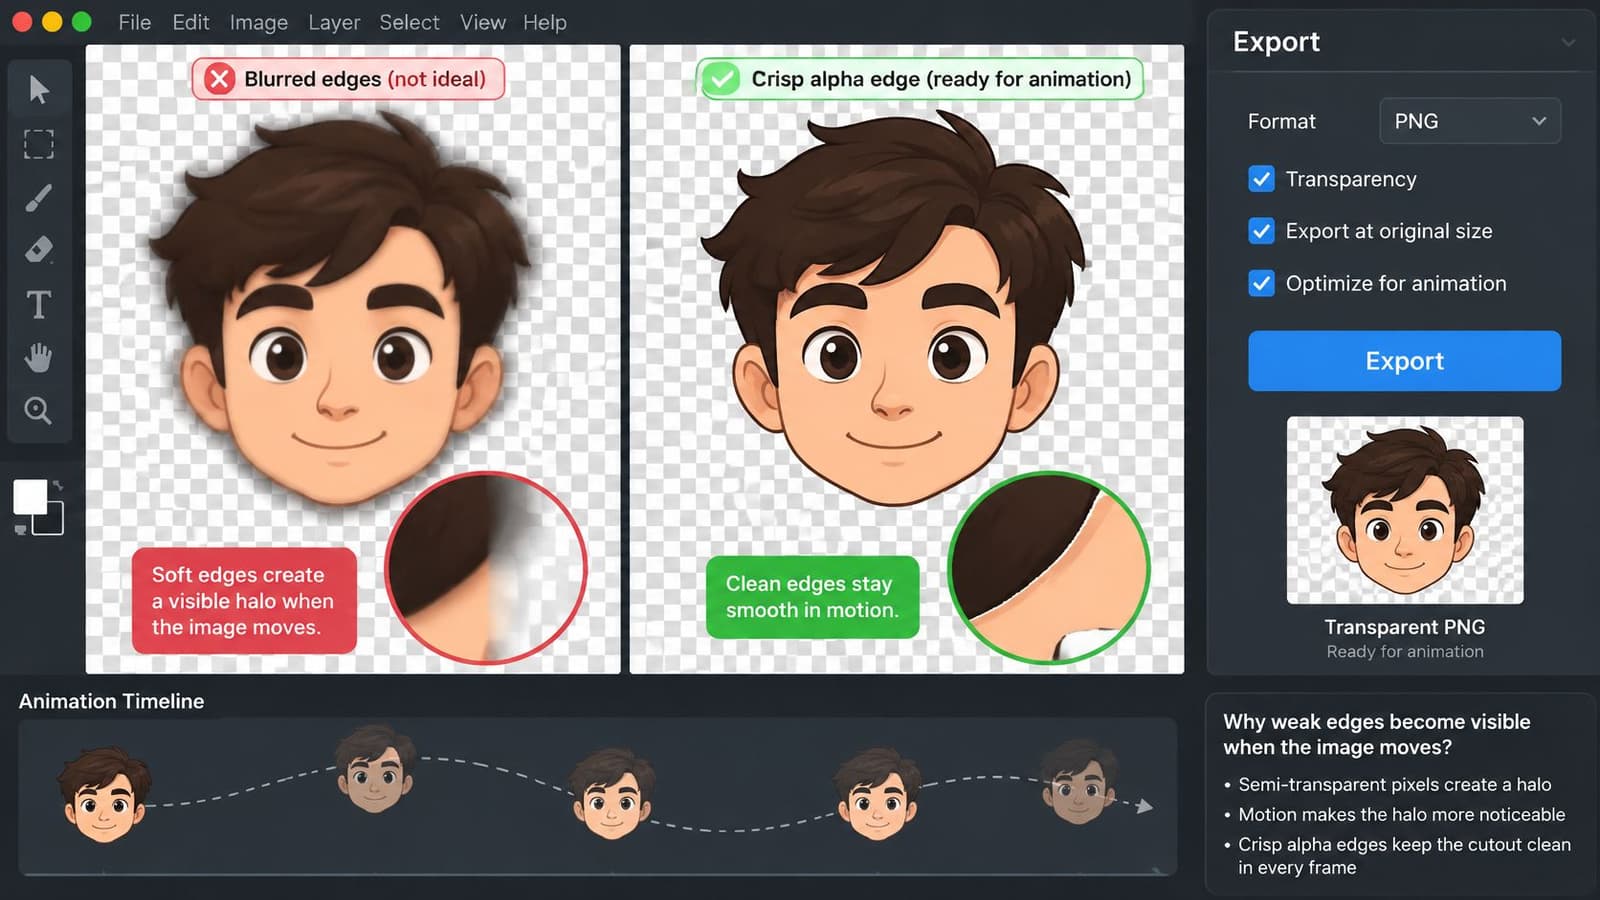
Preserve useful source detail
Keep the photograph at its original useful resolution while editing. Enlarging a tiny source can make it easier to paint a mask, but it won't restore real eyelashes or hair detail.
For scanned prints, capture enough optical detail to resolve the photograph's texture rather than relying on scanner interpolation. Save an archival master separately from the animation copy, and avoid repeated JPG saves during restoration.
Export settings by source and use
| Source and use | Format | Background |
|---|---|---|
| Phone photo animated on a new background | PNG with transparency | Transparent |
| Scanned family print | TIFF or high-bit-depth PNG with alpha support | Transparent |
| Compositing into a new scene | PNG | Transparent |
| Flat-background social export | JPG | Solid color, no alpha |
TIFF can retain transparency, but not every application interprets it the same way. PNG is generally the simpler interchange choice for a finished cutout; keep the layered PSD or XCF file for future repairs.
Prepare the framing for movement
Leave breathing room around the head, especially above hair and beside a profile's nose. A crop that looks neat as a still may feel cramped when the intended camera move pushes toward the face.
Don't expect animation to reconstruct a missing shoulder or a cropped crown faithfully. Choose a gentler motion, restore the framing manually, or select another photograph when the source doesn't support the movement.
Use the embedded demonstration to consider how a still portrait can be presented in motion.
Before exporting the final file, complete this check:
- Inspect at actual size: Judge facial detail at the intended viewing scale, not only while magnified.
- Verify transparency: Reopen the export and confirm that no white canvas or unintended shadow was baked in.
- Check framing and motion: Keep the entire intended subject inside the frame and preview movement against the destination background.
- Name and validate the file: Use a descriptive filename, retain the editable master, and verify the receiving service's current format and upload limits.
A transparent input doesn't guarantee transparent video output. If your montage needs an animated overlay rather than a finished scene, check the destination format's alpha support; this guide to making a transparent GIF explains a separate delivery route.
Photo for Video turns a still photograph into a gently animated clip for memorials, birthdays, anniversaries, and family keepsakes. Visit Photo for Video with your prepared portrait, describe the movement and tone you want, and preview the result before adding it to your tribute montage.