How to Replace a Face in a Picture Without It Looking Fake
Learn how to replace a face in a picture with natural results. Covers manual editing, AI tools, mobile apps, blending, ethics, and export tips.
You have a family group photo that would be wonderful if one person hadn't blinked, looked away, or been caught in an awkward expression. Perhaps the image is older, slightly soft, or destined for a memorial slideshow. Replacing one face can seem like a simple matter of cutting out a better expression and placing it over the original, but natural results depend on decisions made before the edit begins.
The strongest face replacements preserve the photograph's perspective, lighting, texture, expression, and visual history. They don't just insert the right identity. They make the inserted face belong to the original scene, while keeping the edit traceable and respectful when the image comes from a family archive.
Table of Contents
- Why Replacing a Face Is Harder Than It Looks
- Choosing the Right Method for Your Skill and Goal
- Manual Face Replacement in Photoshop or Affinity
- Automated AI Face Swap Tools and Mobile Apps
- Blending, Color Matching, and Final Retouching
- Ethics, Consent, and Provenance You Shouldn't Skip
- Export Settings for Static and Animated Use
Why Replacing a Face Is Harder Than It Looks
A group photo often exposes the problem immediately. One relative is looking down, another person is half hidden, and the only usable replacement image shows the same face from a different angle. You can place that face over the target, align the eyes, and still end up with a result that feels wrong. The eyes may point in a different direction, the jaw may carry the wrong shadow, and the face may look sharper than everyone around it.
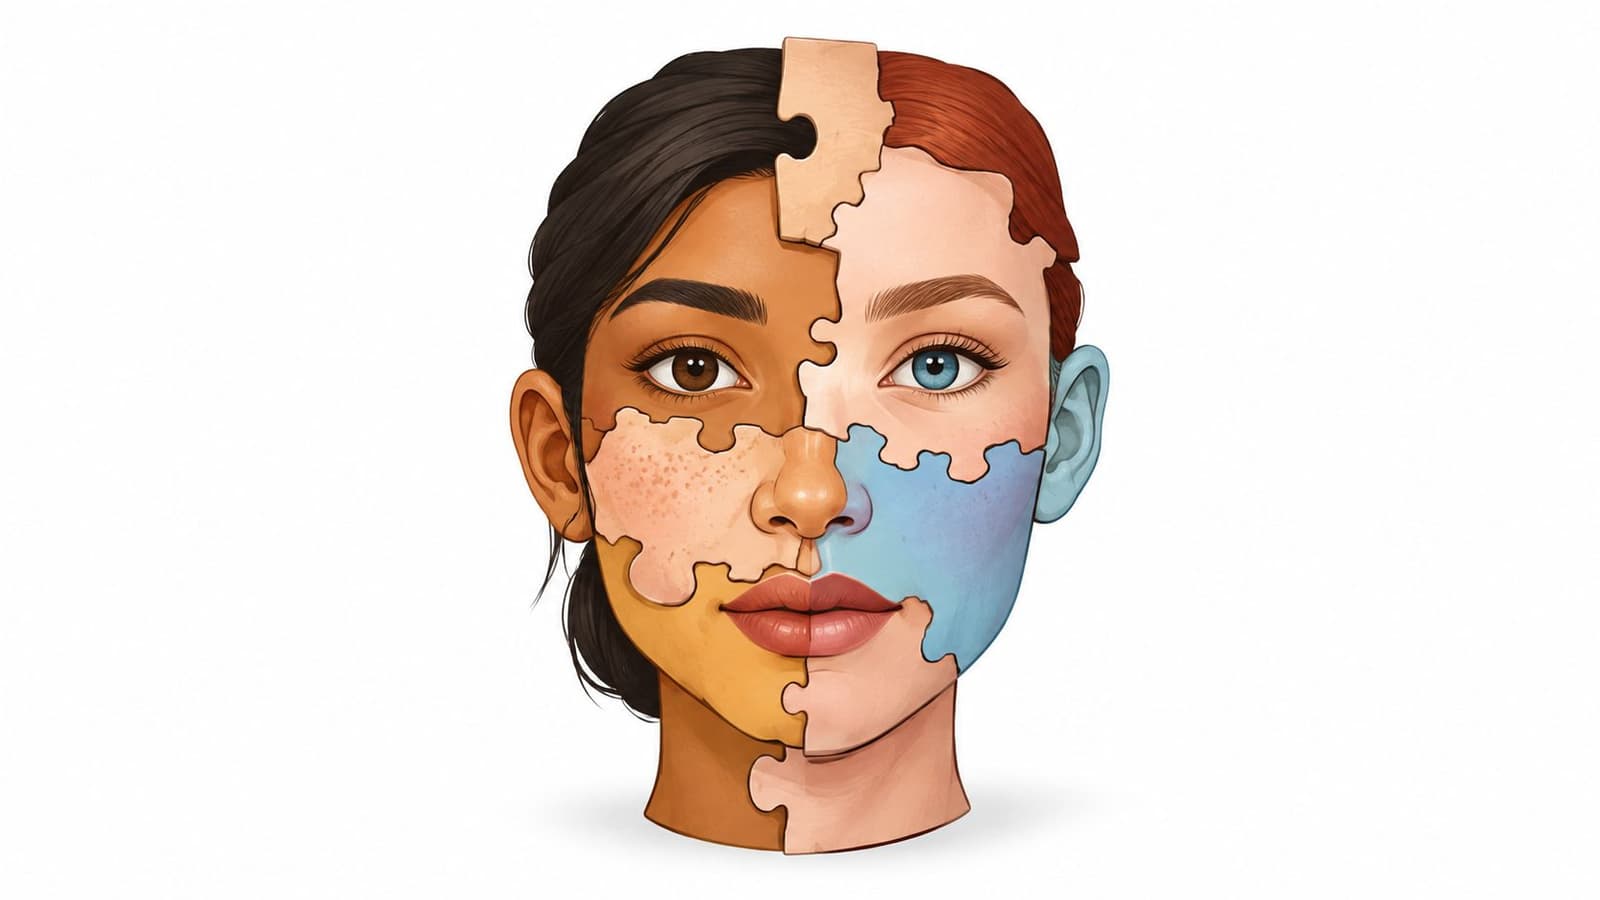
That happens because face replacement is an image-compositing problem, not a single filter. The source face must be detected, aligned to the target head pose, blended with compatible lighting and skin tone, and checked for identity and visual artifacts. A convincing identity match can still fail as a photograph if the geometry and illumination disagree.
Practical rule: Choose the source face for its visual compatibility first, and its identity second. A technically perfect identity placed at the wrong angle will look less natural than a slightly less ideal source with matching perspective.
What makes two faces swappable
Start with the target head position. Compare the tilt, turn, eye line, mouth position, and apparent camera height in both images. A frontal source face placed on a turned head usually creates stretched cheeks, uneven eyes, and an implausible jaw. Perspective matters too. A close camera and a distant camera render facial proportions differently, even when both portraits look similar at first glance.
Lighting deserves the same attention. Check whether the brightest cheek, nose bridge, and forehead appear on the same side. Look at the catchlights in the eyes, which should fall in a compatible area. A warm indoor photograph and a cool outdoor portrait can sometimes be reconciled, but a strong side light facing the opposite direction is much harder to repair with color controls.
Expression is another deal-breaker. An open mouth cannot easily replace a closed mouth without affecting teeth, lips, chin tension, and nearby shadows. Match gaze direction and expression before worrying about skin tone.
The NIST meta-analysis of face-recognition covariates identified six recurring variables that affect recognition accuracy: age, time between images, gender, facial expression, image resolution, and race. It also found broad agreement that recognition performance generally declines when photographs are taken more than one year apart, while changing expression makes matching harder. Those findings concern recognition rather than retouching, but they explain why source selection has such a large effect on a believable composite.
Run this pre-flight check
Before opening Photoshop, Affinity Photo, or an AI tool, compare both files against the same short list:
- Pose: Do the forehead, nose, eyes, and chin face the camera from a similar angle?
- Expression: Are the mouth, eyelids, brows, and gaze compatible?
- Pixel density: Is the face region similarly detailed? Overall image dimensions can be misleading if one face occupies a much smaller area.
- Lighting: Do the shadows, highlights, color temperature, and catchlights agree?
- Occlusion: Are glasses, hair, hands, microphones, or foreground objects hiding part of the face?
- Texture: Does the source contain comparable grain, sharpness, and aging?
- Identity context: Will the replacement preserve the person's recognizable features without changing the meaning of the photograph?
If several answers are negative, don't try to rescue the pair with more aggressive smoothing. The source images are probably the problem. A good workflow can refine compatible material, but it can't make every pair of faces interchangeable. The same visual mismatch can later produce the kind of discomfort discussed in this guide to the uncanny valley in animation, especially when a still image is later given motion.
Choosing the Right Method for Your Skill and Goal
There isn't one best way to replace a face. The right choice depends on how much control you need, how private the image is, and what happens after the edit. A casual social image can tolerate shortcuts that would be distracting in a printed family portrait or a tribute video.
| Method | Skill Needed | Time per Image | Best For |
|---|---|---|---|
| Manual Photoshop or Affinity editing | Intermediate | About 30 to 90 minutes | Prints, archives, animation, and family projects |
| Automated AI face-swap tool | Basic editing judgment | Usually fast | Clean portraits and quick creative variations |
| Mobile app | Beginner | Very fast | Casual social posts and playful edits |
Manual editing gives you control over landmarks, masks, occluders, texture, and the final color relationship. It takes longer, and you need to understand layers and selections, but you can make decisions that automated systems often miss.
AI tools detect a face, align it, generate or transform the replacement, and blend it into the target. They can be surprisingly effective with clean, well-lit portraits. They become less dependable with group photographs, profile views, obstructed faces, strong shadows, and source images that disagree with the target's expression.
Mobile apps prioritize speed and convenience. Many also compress the upload and smooth skin, which may be acceptable for a quick post but damaging to an old scan or memorial image whose texture carries part of its character.
A useful decision rule is simple. If the image will be printed large, animated, presented to relatives, or kept as part of an archive, lean toward a manual workflow or an AI result followed by manual cleanup. If you're making a temporary meme or casual social post, an app may be sufficient. The audience and future use should determine how much imperfection you accept.
Manual Face Replacement in Photoshop or Affinity
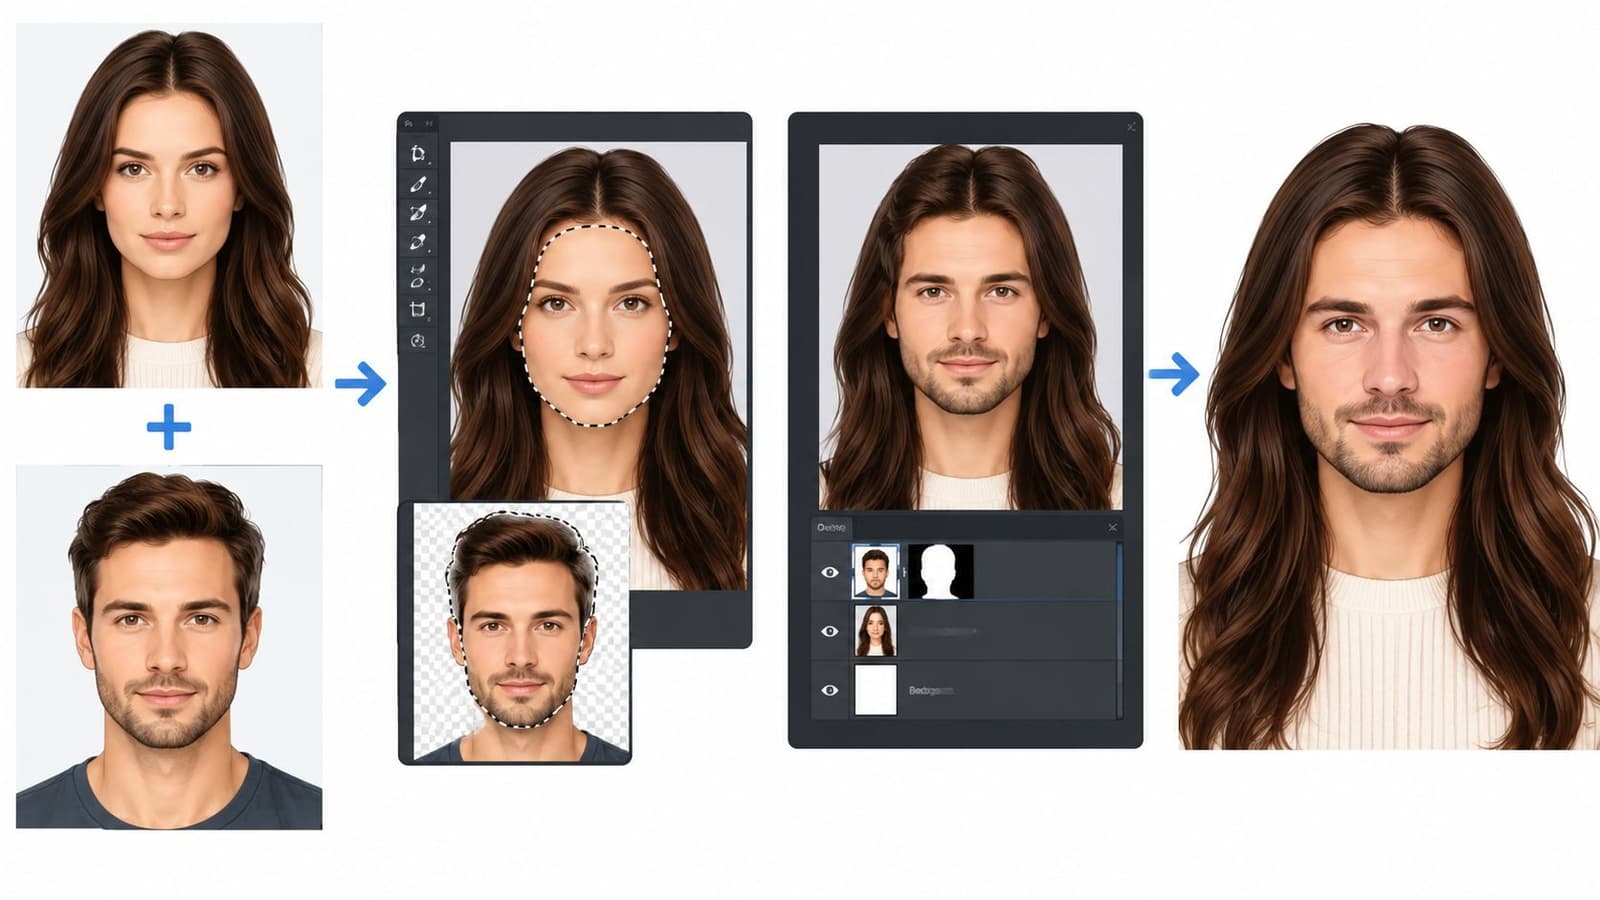
Manual editing works best when you want to control the result instead of accepting whatever the software decides. Keep the original target untouched, place the source on its own layer, and name each stage clearly. That edit history matters later, especially if the image becomes part of a family archive.
Align the face before refining it
Begin by marking consistent landmarks around the eyes, nose, mouth, cheekbones, and jaw. You can use facial landmark detection as a guide, or place control points manually. The important part is consistency. Align the eye line and head angle first, then position the nose and mouth, and only afterward adjust the outer face.
Use a similarity or affine transform to establish scale, rotation, and position. If the perspective still doesn't match, apply a restrained warp. Don't stretch the entire face freely. Small, directional adjustments around the jaw, cheeks, and forehead usually hold structure better than broad distortions.
Liquify can help, but use it in small pushes that follow the target's geometry. Freeform smearing tends to flatten features and makes the source look waxy. If the source is still largely off after alignment, replace it instead of adding more distortion.
Create a layer mask rather than erasing the source permanently. Feather the transition around the jaw, hairline, and ears, but keep the feather controlled. A mask that's too hard produces a visible cutout. A mask that's too soft washes the source into the neck and creates a halo.
Preserve what belongs to the target
The target's glasses, hair fringe, ears, hands, and other foreground objects should usually remain above the inserted face. Build those elements into separate layers or restore them with carefully painted masks. This preserves depth and prevents the replacement from appearing to sit on top of every object in the scene.
An occlusion benchmark illustrates why this matters. It reported 97.08% ArcFace accuracy on simulated masked-face data but 78.25% on real-world masked faces, showing how performance falls when shadows, occlusions, and uncontrolled capture replace clean examples. The benchmark is about recognition, not a guarantee of editing quality, but it reflects the same practical problem: software handles clean facial information more reliably than a face partly hidden by real-world objects. The findings are documented in the occlusion benchmark.
For color, use Curves on a masked adjustment layer that affects only the replacement. Match brightness and contrast before adjusting hue. A global Hue/Saturation change often shifts the whole photograph and still leaves the inserted skin looking disconnected. Match the shadow density around the nose, eyes, and jaw as carefully as the average skin color.
The biggest avoidable error is a hard mask edge. It may look acceptable in the editor, then turn into a bright or dark outline after JPEG compression. Feather gradually, inspect against the target background, and keep a lossless version before exporting.
Automated AI Face Swap Tools and Mobile Apps
AI face-swap tools are useful when the source and target already cooperate. Upload a sharp source face, select the target face carefully, and let the system detect landmarks and generate the composite. Treat the first output as a starting point, not as a finished photograph.
Choose a source with a similar head angle, expression, lighting direction, and resolution. Avoid images where hair, hands, glasses, or microphones cross the face. Group shots are especially difficult because the system may select the wrong person or borrow visual information from nearby faces. Strong shadows and profile angles can also make the generated eyes, mouth, and jaw drift away from the target.
The first pass commonly needs manual cleanup. Inspect the eye color and direction, the edge of the jaw, the transition into the ears, and the relationship between the face and any glasses or hair. Correct tone with a localized adjustment rather than applying a smoothing filter across the entire image. If the result looks plastic, restore texture instead of adding more blur.
A study of 821 previously unknown YouTube videos classified 243, or 29.6%, as DeepFaceLab-style manipulations. Under the study conditions, its detector reported 93% frame-level accuracy and 92% video-level accuracy, while those results should not be treated as universal performance for every still image or tool. The study is available in this analysis of deepfake detection and manipulated YouTube videos.
For a more detailed practical comparison of setup choices and cleanup, Nim's guide to realistic face swaps is a useful companion. It reinforces the point that input quality and visual compatibility usually matter more than the novelty of the software.
Mobile apps follow the same broad logic but hide most of the controls. They're convenient for casual edits, yet aggressive compression and skin smoothing can erase the grain and small irregularities that make an old photograph feel authentic. Use them cautiously for private family material, and check what happens to uploads after processing.
Blending, Color Matching, and Final Retouching
Placement gets the face into the photograph. Blending makes it belong there. Work from broad relationships toward small details. First match exposure and contrast, then color temperature, then local shadows and highlights, and finally texture.
A Curves adjustment clipped to the swapped region is usually safer than changing the whole image. If the face is too bright, lower its midtones before chasing hue. If the skin is too warm or cool, use a restrained HSL adjustment on the same masked region. Soft Light blending can help unify tonal variation, but don't use it to hide a source that has incompatible lighting. It may reduce the obviousness of a mismatch while preserving the wrong shadow direction.
Frequency separation can help unify micro-texture when the source is sharper or smoother than the target. Use it conservatively. Family photographs often contain film grain, scanner noise, print texture, or small focus errors that are part of the image's identity. After compositing, add back matching grain across the edited region so the new face doesn't look unnaturally clean.
Inspect at two very different scales
At high magnification, inspect the jaw, hairline, ears, nostrils, eyelids, teeth, and glasses. Look for seams, ringing, halos, repeated texture, and abrupt changes in sharpness. Then reduce the image to a small thumbnail and ask a different question: does the person look like they belong in the scene, with the same expression and visual weight?
Research on deepfake detection shows that detectors can exceed 95% accuracy on standard benchmarks yet lose more than 20 percentage points under heavy compression. Those figures come from particular detection tasks, not a universal measure of editing quality, but they explain why a composite must be checked before and after delivery compression. See the research on compression and deepfake detection robustness.
A seam visible only at high magnification may need subtle texture and edge work. A wrong gaze or expression visible at thumbnail size usually means you need a different source image.
Keep the original and the working file separate from the delivery file. If you need to combine several images into a composition, use a structured layer workflow such as the one described in this guide to merge photos into one photo. For a final sanity check, an AI Image Detector may provide another perspective, but don't treat an automated result as proof of authenticity or as a substitute for human review.
Ethics, Consent, and Provenance You Shouldn't Skip
A natural-looking face replacement can still be inappropriate. Get explicit permission from living subjects before altering and sharing their likeness. Your own image and clearly labeled creative work are straightforward cases. A memorial image involving a deceased relative needs more care, because family members may disagree about what feels respectful, especially if the edited face will later be animated.
Don't present an altered photograph as documentary evidence. Don't place someone into a misleading situation, imply that an event happened when it didn't, or circulate a synthetic portrait without labeling it as edited. A tribute can be emotionally honest without pretending the replacement is an untouched record.
Use a short consent and provenance checklist:
- Permission: Confirm that identifiable living subjects agree to the edit and its intended audience.
- Labeling: Mark the finished file as edited or synthetic when viewers could mistake it for an original record.
- Original retention: Keep the untouched source file separately from the working document and exported result.
- Metadata care: Remove unnecessary identifying metadata before sharing sensitive family images.
- Upload privacy: Check retention and deletion terms, and avoid public tools for private archives when their handling policies are unclear.
The privacy concern also has a technical dimension. A 2019 NIST evaluation of hundreds of facial algorithms found that demographic effects can alter the likelihood of false matches and missed matches, with differences linked partly to training-data representation. The finding is documented in the NIST evaluation of face-recognition algorithms and demographic effects. It doesn't decide whether a particular edit is acceptable, but it is a reminder that automated confidence isn't the same as human judgment.
The most skilled editor isn't the person who makes the swap impossible to question. It's the person who makes consent, authorship, and the boundary between memory and fabrication clear.
Export Settings for Static and Animated Use
The edit isn't finished when it looks right in your editor. Save a lossless master first, preferably as PNG or TIFF, with the layers or edit history preserved separately. Then create a delivery file for the exact place it will appear. Don't keep saving over a JPEG, because each recompression can soften edges, create ringing, and make a previously subtle mask visible.
For a static image, export a copy at the display dimensions required by the print service, slideshow, website, or social platform. Keep the master untouched and make platform-specific versions from it. Social platforms often recompress uploads, so inspect a test export before publishing. If the jaw edge looks slightly too sharp, soften it and add matching grain before delivery rather than trying to repair the compressed copy afterward.
Animation adds another layer of scrutiny. A still face may pass when motionless, but small texture differences, an uneven eye line, or a weak jaw boundary can become obvious once the face moves. Clean landmarks and a stable expression help animation systems track the replacement. A gentle motion treatment is less forgiving of a face that was only approximately aligned.
Use the guidance in video quality settings when preparing an edited still for a moving output. Keep the clean image as the source, and judge the result in the final video context rather than only in the retouching application.
Troubleshoot the visible symptom
The eyes look in different directions. The source and target probably have incompatible gaze or head pose. Choose a source with a closer camera angle and expression instead of trying to repaint the pupils.
The jaw has a bright or dark outline. The mask is too hard, or compression is exaggerating the edge. Feather the mask gradually, preserve the target-side shadow, and export again from the lossless master.
The skin tone won't match with Curves. The lighting direction is probably different. Color tools can adjust brightness and temperature, but they can't recreate a shadow that falls from the opposite side.
The face looks sharper than the photograph. The source has higher local detail or less grain. Reduce excessive sharpness, match the target's texture, and apply grain consistently across the replacement.
Glasses or hair look pasted behind the face. Those elements weren't preserved as foreground layers. Restore them above the inserted face with a clean mask.
The result works in the editor but fails after upload. Inspect the compressed delivery file at its real display size. A subtle edge or ringing artifact can become more obvious after platform processing.
Know when to start over
Start over with a different source when the expression is wrong at thumbnail size, the eye direction remains inconsistent, or the lighting cannot be reconciled without flattening the face. Try a new alignment when the source is compatible but the jaw and eye line drift. Lower your expectations when the original is severely damaged, tiny, or heavily occluded.
Source selection remains the most impactful decision in the workflow. More masking, smoothing, and color correction won't turn an incompatible portrait into a natural replacement.
Photo for Video turns a single still into a 5–6 second living-memory clip for birthdays, memorials, anniversaries, and family keepsakes, while preserving the character of the original image. If you've prepared a carefully labeled face replacement and want to give it gentle motion, visit Photo for Video to explore the workflow and create a respectful animated keepsake.