How to Add Frame to Photo: Complete Guide 2026
Learn how to add frame to photo using free mobile, web, and desktop tools. Get styling tips, sizing, and prep photos for print/animation.
You're probably doing this for a reason that isn't purely visual.
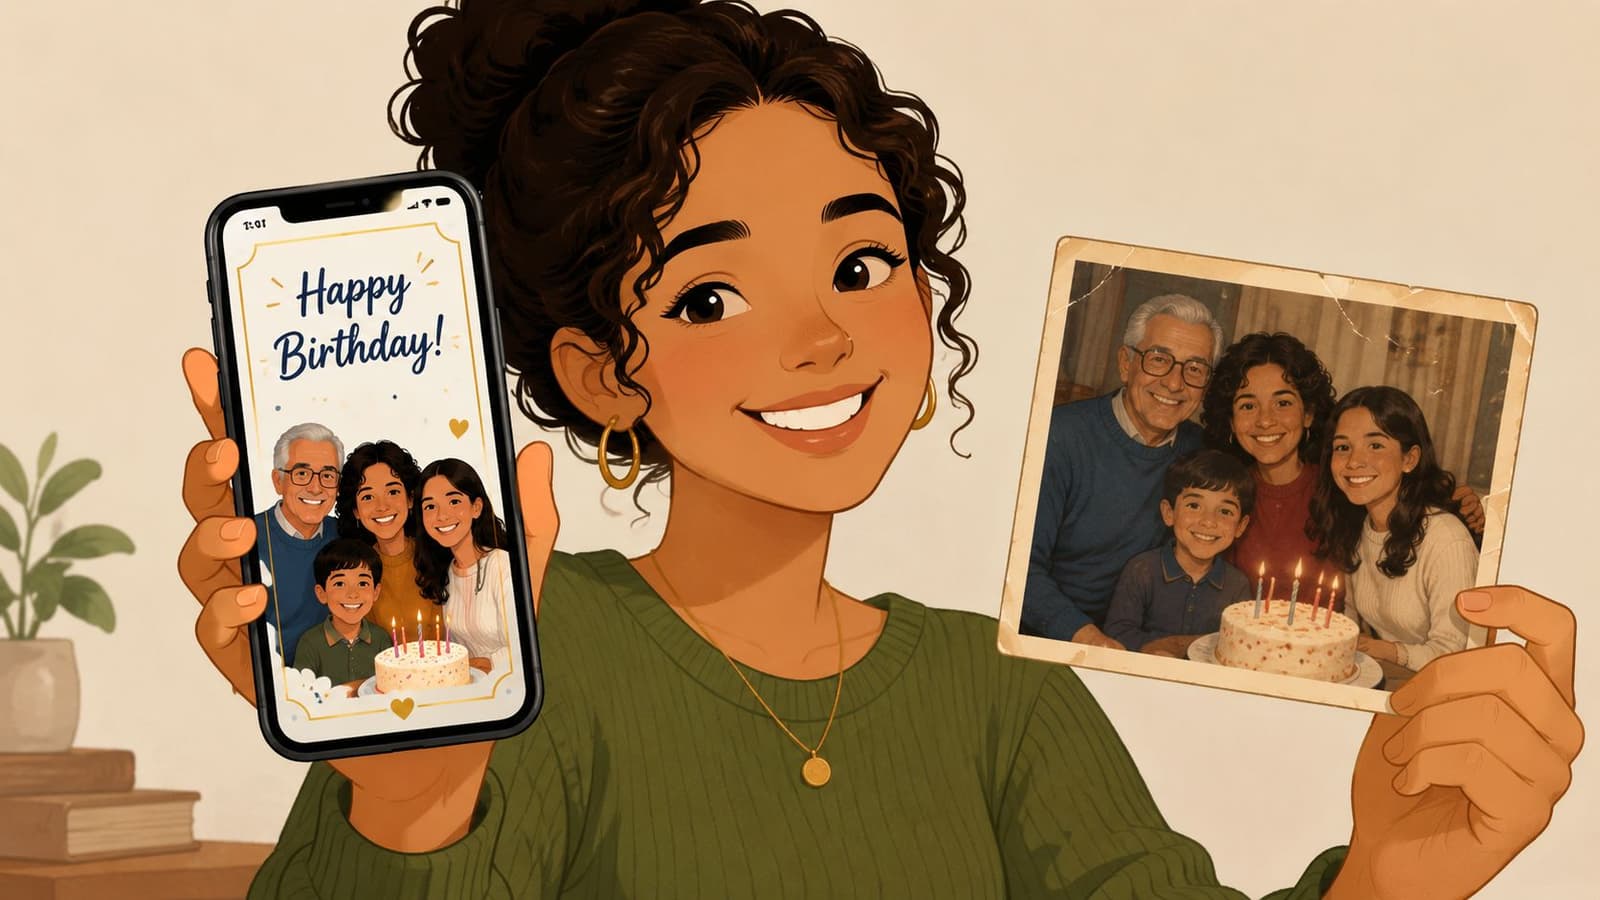
Maybe you've got a phone photo from a birthday dinner that looks unfinished when you drop it into a slideshow. Maybe you scanned an old family print and the edges feel abrupt, cropped, or oddly modern. Maybe you're preparing a memorial card, an album page, or a short tribute video, and the image needs a little structure without losing what made it meaningful in the first place.
That's where adding a frame helps. Done well, it doesn't just decorate a photo. It gives the image breathing room, protects the original file, and makes the picture feel ready for its next life, whether that's print, sharing, or motion.
Table of Contents
- Why a Digital Frame Is More Than Just Decoration
- Choosing the Right Tool for Your Framing Project
- How to Add a Frame with a Free Online Tool
- Styling and Sizing Your Frame for Maximum Impact
- Exporting Your Framed Photo for Print or Web
- Next Step From a Still Frame to a Living Memory
Why a Digital Frame Is More Than Just Decoration
A border can seem minor until you use the same image in real life. The unframed version may look acceptable in your camera roll, then feel abrupt in a printed card, too loose in a memorial collage, or visually lost against a white slideshow background. The frame solves a presentation problem, but it also does something deeper. It tells the viewer where the photo begins, where the eye should rest, and how carefully the image has been handled.
Historically, frames mattered because they preserved and protected what they held. That same logic still applies in digital work. The practical modern version is simple: add the frame on a duplicate, save it as a new file, and keep the untouched original. That preservation mindset is one reason framing still matters in both print and digital image handling, as noted in this history of why frames protect the work they house.
If you're working with family pictures, that small decision changes your workflow. You stop treating the image like disposable content and start treating it like a record.
Practical rule: Frame the copy, not the original. Preservation starts before export.
That matters even more with scanned prints. Dust, paper tone, faded edges, and slight discoloration are often part of the memory. A hard, trendy border can flatten that feeling. A thoughtful border can support it. If you're also trying to protect aging physical copies, this guide on the best way to preserve old photos is worth pairing with your digital framing workflow.
What a frame actually does
- Creates focus: A border separates the subject from the background of a page, screen, or slideshow.
- Adds intention: Even a plain edge tells viewers the image was prepared, not casually dropped in.
- Supports storytelling: A soft white border can make a family snapshot feel like a print. A darker edge can make a tribute image feel grounded and formal.
- Prepares the file for reuse: Framed images are often easier to place across albums, tribute layouts, social posts, and simple motion projects.
A good frame shouldn't call attention to itself first. It should make the photo easier to feel.
Choosing the Right Tool for Your Framing Project
The best tool depends less on features and more on the kind of photo you have in front of you. A quick birthday post and a scanned anniversary portrait don't need the same workflow. Users often choose between mobile apps, browser-based editors, and desktop software.
Framing Tool Comparison
| Tool Type | Best For | Pros | Cons |
|---|---|---|---|
| Mobile apps | Fast edits from your phone | Convenient, quick to share, good for simple borders | Less control over sizing, export, and subtle styling |
| Web-based editors | Easy framing without installing software | Accessible, visual, beginner-friendly | Some options are simplified, and premium features may be gated |
| Desktop software | Old scans, print prep, precise border control | Strongest control over canvas, layers, color, and output | Takes longer to learn and use |
Mobile apps work when speed matters
If the photo already looks good and you only need a clean border for posting or sending to family, a mobile app is often enough. Snapseed is a common choice because it's direct. You can test a border in seconds and decide whether the image feels more complete or just more crowded.
The downside shows up when the image is delicate. Old scans, tribute portraits, and print-bound files usually need more finesse than a mobile preset offers. Borders that look fine on a phone can feel too heavy when printed or enlarged.
Fast tools are great for deciding whether a frame helps. They're weaker when the frame needs to respect age, texture, or output size.
Web editors are the easiest place to start
Canva and Adobe Express sit in the middle. They're easier than desktop software and usually clearer than phone apps because the workspace is larger. For most casual users, this is the most comfortable way to add frame to photo files without getting dragged into layer settings and technical menus.
These tools are especially useful when you want to:
- Upload one image and finish quickly: Good for invitations, tribute slides, and social graphics.
- Test several looks: You can compare a thin white border, a soft cream mat effect, and a darker presentation style.
- Export for sharing right away: That matters when the photo is needed today, not after an evening of editing.
Desktop editors are for control
Photoshop and GIMP make sense when the photo carries emotional or archival weight. If a scan has uneven edges, paper discoloration, or a need for exact margins, desktop software gives you room to work carefully. You can enlarge canvas, preserve the image untouched, and create borders that feel intentional rather than automated.
Desktop is also where you can make judgment calls that simpler tools don't handle well:
- whether a border should stay neutral or echo a paper tone
- whether a shadow makes the image feel matted or fake
- whether the final file is being built for print, not just screen
If you're unsure, start in a web editor. If the result feels generic, move to desktop. That's usually the cleanest path.
How to Add a Frame with a Free Online Tool
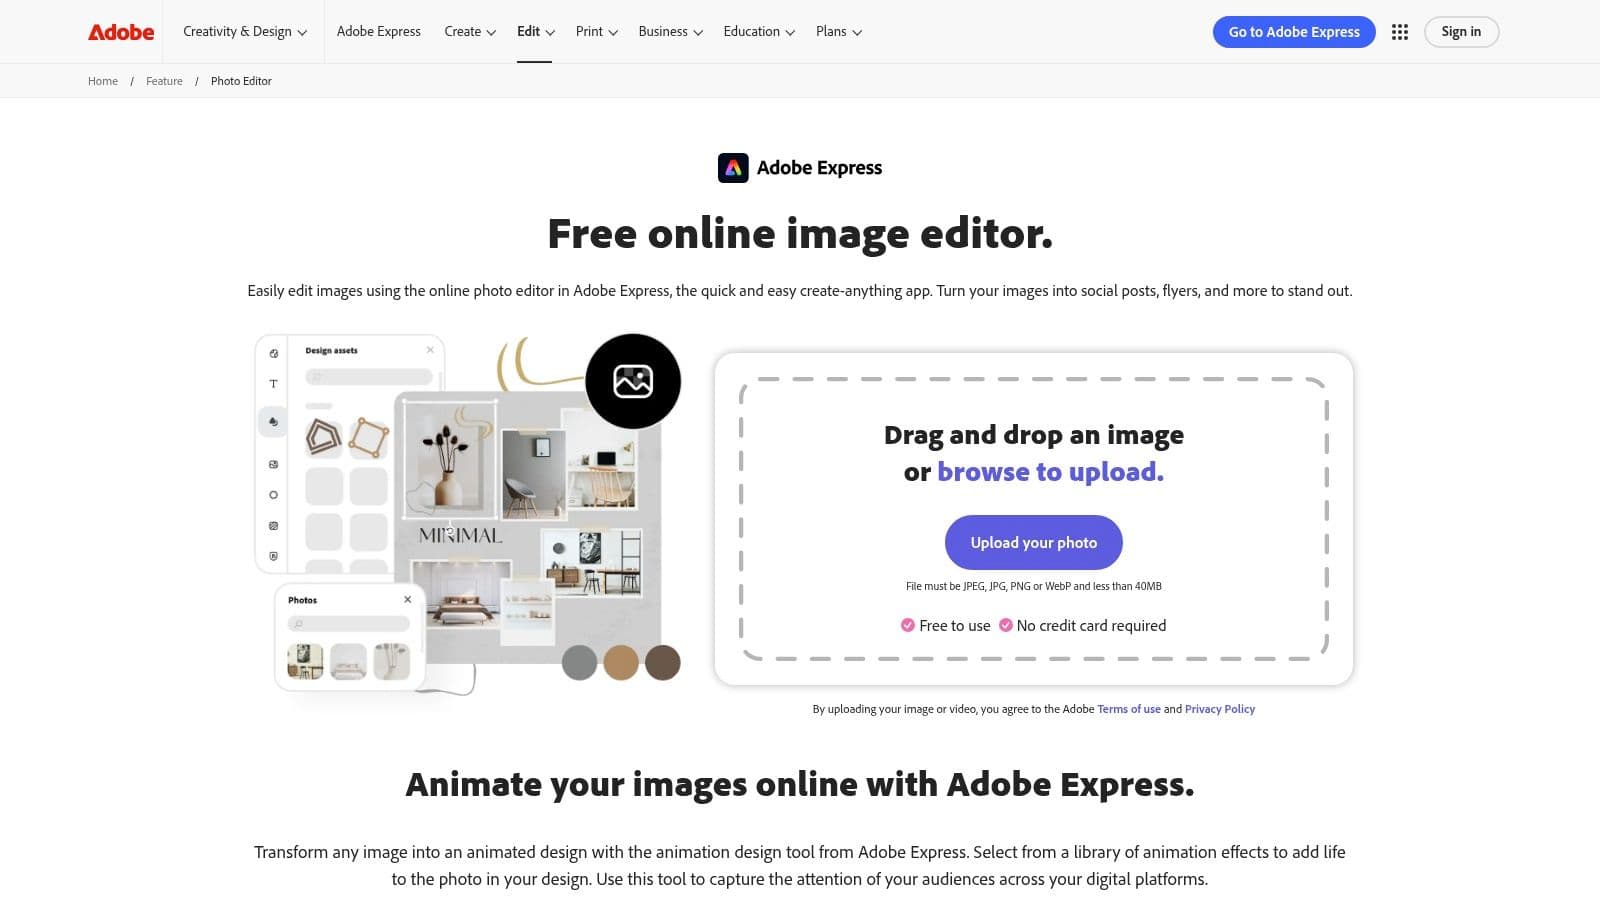
Adobe Express is one of the simplest ways to add frame to photo files when you want speed without giving up too much control. For a straightforward family portrait, tribute slide, or keepsake image, it gives you enough room to add a clean border and export a polished result.
Start with the cleanest file you have
Use the best version available before you touch the border. If you have both a compressed chat download and the original phone photo, use the original. If it's a scanned print, crop obvious scanner bed space first, but don't trim away the natural edge unless it's distracting.
Then open Adobe Express and upload the image. If your photo needs cleanup before framing, this walkthrough on free online photo retouching can help you fix basic issues first.
A good first test is a plain white or off-white border. It's neutral, easy to judge, and unlikely to overpower the image.
Build the border without touching the photo itself
Adobe Express emphasizes drag-and-drop customization for framing, which is useful for beginners and fast edits, as shown on its design frame feature page. In practice, the goal is to add surrounding space, not reshape the photo until it fits a decorative idea.
Work through it in this order:
- Upload the image and place it on a blank canvas or use the frame or border controls available in the editor.
- Choose a simple border style first. Skip ornate options until you know the picture can support them.
- Adjust thickness slowly. Thin borders usually feel more credible than heavy ones on family photos.
- Test color against the image background. Pure white can look crisp. A soft cream can feel better for older prints.
- Zoom out before deciding. A border that looks elegant at close view may disappear or dominate when seen at final size.
If the frame becomes the most noticeable thing on the screen, it's too strong.
For most personal photos, the strongest result is often the least flashy one. A narrow plain border around a portrait usually does more for the image than a novelty frame effect.
Here's a quick video if you prefer to watch the process in motion:
Export a version you can actually use
After the border looks right, save a new copy rather than overwriting your original image. Give it a filename that tells you what it is, such as “grandma-portrait-framed” or “birthday-photo-white-border.” That sounds basic, but it prevents confusion later when you're building albums, montages, or tribute slides.
Before you download, check three things:
- Edge cleanliness: Make sure the border width looks even on all sides.
- Subject spacing: Faces shouldn't feel cramped against the frame.
- Background harmony: The frame should support the image, not fight it.
If the result feels off, don't immediately change tools. First try a thinner border, a softer tone, or a less decorative style. Those adjustments fix most framing problems faster than starting over.
Styling and Sizing Your Frame for Maximum Impact
A framed photo often gets judged in two very different moments. First on a screen, where every border looks sharper and bolder than expected. Later in print, where that same border can feel too thin, too heavy, or oddly modern next to an older image. Good styling accounts for both.
Match the frame to the photo's job
Start with purpose, not presets. A tribute slide, a printed family portrait, and a scanned heirloom do not need the same kind of frame because they are doing different work. One has to read fast on a phone. Another has to sit comfortably on a wall. A third has to preserve the truth of the original photo while giving it enough structure for sharing, reprinting, or later animation.
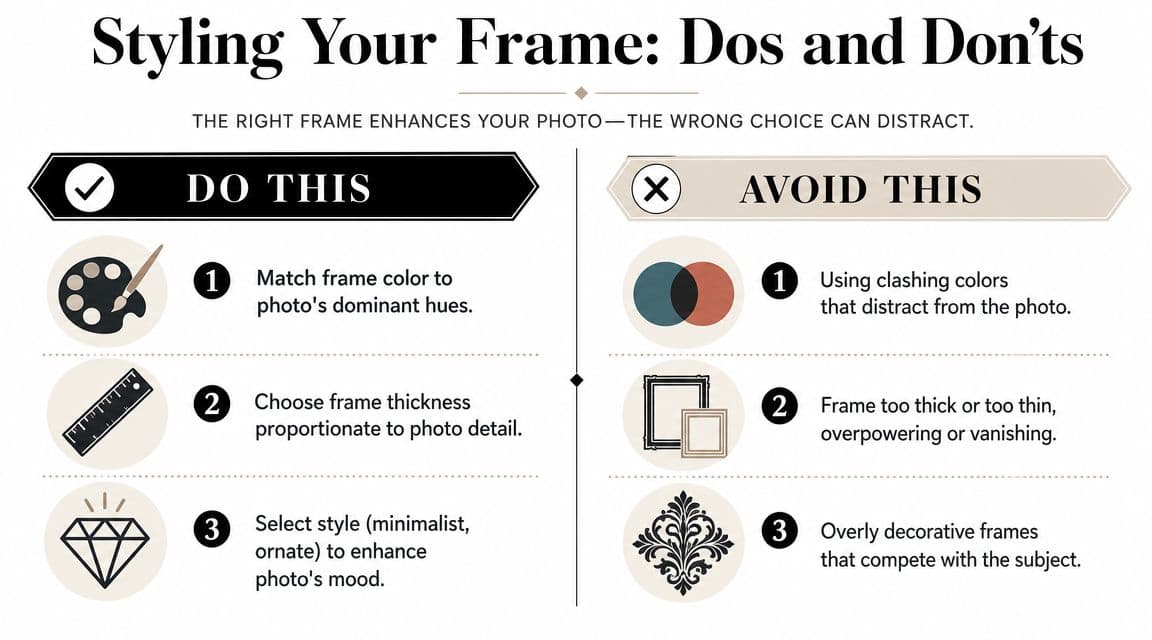
Use these guidelines when styling:
- For modern portraits: A white, black, or muted neutral border usually gives the cleanest result.
- For busy backgrounds: Add a little more space so the subject has room to breathe.
- For formal tribute images: A mat-like border often feels respectful and steady.
- For playful family moments: A softer border can add warmth, but faces should still stay central.
Color choice matters as much as width. Pulling a quiet tone from the image usually works better than dropping in a stock frame color. Cream from aged paper, charcoal from a jacket, or soft gray from a backdrop tends to look intentional and calm.
A frame should support the story already in the photo.
That matters even more if the image may be animated later. Borders that are too loud, too glossy, or too trendy become distracting once motion is added. A simpler frame holds up better in both a printed keepsake and a moving memorial piece.
Old photos need restraint
Older scans are easy to overcorrect. I see this all the time with family photos that carry their age in the paper tone, soft contrast, or slightly uneven edges. If you frame them too aggressively, they stop feeling preserved and start feeling redesigned.
The main choice is usually between a plain border and a simulated mat. Both can work. The right one depends on what the original print already gives you.
- Plain border: Best when the photo already has character, such as fading, deckled edges, silvering, or warm paper tone.
- Simulated mat: Helpful when the image needs separation from a busy background or a digital memorial layout.
- Heavy drop shadow: Rarely right for keepsakes. It adds a fresh graphic effect that can clash with an old photograph.
There is a real trade-off here. A mat-style frame can make a scan feel ready for display and easier to place into a tribute video or slideshow, but too much shadow or contrast can erase the quiet authenticity that makes an old family photo believable. A plain border preserves that authenticity better, though it may need careful sizing so the image does not disappear against the page or screen.
A convincing archival look usually comes from small decisions:
- keep the border modest
- avoid bright modern colors
- let paper warmth stay visible
- leave a little breathing room around worn edges
- resist the urge to sharpen every imperfection
That last point matters. Scratches, soft focus, and faded corners are not always problems to fix. Sometimes they are part of the evidence that this photo survived. Families often respond to that honesty. They do not want the image turned into a new design. They want it handled with care.
Exporting Your Framed Photo for Print or Web
A good frame can fall apart at export. Borders that looked balanced in the editor can print too tight, crop awkwardly, or lose their intended proportions when shared online. The final file needs to match where the image is going.
Print starts with the target size
The most common consumer photo frame sizes remain 4x6, 5x7, and 8x10 according to this guide to standard frame sizes. Those sizes still shape everyday print and framing decisions, which is why I usually decide the destination first before I add any border at all.
If your image doesn't naturally match the print format, the safer move is often to enlarge the canvas instead of cropping the photograph. That preserves the original image area and adds controlled space around it. Adobe Photoshop's canvas-size method works this way. In the same standard sizing reference, adding 200 pixels to the canvas creates a 100-pixel border on each side because the added space is split evenly across opposite edges.
Use that thinking even if you aren't in Photoshop:
- Decide the final print size first
- Add space around the image second
- Keep the subject untouched whenever possible
That workflow is especially useful for family archives because it respects the original photo instead of reshaping it to fit a frame.
Choose the file type based on use
For most everyday sharing and print lab uploads, JPEG is the practical choice. It's widely accepted and easy to send. For graphics-heavy layouts or cases where you want especially clean edges around a simple border, PNG can be useful, particularly for web use or design assembly.
Before exporting, check this short list:
- For print: Confirm the file matches the intended physical size and that the border still feels balanced when viewed smaller and larger.
- For web or slideshows: Make sure the file loads cleanly and doesn't look oversized for the platform.
- For archives: Keep the original untouched file and the framed export as separate versions.
Save one master original, one framed version for use, and one final export for the specific destination.
That naming discipline prevents a lot of accidental loss later. It also makes it much easier to reuse the image for albums, cards, memorial displays, or future edits.
Next Step From a Still Frame to a Living Memory
A carefully framed photo is often the best starting point for motion. Once the edges are clean, the presentation is intentional, and the image feels complete, it's much easier to turn that still into something that feels alive without making it look gimmicky.
That matters for tribute work. A birthday portrait, anniversary snapshot, or restored family scan often needs only a little movement to feel newly present. The frame helps by establishing clear boundaries and a finished look before any animation begins.
If you want to take that next step, this guide on how to turn still photos into video shows how a single prepared image can become a short moving keepsake. The strongest results usually come from subtle choices: gentle motion, a calm camera move, and respect for the original texture of the photo.
A framed photo already has focus, margin, and visual intention. That makes it a stronger source image for tribute videos, memorial slides, anniversary messages, and family keepsakes that need to feel tender rather than overproduced.
If you want to go beyond a static border, Photo for Video turns one treasured photo into a short living memory with gentle, natural motion that works beautifully for birthdays, memorials, anniversaries, and family tribute edits.