Photo Retouch Online Free: Quick Edits & More
Learn to photo retouch online free! Our 2026 guide covers quick fixes, blemish removal, and preparing old photo scans while preserving their authentic texture.

You're probably here with one specific photo open in another tab.
It might be a scanned portrait of your grandmother, a faded wedding print with a crease through the middle, or a small snapshot you want to include in a birthday or memorial video. The urge is usually the same. You don't want to turn it into something glossy and modern. You want to make it usable again. Clearer. Gentler. Alive enough to move people when it appears on screen.
That's why photo retouch online free matters so much now. What used to require desktop software and a lot of technical patience is now available in a browser. Platforms like BeFunky say more than 3 million active users edit over 350,000 photos every day on their platform, which shows how far online editing has moved into everyday family use, not just pro studios (BeFunky photo editor features). That shift matters when you're working from a kitchen table, a laptop, or a phone, trying to rescue one meaningful picture before a tribute deadline.
The important part is this. Retouching an old family photo isn't just cleanup. It's preparation for a second life. If the image may later be animated, shared in a slideshow, or included in a keepsake video, your edits need to support motion without stripping away the age, texture, and truth that make the image feel real.
Table of Contents
- Bringing Your Cherished Photos Back to Life
- Choosing Your Free Online Retouching Tool
- Mastering Quick Photo Fixes for Instant Impact
- Repairing Imperfections Like Dust and Blemishes
- Preserving Analog Texture for Authentic Animation
- Exporting Your Retouched Photo for Video
Bringing Your Cherished Photos Back to Life
An old photo usually arrives with damage and emotion bundled together. A thumb crease across a smile. Silvering at the edges. Faded blacks that have drifted toward gray. The first instinct is often to “fix everything,” but that's rarely the right starting point.
For family photos, the better question is simpler. What needs help, and what deserves to stay?
A tiny scratch on a cheek may distract the eye. A soft paper texture across the whole print may be part of the memory. When people over-edit, they often erase the very qualities that tell you this image has lived in a wallet, a frame, or the back of a drawer for decades. If the photo may end up in a tribute montage or animated keepsake, that history matters even more because motion tends to amplify both good restoration and bad restoration.
What has changed for ordinary families
Online editing made this kind of work much more approachable. You no longer need specialist software just to crop, brighten, remove a dust spot, or soften a crease. That matters for anyone handling family archives at home, especially if you're also sorting prints, scanning albums, and learning preservation as you go.
If you're also thinking beyond retouching, this practical guide to the best way to preserve old photos is worth reading before you commit to heavy edits or discard original scans.
Practical rule: Keep your first retouched version conservative. You can always make a second, cleaner version later. It's much harder to recover lost texture once you've smoothed it away.
The real objective
When I restore family pictures for screen use, I don't chase perfection. I chase legibility and feeling. I want the eyes to read clearly, the face to feel human, and the photo to hold up when viewed larger than the original print ever was.
That's the difference between technical correction and emotional preservation. One aims for flawlessness. The other helps a cherished image survive one more generation of sharing.
Choosing Your Free Online Retouching Tool
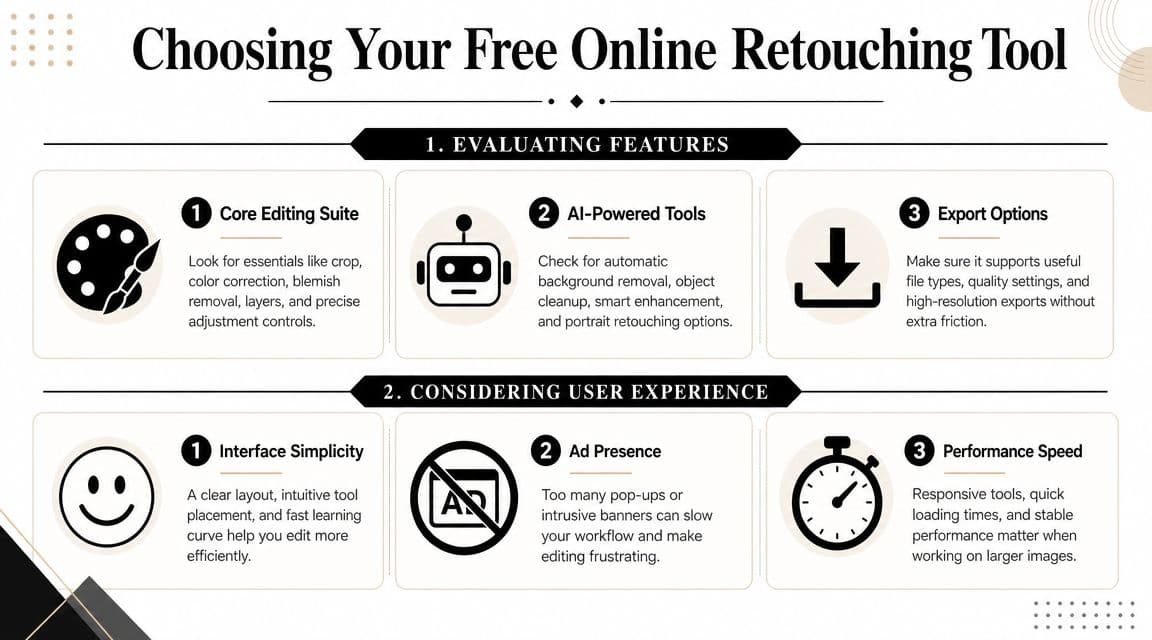
Not every free tool solves the same problem. Some are broad editors built for hands-on adjustment. Others are narrow AI tools built for speed. If you pick the wrong category, the work feels frustrating before you've even made the first edit.
Two tool types that matter
Here's the simplest comparison:
| Tool type | Best for | Typical strength | Typical weakness |
|---|---|---|---|
| Browser editors like Pixlr, Fotor, Canva, or Photoshop Express | Full photo cleanup | Crop, exposure, contrast, color, spot fixes in one place | Can feel limited on fine texture work |
| Single-purpose AI tools like Pixelbin or similar retouch pages | Fast repairs | Quick upload, automatic retouch, easy export | Less control over what the AI changes |
That split matters more than feature lists. If your photo needs straightening, tonal repair, and only a few small blemish fixes, use a browser editor first. If you've already got a decent scan and mainly need a quick polish, an AI-first tool can save time.
According to Imagen's professional retouching guide, browser editors such as Pixlr and Canva work well for convenience, while more advanced workflows that need RAW support or fine texture control often still call for desktop software. That matches real practice. Free online tools are efficient for quick cleanup, but they can struggle when hair detail, fabric texture, or precise masking really matters.
How to decide in under a minute
Use this checklist before you upload anything:
- If the photo is badly faded: choose a browser editor. You'll want manual control over exposure, contrast, and color.
- If the damage is small and local: an AI cleanup tool can help, especially for dust, minor spots, or background distractions.
- If the image is very personal: pause and review the service's privacy terms before upload.
- If the final use is animation or video: favor tools that let you export a clean, high-resolution file.
Upload convenience is not the same as restoration quality. The fastest tool often gives the least say over what gets changed.
Privacy is part of the tool choice
This gets skipped in many roundups, but it matters with family photos. A baby portrait, military uniform, memorial image, or wedding picture isn't just another file. Before uploading, check whether the service explains retention, deletion, and whether files are used for training or product improvement. If the policy is vague, I'd avoid using that photo there.
Free access is useful. Blind trust isn't.
A practical recommendation
For most families, the smoothest path is a combination. Start in a full editor for global corrections. Then use AI only for specific cleanup that would take too long by hand. That gives you speed without surrendering the whole image to automation.
Mastering Quick Photo Fixes for Instant Impact
The biggest improvements usually come from the least glamorous edits. Before you remove a single scratch, fix the frame, the light, and the color. Those three choices do more for an old family photo than any dramatic “enhance” button.
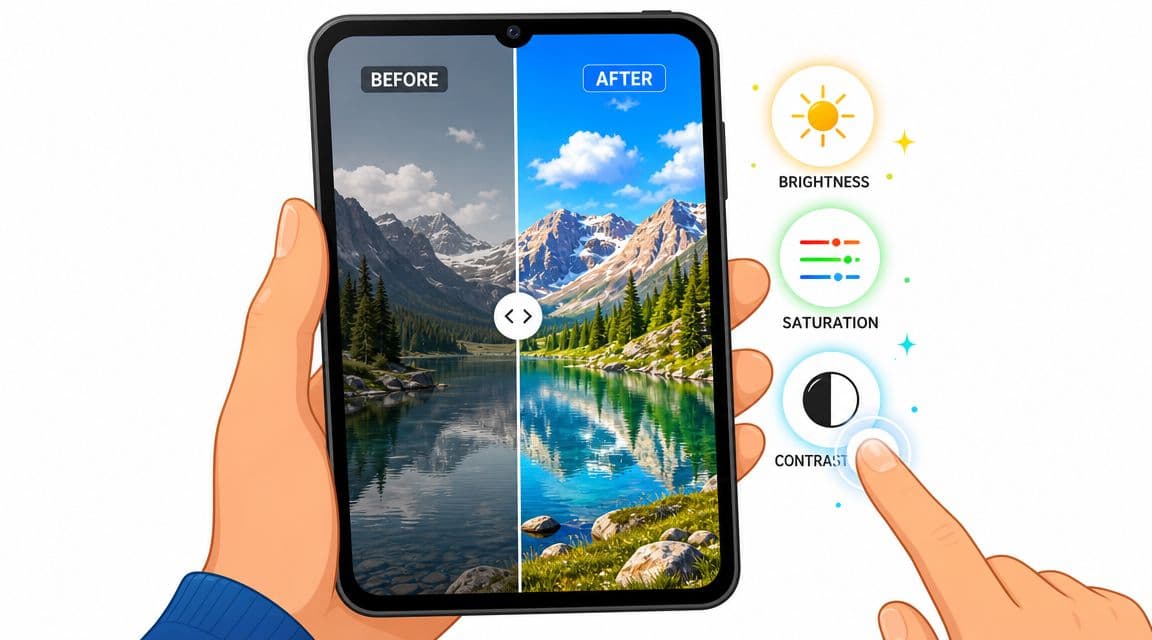
A sound workflow starts with global adjustments first. Tucia's retouching guidance recommends beginning with exposure and cropping before moving into detail work, and that order is right. If you crop later, you often waste time repairing parts of the image that won't even remain in the final frame.
Start with shape and framing
Old prints are often scanned slightly crooked or with extra border showing. Fix that first.
- Straighten the image so horizon lines, door frames, or shoulders don't lean unintentionally.
- Crop with purpose. Remove scanner bed edges, torn borders, or empty space that weakens the subject.
- Leave breathing room around faces if the image may be animated later. Tight crops can feel cramped once motion is added.
A common mistake is cropping too aggressively because the old print looks small. On screen, especially in video, a little surrounding context helps the photo feel grounded.
Then repair the light
Faded family photos usually need tonal help, not drama. Raise exposure gently if the scan looks muddy. Add contrast carefully so faces separate from the background. If highlights start to disappear in foreheads, collars, or white dresses, you've gone too far.
A photo that looks “improved” at first glance can still be damaged by auto-enhance. Watch the brightest areas. They usually tell you first when the software is overreaching.
The same source warns about clipping highlights during auto-enhancement and over-smoothing during AI edits. That's exactly what I see most often with free tools. The software tries to help, but old paper and film don't behave like new phone photos.
This walkthrough can help if you want to watch a basic editing flow in action:
Finish with restrained color
Black-and-white photos still need tonal balance, but faded color prints are where people usually overdo it. A little warmth can restore life to skin. Too much saturation makes old dyes look synthetic.
Use a light hand on these controls:
- White balance: correct strong yellow, blue, or magenta casts first.
- Saturation: increase only until skin and clothing stop looking washed out.
- Clarity or structure: add sparingly. Too much creates harsh edges and a brittle, crunchy look.
If you're using AI sliders, keep strength low. Tucia specifically notes that spot tools are best for discrete defects and that low-strength AI helps avoid a plastic-looking result. That advice is worth following every time.
Repairing Imperfections Like Dust and Blemishes
Once the global fixes are in place, detail repair gets easier because you can see what's damage and what's original texture. At this stage, modern tools feel almost magical, but they can also do the most quiet harm.
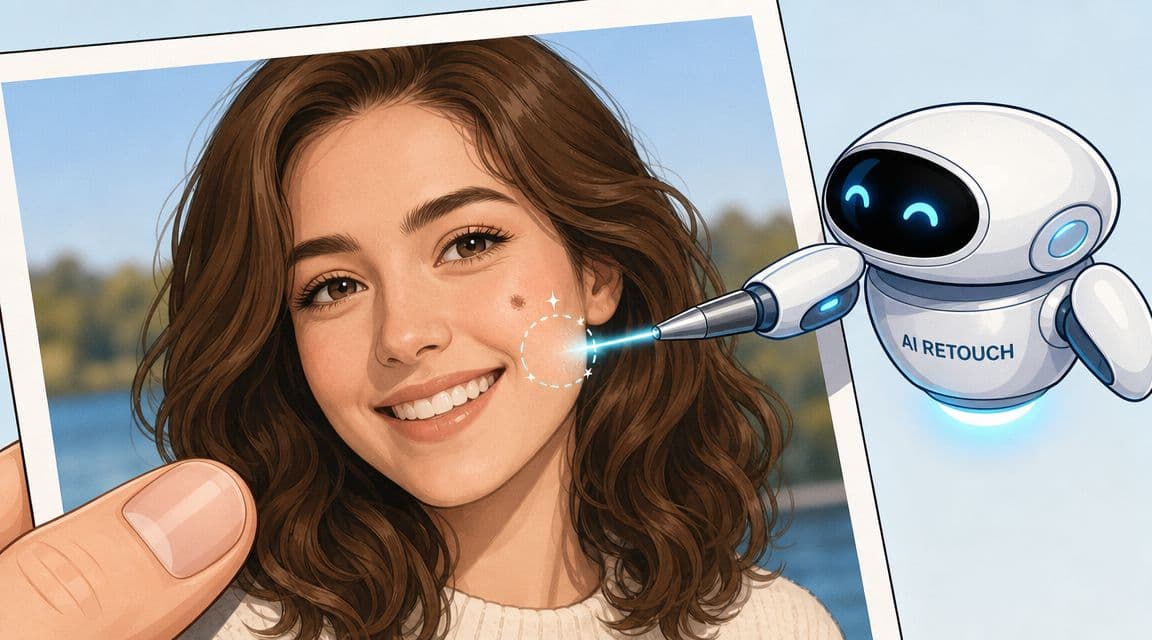
Pixelbin's online retouching page presents this newer reality clearly. It says users can upload a photo, have AI retouch it automatically within one minute, and download a high-resolution result without watermarks or subscription costs. It also states that its free flow supports WEBP, JPG, JPEG, and PNG files up to 10 MB. That kind of quick upload-to-download workflow is why AI retouching has become so common for simple cleanup.
What to remove and what to leave
Use AI cleanup for damage, not identity.
Good candidates for removal:
- Dust specks scattered across flat areas like sky, walls, or dark jackets
- Small scratches that cut through background regions
- Temporary blemishes such as a pimple in a portrait
- Scanning debris like lint, fibers, or random marks introduced during digitizing
Be cautious with:
- Permanent facial lines
- Moles or scars family members would recognize
- Fabric weave and paper grain
- Fine hair along the face or collar
Those details often carry memory. If you remove them automatically, the person may still look “better,” but less like themselves.
A better repair method
Work close, then pull back.
- Zoom in enough to see the flaw clearly.
- Use the smallest practical brush or repair area.
- Click or paint only over the defect, not the surrounding texture.
- Zoom back out after every few fixes.
That last step is where judgment happens. A repair that looks clean at high magnification can look smeared at normal viewing size.
Less is usually more. If you can notice the repair before you notice the original flaw, the fix is too strong.
For deeper physical damage such as tears, folds, silvering, or badly worn prints, this guide to old photo recovery can help you decide whether a quick online retouch is enough or whether the image needs a slower restoration pass.
Freemium reality
Many free tools handle basic cleanup well, but they often put advanced AI masking, batch editing, or higher-end repair behind a paid tier. That's not necessarily a problem. It just means you should use the free version for what it's good at. Quick fixes, not full forensic restoration.
Preserving Analog Texture for Authentic Animation
The most common mistake in old-photo retouching isn't missing damage. It's removing too much life.
When a family photo is headed for animation, the temptation to smooth, sharpen, and modernize gets stronger because motion can make old flaws more visible. But motion also makes over-editing more obvious. A face with erased pores, flattened wrinkles, and artificial crispness doesn't feel timeless. It feels processed.
Texture is part of the memory
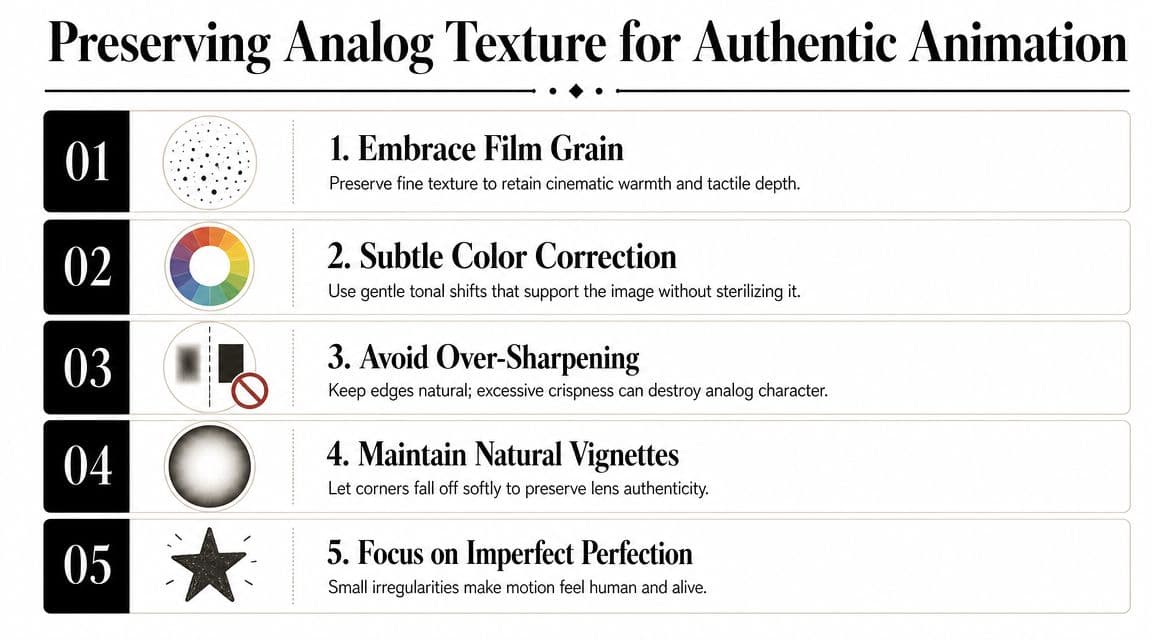
Paper tooth, film grain, slight falloff near the corners, soft focus from an old lens. These aren't always defects. They're part of why an image feels like it came from a particular time and place.
That matters doubly for tribute imagery. The issue isn't just aesthetics. It's honesty. The Adobe Content Authenticity Initiative discussion referenced in this video material highlights a growing concern around provenance and disclosure because AI-edited images can change what viewers believe is original. In family restoration, the practical version of that concern is simple: if a tool changes facial structure, removes age marks, or invents detail, it can shift the emotional truth of the image.
What faithful retouching looks like
A faithful edit usually includes some restraint in each of these areas:
- Noise reduction: lower it until damage recedes, then stop before skin and fabric go waxy.
- Sharpening: use enough to clarify eyes and edges, not enough to carve halos around faces.
- Wrinkle handling: remove distracting scratches that cross the face, but keep natural age lines.
- Background cleanup: simplify distractions without making the backdrop look airbrushed.
Here's the standard I use. If a grandchild would still say, “Yes, that's exactly how she looked in old photos,” the restoration is probably on the right track.
Keep the signs of age that belong to the person and the photograph. Remove the damage that came later.
Why this matters more in motion
Animation reveals texture differences frame after frame. If you over-smooth a cheek but leave a grainy forehead, the inconsistency becomes noticeable. If you over-sharpen a soft print, slight camera movement can make edges shimmer in an unnatural way.
That's why authentic animation starts with authentic retouching. You're not trying to make an old print pretend it was captured yesterday. You're helping it hold together gracefully on a modern screen.
Exporting Your Retouched Photo for Video
A good edit can still fall apart at export. This final step should protect the work, not compress it into a brittle, blocky file that looks worse the moment it enters a video timeline.
For most family-photo projects, JPEG is the practical choice if you want broad compatibility and an easy handoff into video tools. If your editor allows PNG and the image contains delicate tonal transitions or text that you want to preserve with minimal compression, PNG can also be a good option. The key is less about chasing a perfect format and more about avoiding unnecessary re-saving.
Export settings that usually work well
Use a simple checklist:
- Resolution: export at the highest clean resolution your tool allows, especially if the photo may be displayed full-screen.
- Quality: choose high quality rather than the smallest file size.
- Color: keep the output natural. Don't apply extra filters on export.
- Versioning: save one master retouch, then create separate copies for sharing or video use.
If your video project will be rendered for HD or 4K delivery, start with the cleanest still image you can export. That gives motion tools and editors more room to work without emphasizing paper damage or compression artifacts.
One last mistake to avoid
Don't keep reopening and re-exporting the same JPEG over and over. Each round can soften edges or introduce more compression. Keep one final master file, then duplicate from that version whenever you need another output.
If you're building a tribute, slideshow, or memorial montage, it also helps to understand how compression affects perceived quality once the image enters a platform workflow. This breakdown of YouTube video compression gives a useful non-technical overview.
The best export is the one that preserves your restraint. Clean enough to read well. Honest enough to still feel like the original photo your family remembers.
If you've finished retouching a treasured image and want to turn it into a gentle, living keepsake, Photo for Video makes that next step simple. You upload a single photo, describe the motion and tone you want, and get a short MP4 that brings the memory forward without flattening the original character of the image.