Black and White Animation: How to Animate Old Photos
Black and white animation from one photo: prep scans, keep grain, add subtle motion, and export a clean 5-second clip. Step-by-step guide.
You've got a faded photograph of your grandmother open on your phone. You want a little movement for a family tribute, but not a new face, a polished complexion, or a background that ripples behind her. The scratches and uneven exposure belong to the picture. You'd like them to stay.
Good black and white animation starts with that distinction. Restore enough to support stable movement, then stop. The aim isn't to make an old photograph look newly taken. It's to create a quiet moving version that still feels like the print your family knows.
Table of Contents
- The Six-Stage Workflow at a Glance
- How to Prep a Scan Before You Animate
- Converting to Black and White Without Losing Texture
- Choosing Motion That Respects the Photo
- Timing and Tone Choices for Tribute Clips
- Export and Confirm the Clip Before You Share It
The Six-Stage Workflow at a Glance
Start by separating preparation from animation. If you try to repair the photograph while generating movement, it becomes harder to tell whether a changed cheek, softened collar, or missing crease came from restoration or motion synthesis.
Keep an untouched master and work on a duplicate. Treat each stage as a separate decision rather than accepting an automatic enhancement preset.
Black and white animation workflow by stage
| Stage | Goal | Key setting | Typical time |
|---|---|---|---|
| Prep scan | Capture the tonal range and identify surface dust | Highest practical capture resolution, untouched master retained | Brief for a clean digital original; longer for a physical print |
| Tone conversion | Create neutral grayscale while keeping midtones | Luminance-only adjustment, no hard threshold | Short, with careful comparison |
| Restoration | Control distracting grain and recover local contrast | Denoise before motion estimation | Often the most variable stage |
| Motion design | Choose a restrained move that suits the subject | Conservative motion amplitude | Brief when the composition is clear |
| Render and check | Catch unstable edges and invented detail | Review faces, hair, and flat backgrounds frame by frame | Allow time for another render |
| Export | Produce a shareable file without losing texture | Match the intended playback format and inspect compression | Usually brief, followed by playback testing |
Don't use a fixed completion time as a quality target. A clean digital original may need little restoration. A damaged print may need careful local work before it's ready for motion.
Find the difficult stage first
Look at the photograph before opening the animation controls. Is the face hard to read? Are there scratches across important features? Does the composition leave room for a camera move?
Practical rule: Spend your effort where the photograph is weakest, not where the software offers the most controls.
Note which row needs the most attention. That's your starting point, even if the animation button is already available.
How to Prep a Scan Before You Animate
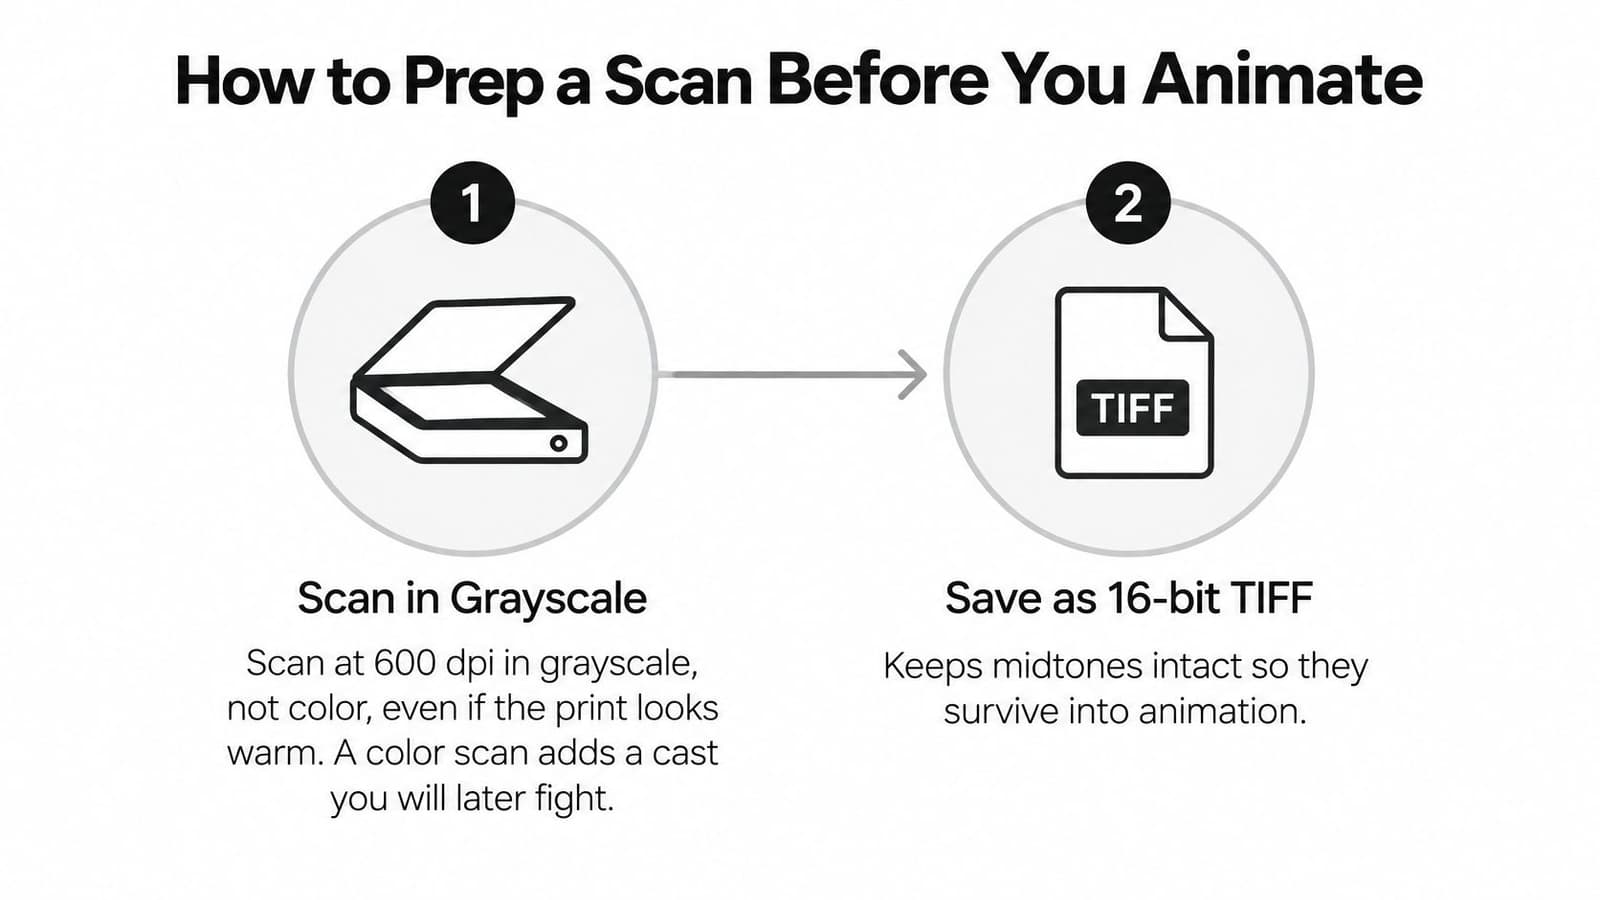
A useful scan preserves choices. You should be able to adjust the face without losing the paper, crop without cutting into the subject, and reverse every repair that changes the photograph's character.
The capture and file-saving decisions come before retouching.
Capture a master you can return to
-
Inspect the print before cleaning it. Decide which marks are loose dust and which belong to the photograph. Don't treat a crease, handwritten note, or worn border as something that automatically needs removal.
-
Use the highest practical capture resolution. Check the actual face detail rather than trusting the scanner's enhancement preview. Enlarging a weak capture later isn't a substitute for recording useful detail at the start.
-
Separate neutral grayscale from the physical original. For a monochrome animation, prepare a neutral grayscale working copy. If the warm paper tone matters to the family, retain a separate capture that records it rather than discarding that information.
-
Save an untouched master before editing. Use a lossless working format where available, and keep restoration on a duplicate or separate layers. The common mistake is saving repairs over the only full-quality scan.
The guide to scanning old photos is a useful companion when the original needs digitizing before you begin.
Repair selectively and leave room to move
-
Crop with the intended composition in mind. Leave enough surrounding image for the proposed movement. A tight crop may look good as a still but leave no room for reframing.
-
Heal isolated distractions locally. Use a small healing brush on a separate layer for dust or a scratch that obscures a feature. Avoid brushing across an entire face just because a local repair takes more care.
-
Check the tonal endpoints without forcing them. Look for blocked shadows and blank highlights. Don't turn aged paper into featureless white just to make the histogram look fuller.
Keep meaningful deckled edges, fold lines, and uneven exposure unless there's a clear reason to alter them. Their presence doesn't make the scan unfinished.
Finally, view the working copy at the size someone will see on a phone. If the face reads clearly and the repairs don't draw attention, stop preparing the scan. More retouching isn't automatically better preparation.
Converting to Black and White Without Losing Texture
Tonal damage and excessive grain are different problems. Faded skin needs tonal separation. Distracting grain needs noise control. Applying a strong sharpening filter to both is a poor substitute for treating them separately.
Historical-film restoration research identifies degraded tones, grain, and contrast loss as distinct restoration tasks. For a family photograph, that means using targeted adjustments rather than one aggressive enhancement pass.
Keep the grayscale continuous
Begin with a luminance-only conversion or adjustment. Keep the grayscale neutral, and disable automatic tinting or colorization. Compare the result with the source before moving any contrast controls.
Don't confuse black and white with a binary image. Hard thresholding turns tonal transitions into abrupt light and dark areas. That can remove the midtones you need for skin, cloth, and paper texture.
Consider a wedding portrait with a pale veil against a bright wall. A threshold treatment might separate the bride's silhouette while removing the veil's weave. The repair isn't stronger sharpening. Return to the continuous-tone version and adjust the veil locally.
Use a gentle curve to improve separation where it matters. Protect the bright fabric and avoid making every dark area equally dense.
Reduce interference, not evidence
Apply spatial denoising to the still where necessary. Temporal processing becomes relevant once you have a sequence to inspect. In either case, keep noise control ahead of sharpening and motion estimation.
Use these checks while adjusting:
- Skin texture: Keep the tonal transitions around cheeks and eyes rather than smoothing them into blank patches.
- Clothing detail: Watch fine fabric structure as you change the denoise strength.
- Paper character: Leave visible aging where it doesn't obstruct the subject.
- Edge quality: Back off if outlines develop bright rims or dark ringing.
A restored photograph should look easier to read, not as though it was printed on different paper.
Don't aim for a perfectly clean wall or completely smooth background. Reduce only what interferes with the intended motion. Fine grain can remain part of the image.
Compare the source and working copy at actual pixel size, then at normal viewing size. Can you still distinguish the weave of a sweater? Does the wall retain variation? If the edited version looks crisp but generic, restore some of the texture you removed.
Choosing Motion That Respects the Photo
A family portrait can look wrong with only a few pixels of invented movement. Choose one move per clip, starting with a restrained camera move that leaves the person's features untouched. Grain, scratches, and uneven exposure belong to the photograph's history. Keep them visible while making the motion smooth.
A camera move changes how viewers see the existing image. Subject animation changes what the person appears to do. For a family photograph, that distinction matters: the image records a moment, not the person's unrecorded expressions or mannerisms.
Motion moves for black and white family photos
| Move | Amplitude | Best for | Avoid when |
|---|---|---|---|
| Slow push-in | Small, barely noticeable enlargement | Portraits and memorials | The crop leaves no useful room around the face |
| Breathing scale | Very slight expansion and return | A single subject and a quiet mood | The movement looks like body distortion |
| Subtle parallax | Minimal separation between masked layers | Scenes with clear foreground and background depth | Reliable layer boundaries aren't available |
| Pan across | Limited travel within captured image content | Wide landscapes and group photographs | The move reveals missing image areas |
| Aggressive zoom or spin | Deliberately large movement | Not recommended for family tributes | The treatment overwhelms the photograph |
Build movement around what actually exists
If you generate motion, use an occlusion-aware workflow rather than shifting every pixel uniformly. Separate the subject, background, and plausible depth layers. Check forward and backward flow for inconsistencies, then mask areas newly exposed during frame synthesis. Keep the original scan available for comparison, especially where scratches or changes in exposure cross a layer boundary.
The AnimeRun motion-estimation benchmark is an anime-domain benchmark for flow and occlusion methods. It does not validate those methods for photographic portraits. Use it as a reference for the technical problem, not as evidence that generated movement will preserve a family photograph.
If separating a shoulder from a wall exposes an empty strip, repair that background separately. Don't stretch nearby grayscale pixels across the gap, since that can smear grain and erase the local tonal variation. If the repair looks artificial, reduce the layer separation or use a rigid camera move instead.
Reject movement that changes identity
Inspect the eyes, mouth, and hairline frame by frame. Look for invented facial detail, double edges, contour wobble, and gray smearing. Monochrome leaves little color variation to distract from these errors, and repetition can make a small defect more noticeable. Keep local facial and hair movement out of the clip.
The guide to uncanny valley animation describes how realistic-looking animation can still feel wrong. Use that as a viewing check, not a reason to add more effects. If a face looks unstable, remove the local movement. A still photograph with a quiet camera move keeps the person recognizable while preserving the marks that make the image their own.
Timing and Tone Choices for Tribute Clips
A family may want a memorial clip to feel quiet, a birthday montage to fit a lively edit, or an archive copy to remain clearly documentary. Set timing and tone for that purpose, while preserving the photograph's recognizable details. Grain, scratches, and uneven exposure are part of its record. Keep them visible rather than scrubbing them away for a polished look.
-
For a memorial, choose recognition over performance. Hold on the unchanged photograph before movement begins. Use a quiet approach and finish on a settled image, not a dramatic gesture.
-
For a birthday montage, match the surrounding edit. A moderate tonal adjustment can help the portrait sit with brighter footage. Keep the grayscale neutral, disable automatic tinting, and avoid making the image jump or lurch to a musical beat.
-
For a historical archive, separate access copies from evidence. Keep the unaltered source, record the date and provenance when known, and label the animated version as an interpretation. A still image is a valid choice.
-
For a social reel, resist exaggeration. Use a restrained, repeatable treatment. Avoid cinematic behavior that makes a recognizable family member seem fictional.
Tribute clip timing and tone templates
| Context | Duration | Motion start | Move | Tone |
|---|---|---|---|---|
| Memorial | Enough time to recognize the person without rushing | After a quiet still hold | Slow push-in | Reflective, with visible aging retained |
| Birthday montage | Matched to the surrounding edit | After the photograph registers | Gentle camera movement | Neutral grayscale, with moderate tonal adjustment |
| Historical archive | Determined by presentation needs | Optional | Still image preferred, or minimal movement | Documentary, clearly labeled |
| Social reel | Brief and loop-friendly | Gradual | Restrained breathing scale | Clear without theatrical effects |
Treat monochrome as a meaningful choice
Research on animated documentary aesthetics examines the visual choices involved in animated documentary. For a family photograph, monochrome can preserve a sense of historical distance and keep attention on the original image. Treat that appearance as a deliberate choice, not an automatic filter.
A faded photograph does not have to remain untouched. Adjust tone only as much as the clip needs, and retain the marks that make the image familiar. Removing every scratch or flattening uneven exposure can make a clean result feel less connected to the source.
Respect test: Would the person in the photograph recognize this as their picture, rather than a performance made from it?
Ask relatives who remember the person, especially when preparing a memorial. They may spot an unfamiliar expression before an editor notices a technical flaw. If they hesitate, simplify the treatment.
Export and Confirm the Clip Before You Share It
Export settings for black and white tribute clips
| Setting | Recommended value | Why it matters |
|---|---|---|
| Resolution | Match the delivery canvas and usable source detail | Avoids unnecessary enlargement and oversized files |
| Frame rate | Match the tribute project or destination requirements | Keeps the clip consistent with the surrounding edit |
| Codec and container | Use the destination's supported delivery preset; retain a separate master | Helps avoid playback surprises |
| Duration | Leave room for the chosen move and a settled ending | Prevents rushed motion or an abrupt cut |
| Bitrate | Use a quality-focused setting and inspect the exported file | Lets you judge whether compression has damaged texture |
| Colour space | Neutral grayscale without added tint | Preserves the intended monochrome appearance |
Don't judge the export by its filename or preset label. Open the actual delivered file. A clean preview in the editor isn't the same thing as a checked file on the device your relatives will use.
Check the file, not just the timeline
Use the video quality settings guide when choosing delivery settings. Keep a high-quality master separate from the smaller sharing copy so a later revision doesn't begin with an already compressed file.
Run this checklist before sending anything:
- Facial continuity: Compare the opening, middle, and ending frames with the source. The cheek, collar, and expression should remain recognizable.
- Edge stability: Inspect eyes and the hairline throughout the move, not just in a paused thumbnail.
- Background consistency: Watch flat areas during playback for flicker or patches that change tone.
- Texture preservation: Check that static regions still resemble the prepared photograph rather than a smoothed substitute.
- Opening and ending: Confirm that viewers have time to register the picture and that the final frame doesn't cut off an unfinished movement.
- Playback behavior: Test the delivered copy on the intended phone, television, or presentation system.
If a check fails, return to the stage responsible. Reduce or remove motion when contours deform. Revisit restoration when texture has already disappeared in the working still. Change export settings only when the master looks correct and the delivered file doesn't.
Keep an honest handoff
Store the original scan, the restored still, and the finished clip as distinct files. Name the animated version clearly so someone finding it later won't mistake it for historical footage.
When sharing a tribute draft, ask a relative a specific question: does the person still look like themselves? That's more useful than asking whether the animation looks impressive.
Keep the least altered successful version. Black and white animation doesn't need to demonstrate every available feature. It needs to preserve the photograph's identity while adding movement the family feels comfortable keeping.
Photo for Video turns a single still image and a short motion description into a watermark-free MP4 keepsake with gentle movement. Upload your prepared photograph, request restrained motion that preserves its analog texture, and check the result against the original before adding it to your family tribute.