How Big Is a 4 by 6 Photo
How big is a 4 by 6 photo? Get exact dimensions in inches & pixels, ideal resolution for printing, & tips to prepare photos for perfect prints.
You're probably here because a simple photo task suddenly got less simple.
Maybe you've got a favorite picture on your phone and want to print it for a birthday card. Maybe you found an old family snapshot and want to scan it for a memorial tribute or anniversary slideshow. Then the printer, lab, or frame listing asks for a 4x6 photo, and now you're wondering what that means. Is it the paper size? The pixel size? Will your photo get cropped? Will it look blurry?
That's where many encounter confusion. The phrase sounds straightforward, but it mixes two different worlds: physical size and digital image size. One tells you how big the print will be in your hand. The other tells you whether the file has enough detail to look good when printed.
The practical problems are where things usually go wrong. A phone photo might be the wrong shape for a 4x6 print. A scanned image might technically print, but still look soft because the resolution is too low. And if the photo matters, you don't want to find out after you've ordered prints or built a tribute video.
Table of Contents
- Welcome to the World of 4x6 Photos
- What a 4x6 Photo Really Means
- From Inches to Pixels A Guide to DPI and Resolution
- Printing and Framing 4x6 Photos Without Surprises
- Optimizing Scans and Digital Photos for Animation
- Frequently Asked Questions about 4x6 Photos
Welcome to the World of 4x6 Photos
A 4x6 photo sounds like the easiest print size in the world. It's the one people use for family albums, refrigerator magnets, greeting cards, and simple tabletop frames. Because it's so common, many people assume any photo can slide into that format without trouble.
Then reality steps in.
You upload a phone picture, and the preview trims off someone's hair. You scan an old print, and the digital file looks fine on screen but turns soft when printed. Or you buy a frame labeled for the same size and notice the fit is tighter than expected. None of that means you did anything wrong. It just means the phrase how big is a 4 by 6 photo has more layers than it seems.
A good photo result depends on two things working together: the shape of the image and the detail inside it.
One is physical. A print has actual measurements you can hold and frame. The other is digital. Your image file is made of pixels, and those pixels have to be dense enough to stay sharp when spread across the paper.
People usually ask the size question because they're trying to protect a memory, not because they care about technical jargon. That's why terms like aspect ratio, DPI, and resolution can feel annoying. But once you see them in plain language, they stop being mysterious.
A useful way to think about it is this:
- Physical size tells you how large the print will be.
- Aspect ratio tells you the shape of the rectangle.
- Pixels and DPI tell you whether the print will look crisp or fuzzy.
If you understand those three pieces, you can print, scan, crop, and frame with a lot more confidence.
What a 4x6 Photo Really Means
You're ordering prints for a family album. The site says “4x6,” which sounds simple enough, until the preview chops off part of a face. That moment usually reveals the actual issue. A 4x6 photo is not only a size. It is also a shape.
The size in your hand
A 4x6 photo measures 4 inches by 6 inches, or 10.16 cm by 15.24 cm, as explained in Fotor's guide to 4x6 photo dimensions.
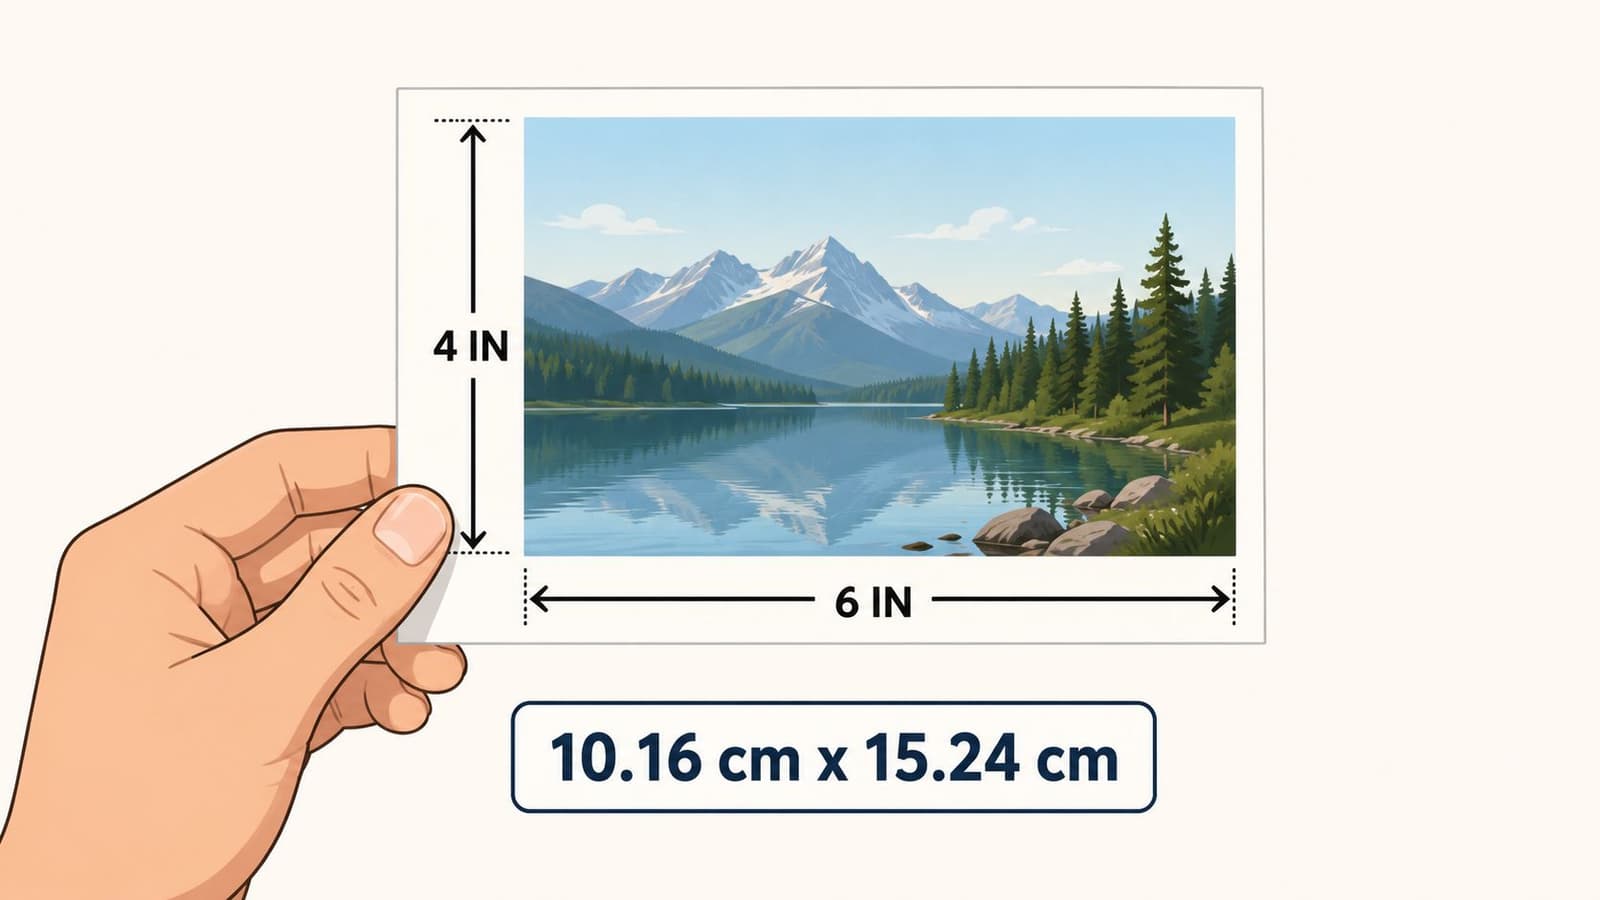
If you hold the print in your hand or lay a ruler across it, that is the physical size you will get. That part is straightforward, and it is usually enough for choosing a frame, album pocket, or mailer.
The confusion starts because two photos can both be called “good for 4x6” while behaving very differently at print time.
Why the shape matters
A 4x6 print uses a 3:2 aspect ratio. Aspect ratio is just the photo's shape, the relationship between its width and height. A simple way to picture it is a cookie cutter. If your image has the same shape as the cutter, it fits neatly. If it has a different shape, part of the image gets trimmed, or empty space appears around it.
That is why the inches alone do not tell the whole story.
Here is the practical part:
- A photo that already matches 3:2 usually prints on 4x6 paper without awkward surprises.
- A photo with a different shape often gets cropped to fit.
- Some print services add white borders instead, which keeps the whole image but changes the final look.
Phone photos are a common trouble spot. Many are shot in shapes like 4:3 or other ratios, not 3:2. So even if the file is sharp, the composition may still shift when you print it. A person near the edge of the frame, a child's hand, or part of the background can disappear.
That is the practical problem many number-only guides miss. Getting to 1200x1800 pixels is only part of the job. If the photo is the wrong shape, the print lab still has to make a choice about what stays and what gets cut. If you need help with a blurry or undersized file after cropping, this guide on how to fix photo resolution can help.
A good habit is to check the crop box before you order. For cherished family photos, that quick step matters more than people expect. It helps you protect the parts of the image that make the memory feel complete.
From Inches to Pixels A Guide to DPI and Resolution
Think of pixels like mosaic tiles
A printed photo lives in inches. A digital photo lives in pixels.
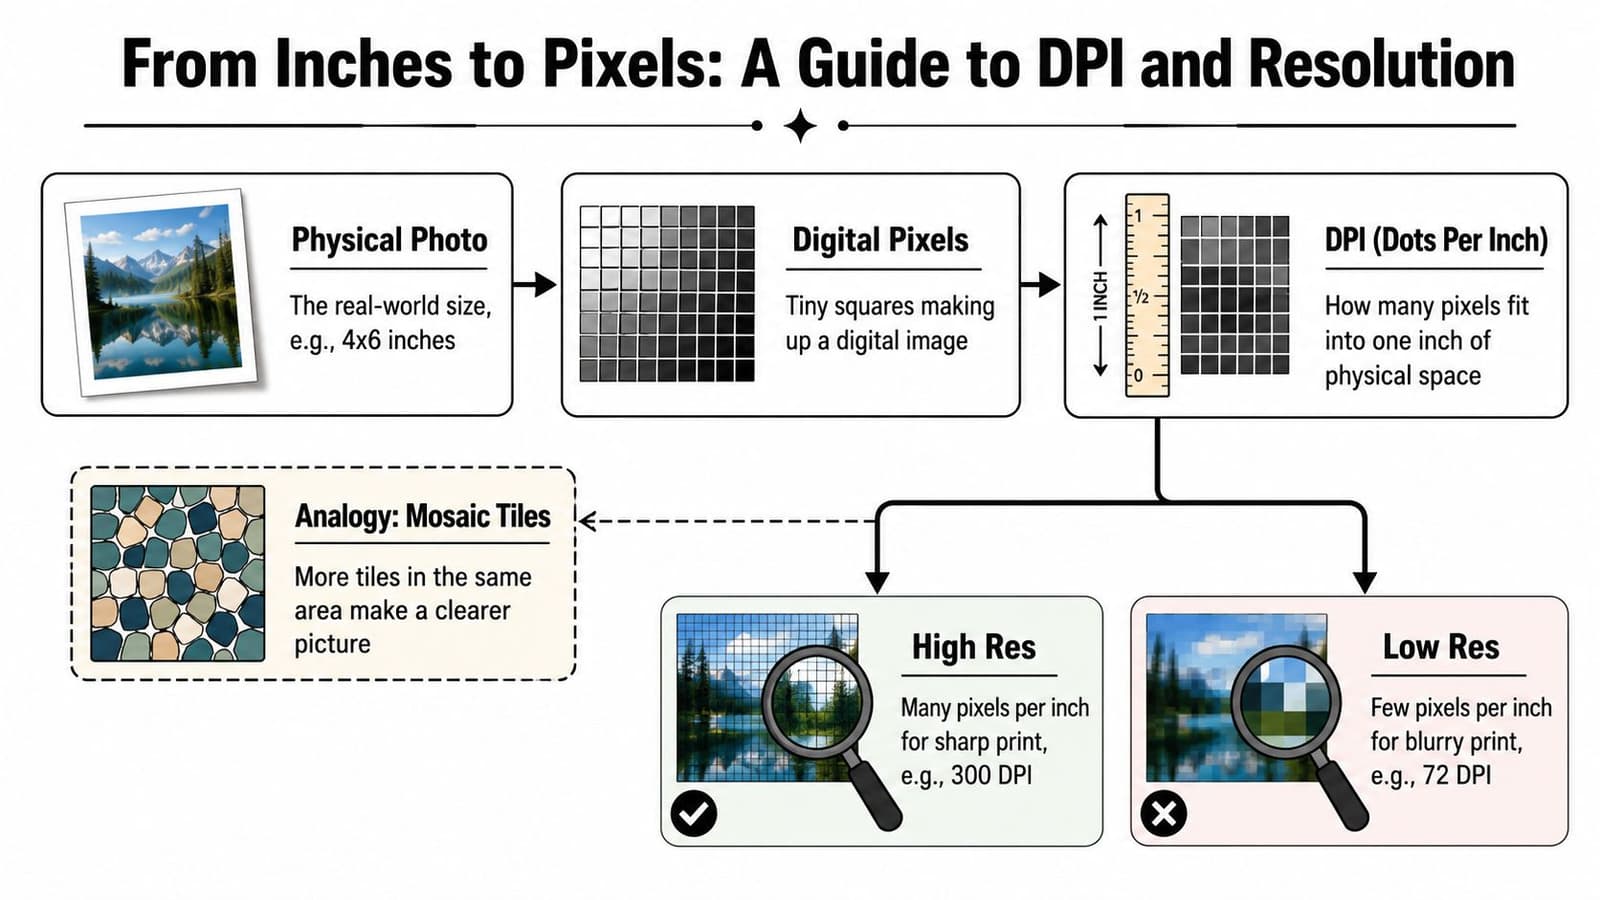
Pixels are the tiny squares that build the image on your screen. If you zoom in far enough, the photo stops looking smooth and starts looking like a mosaic made of little tiles. More tiles packed into the same space usually means a cleaner, sharper picture.
That's where DPI or PPI comes in. It tells you how densely those pixels are packed when the image is printed. If fewer pixels are stretched across the paper, the print can look soft. If more pixels fit into each inch, edges and fine details hold together better.
4x6 photo pixel dimensions by DPI
For a 4x6 print, the pixel dimensions change based on the print resolution. HPRT's DPI guide for 4x6 photos gives these benchmarks:
| Quality Level | DPI (Dots Per Inch) | Pixel Dimensions (Width x Height) |
|---|---|---|
| Lower-quality or smaller-print workflow | 150 | 600 x 900 |
| Mid-level print workflow | 200 | 800 x 1200 |
| High-quality photo print | 300 | 1200 x 1800 |
This table helps answer the digital version of the question. If you want to know how big a 4 by 6 photo is on your computer, the answer depends on the print quality you want.
Here's the easiest way to read it:
- 150 DPI can work for more casual uses.
- 200 DPI gives you a middle ground.
- 300 DPI is the common benchmark for a sharper photo print.
If you're checking a file and need help improving it before printing, this guide on how to fix photo resolution can help you assess what's salvageable and what may need a different approach.
Why one pixel number isn't the whole answer
A lot of people hear one magic number, usually 1200 x 1800 pixels, and assume that solves everything. It's useful, but it's not the full story.
Print quality depends on more than a pixel count alone. The source image matters. A clean photo with good focus and natural detail usually prints better than a blurry image that has been resized. Viewing distance matters too. A small print held in your hand gets inspected more closely than a large image seen across a room.
More pixels don't repair a weak original. They only give the printer more information to work with if that information is really there.
That's why two files with the same dimensions can print differently. One may look crisp. The other may look smeared or overprocessed because the software had to invent detail that wasn't present in the first place.
Printing and Framing 4x6 Photos Without Surprises
The benchmark for a sharp print
If you want a technically sharp 4x6 print, prepare the image at 1200 × 1800 pixels at 300 DPI, as noted in HPRT's guide to sharp 4x6 output. That benchmark is practical because lower source resolution raises the chance of softness or visible pixelation when the image is enlarged to that print size.
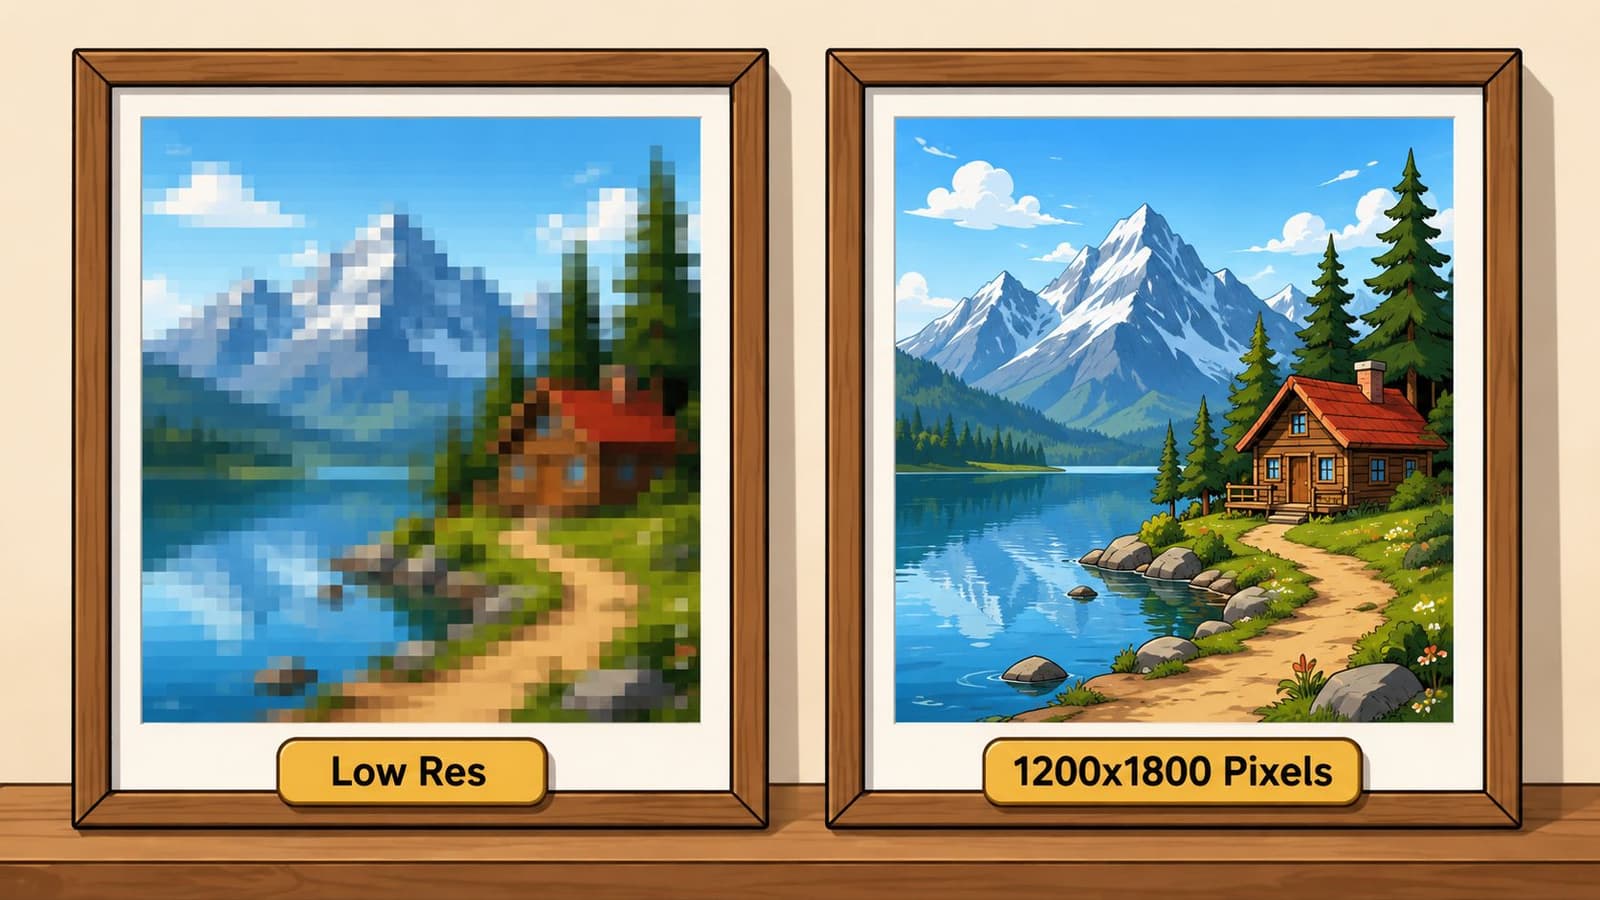
If your file is close to that target and the image is naturally clear, you're in a strong position. If it's much smaller, the printer or editing software may have to stretch the file. That's when faces, hair, clothing texture, and fine edges can start looking mushy.
For family photos, this matters more than people expect. A casual scenic shot can tolerate a little softness. A portrait of a loved one usually can't.
What happens when your photo is the wrong shape
A second problem appears even when the resolution is fine. The photo may still be the wrong shape for a 4x6 print.
Many everyday images don't match the 3:2 proportions of a standard 4x6. When that happens, printing software usually does one of two things:
- Crop to fill by trimming part of the image so it fills the whole print
- Fit inside the frame by keeping the whole image and leaving borders on two sides
That's the moment when people lose the top of a head, the edge of a bouquet, or a hand resting on someone's shoulder.
A frame choice matters too. If you're planning to dress up the print before gifting or displaying it, this guide on adding a frame to a photo is useful for testing the look before you order anything.
How to avoid bad crops before you print
The safest method is to crop the image yourself before sending it to print. That way, you decide what stays and what goes.
Use this checklist:
- Set the crop to 3:2. Most photo apps include a crop preset for this shape.
- Check the edges carefully. Look for hair, hands, text, flowers, and shoulders near the border.
- Leave breathing room around faces. Tight crops often become tighter once a lab auto-adjusts.
- Preview in both orientations. A photo may work better in a horizontal format than portrait, or the reverse.
Here's a helpful visual explanation of what to watch for when preparing images for print:
Practical rule: If the image includes irreplaceable details near the edges, don't let the print lab make the crop decision for you.
That one habit prevents a lot of disappointment.
Optimizing Scans and Digital Photos for Animation
Motion reveals flaws that a still print can hide
A static print and an animated photo don't stress an image in the same way.
When you animate a family photo, the motion often simulates a gentle camera move. That might mean drifting inward, panning across faces, or pushing closer to a specific detail. The moment that happens, weak areas in the file become much easier to notice. A still image may look acceptable at first glance, but motion can expose blur, rough edges, and damaged scan areas.

This is especially important when the original image wasn't created in a 3:2 shape. As discussed in Shutterstock's article on 4x6 cropping issues, photos that don't match the format often lead to cropping, borders, or content loss at output time.
For animation work, that means you should think about composition before you upload anything. A crop that works for print may feel too tight once there's movement. If the subject's face already sits close to the edge, a slow zoom can make the frame feel cramped.
Leave extra room around important faces and objects when you expect any motion. Animation needs space to breathe.
Old prints need special care
Scanned family photos have their own quirks. They may include faded corners, paper texture, dust, small bends, or uneven color. A print that feels charming in your hand can look rough once it's enlarged on a screen and set in motion.
That doesn't mean old photos can't animate beautifully. It means preparation matters.
A smart workflow looks like this:
- Start with the cleanest scan you can make. Dust and scratches become more obvious during motion.
- Check the crop before animating. A memorial portrait needs more margin around the face than people often leave.
- Avoid over-tight framing. Motion needs room, especially if the final video will be used in a slideshow or tribute edit.
- Review the file at full screen. Small flaws hide on a phone and show up on a larger display.
If you're digitizing family prints, this walkthrough on how to scan old photos is a helpful starting point.
A good animated keepsake usually begins with restraint. Don't force a small, weak file to do too much. Give the image enough room, preserve the original feeling, and let the motion stay gentle.
Frequently Asked Questions about 4x6 Photos
Is 6x4 the same as 4x6
Yes. It's the same size, just described in a different orientation.
People often say 4x6 when they're thinking of a print with the longer side horizontal and 6x4 when they're thinking of a portrait print. The paper size itself doesn't change. What changes is which side is horizontal and which side is vertical.
Will a 4x6 photo fit a 10x15 cm frame
Usually, yes, but it can be a snug match depending on the frame or lab.
Some retailers round a 4x6 print to 10x15 cm, even though the exact conversion is 10.16 x 15.24 cm, as discussed in Kate Backdrop's overview of 4x6 size rounding. In everyday use, that difference may feel small, but it can matter for tight frames, mats, and album pockets.
If you're buying across regions, check whether the product is built for the exact imperial size or the rounded metric version.
What file format should I use for printing
A high-quality JPEG is the practical choice because it's easy for labs, apps, and print services to handle.
If you're editing heavily or preserving a master copy from an old scan, many people also keep a TIFF or another high-quality archival version for safety. Then they export a print-ready copy when needed. The key isn't only the file type. It's preserving as much clean detail as possible before resizing, cropping, or sharpening.
Should I fill the frame or keep white borders
It depends on what matters more: using the full paper area or protecting the full image.
Choose fill the frame if you want a classic borderless print and you're comfortable trimming some of the edges. Choose borders if you don't want to lose any part of the original image.
For cherished family pictures, borders are sometimes the wiser choice. A thin white edge is usually less upsetting than cutting off part of someone's face or hand.
If you're turning a treasured still photo into something more vivid, Photo for Video can help you transform one favorite image into a gentle living-memory clip for birthdays, memorials, anniversaries, and family keepsakes. It's a simple way to give an old print, phone snapshot, or scanned portrait a little motion while keeping the feeling of the original photo intact.