How to Add Closed Captioning to a Video: Easy Guide 2026
Learn how to add closed captioning to a video with our 2026 guide. Covers auto-transcription, SRT, YouTube uploads & accessibility best practices.
You've probably got a video open right now that means something to you. Maybe it's a memorial tribute built from old family photos, a short anniversary montage, or a birthday clip you want to share before the date passes. It may only be a few seconds long. It may have music, one spoken line, or no dialogue at all.
That's exactly why captions matter.
When a video is personal, viewers don't get a second chance to catch the name, date, or message you meant to preserve. A caption can carry the words that are hard to hear over music, identify a person in an old photo, or add context that makes a short clip land emotionally instead of feeling vague. If you've been searching for how to add closed captioning to a video, the process is more approachable than it looks, and you don't need a slick production setup to do it well.
Table of Contents
- Why Captions Matter for Every Video
- Choosing Your Captioning Path
- How to Create a Caption File from Scratch
- Uploading Captions to Major Platforms
- Captioning Short Clips and Photo Animations
- Caption Quality and Troubleshooting Tips
Why Captions Matter for Every Video
A personal video often gets watched in imperfect conditions. Someone sees it in a group text while standing in line. A relative opens it on Facebook with the sound off. A friend watches it late at night without headphones. If the meaning lives only in the audio, part of your message disappears.
Captions fix that. They also do more than many people expect. A Kapwing roundup of subtitle statistics cites a joint Verizon and Publicis Media study reporting that up to 80% of viewers are more likely to finish a video with subtitles. The same roundup also cites reports of a 12% increase in view time and 15% more shares when captions are added.
That matters for personal videos just as much as branded ones. If you made a tribute for someone's memorial, you don't want the key line missed because the music was low or the room was noisy. If you paired your clip with narration, a clean script and caption track can preserve the message far better than audio alone. If you're still polishing narration, this guide on how to do a voiceover on a video is a useful companion.
Practical rule: If a word, date, name, or sentiment matters to the memory, put it on screen somehow.
There's also an accessibility reason, and it shouldn't be treated as an afterthought. Captions help deaf and hard-of-hearing viewers, but they also help everyone else follow the video more easily. On a short, emotional clip, that can be the difference between “nice video” and “I understood exactly who this was for.”
Choosing Your Captioning Path
Before you start clicking around in editing software, make two decisions. First, how you'll create the captions. Second, how you'll deliver them.
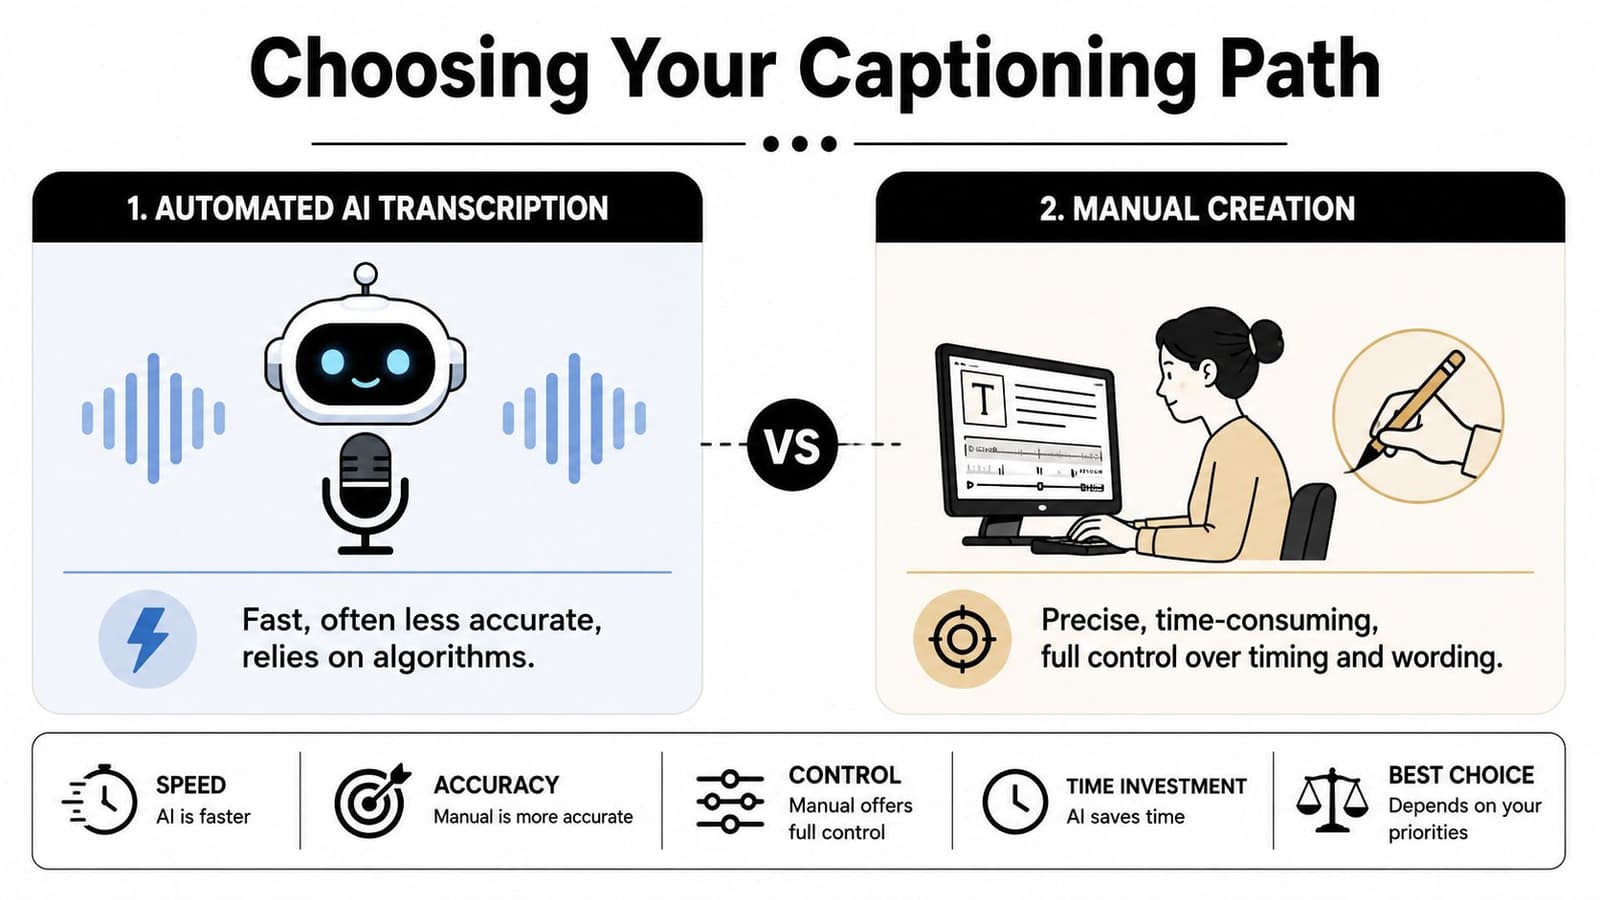
Auto captions or manual work
Automatic captioning is fast. For many simple videos, it gives you a solid draft in minutes. That speed is useful when you're trying to finish a family tribute quickly or turn around several clips at once.
But speed isn't accuracy. YouTube's own guidance says creators should review and edit automatic captions, and notes that cleanup is especially important for videos with names, accents, or background noise in its post about captioning YouTube videos. Personal videos often have all three. A memorial slideshow may include soft music under speech. A birthday montage may mention family names that an automated system won't catch. Old recordings can be muffled.
Manual captioning takes longer, but it gives you control over wording, timing, punctuation, and emotional tone. That control matters when the exact phrasing carries meaning.
Sidecar captions or burned-in text
The second choice is format.
A sidecar caption file sits next to the video as a separate file, often an SRT. The viewer or platform can turn it on and off. This is usually the best option when the platform supports closed captions and you want flexibility.
Burned-in captions are text embedded directly into the picture. They can't be switched off, but they'll stay visible anywhere the video goes. For short social clips, that reliability is often useful.
Here's the practical comparison:
| Method | Best For | Pros | Cons |
|---|---|---|---|
| Auto-generated captions | Fast drafts, clear speech, quick turnaround | Quick to produce, often built into platforms | Needs review, mistakes with names, accents, noise |
| Manual captions | Personal videos, tributes, nuanced wording | Precise, better timing control, better wording | Slower |
| Sidecar captions like SRT | YouTube, hosted video players, reusable delivery | Flexible, editable, can be reused across platforms | Depends on platform support |
| Burned-in captions | Social feed posts, short reels, universal playback | Always visible, no separate file to manage | Not toggleable, harder to revise later |
If the words are likely to change, keep them in a sidecar file first. If the platform is unpredictable, export a burned-in version too.
For many personal projects, the strongest workflow is hybrid. Build a clean SRT first, then decide where you also want an open-caption version for sharing.
How to Create a Caption File from Scratch
If you want the most portable caption format, start with an SRT file. It's simple, widely supported, and you can make one in Notepad, TextEdit, or any plain text editor.
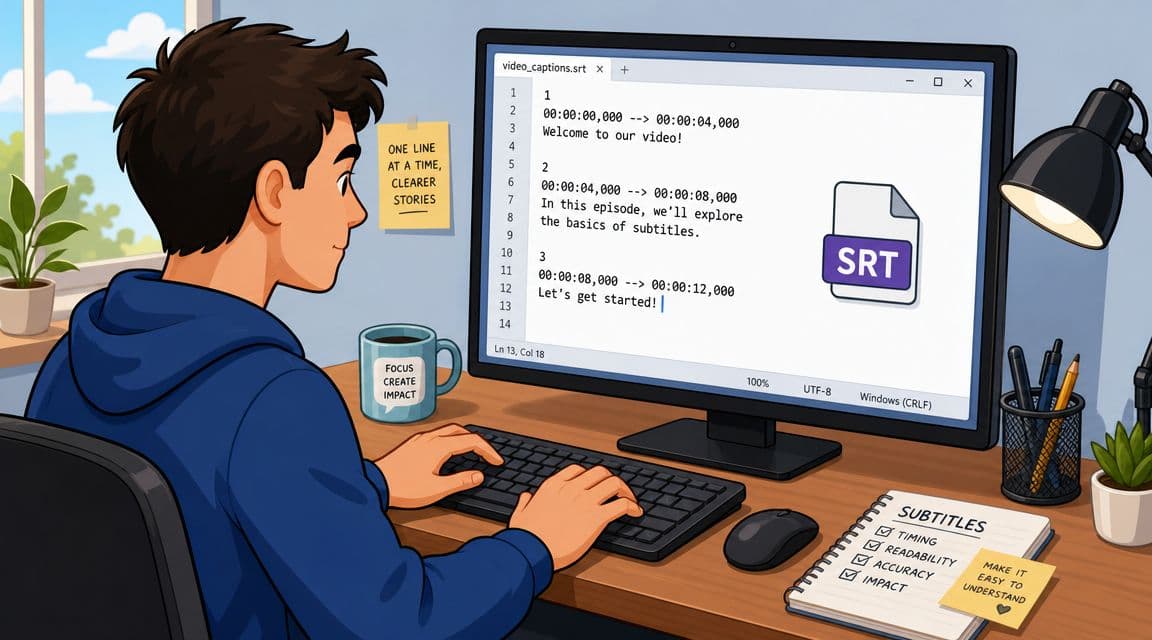
What an SRT file looks like
A standard SRT block has three parts:
- A sequence number
- A start and end timecode
- The caption text
Copy this pattern:
1
00:00:00,000 --> 00:00:03,000
In loving memory of Helen Carter

2
00:00:03,500 --> 00:00:06,000
Beloved mother, grandmother, and friend
That comma in the timecode matters. So does the spacing. Save the file with the .srt extension, not .txt.
A 3Play Media overview of closed captioning workflows notes that the most common method for adding captions is using a sidecar file like an SRT. The same guidance also notes that speech above 180 words per minute can become too fast for viewers to read and for captions to stay synchronized. That's a useful benchmark when you're captioning voiceover-heavy clips.
A simple workflow that works
The easiest reliable workflow is this:
- Write the words first. Start with a clean transcript. If your video has dialogue, transcribe exactly what's spoken. If it's a short tribute with no speech, write the text you want viewers to see.
- Play the video and mark entry points. Pause where each caption should start and stop. You don't need frame-perfect timing on a family montage, but the text should feel naturally aligned with the moment.
- Keep each caption readable. Don't cram a paragraph into one card. Short lines are easier to absorb, especially on phones.
- Leave breathing room. If one caption disappears and the next one arrives instantly, viewers feel rushed.
A SpeakWrite guide to closed-caption workflow describes the process in the same basic order: create an accurate transcript, synchronize each caption to the video timeline, then export as a sidecar file such as SRT, VTT, or SCC.
A good caption doesn't just match the audio. It gives the viewer enough time to actually read it.
For very short videos, I recommend drafting the full text outside the video editor first. It's faster to revise wording in a plain text file than to keep changing tiny caption boxes on a timeline. If you're pulling speech from an existing clip before captioning it, this quick guide on how to get audio from a video can help simplify that prep step.
A few formatting habits that help
Small choices make captions feel polished:
- Use sentence case. It reads more naturally than ALL CAPS.
- Break lines at natural pauses. Split on phrases, not in the middle of a name or idea.
- Match emotion without overdoing punctuation. One period or no punctuation often looks cleaner than multiple exclamation marks.
- Include relevant non-speech audio only when it adds meaning. In a tribute,
[soft music]might be unnecessary.[applause]or[laughter]can add context when the sound matters to understanding.
If you only need one line for the entire video, that still counts as captioning. A five-second clip with one caption is often enough.
Uploading Captions to Major Platforms
Once the file is ready, the job shifts from writing to delivery. Many people get stuck during this phase, because each platform handles captions a little differently.
YouTube
YouTube gives you a few practical paths. According to Adobe's overview of YouTube and Premiere caption workflows, you can upload a timed file like an SRT, use Auto-sync with a plain transcript, or type captions manually in the platform's subtitle tools. The same guidance notes that YouTube supports non-speech cues like [applause] and [thunder] for accessibility in Adobe's closed-caption how-to.
If you already made an SRT, uploading the timed file is usually the cleanest route.
A typical YouTube workflow looks like this:
- Open YouTube Studio.
- Select the video.
- Go to Subtitles.
- Choose the video language if needed.
- Upload your caption file, or paste a transcript for Auto-sync.
- Review timing and text before publishing.
For family and memorial videos, don't skip the review screen. YouTube may display line breaks or timing a little differently than your editor did.
Vimeo and similar hosting tools
Many hosted players use a similar structure. You upload the video, open its settings, and look for subtitles or captions. If the platform accepts sidecar files, upload the SRT and preview it inside the player itself.
That preview matters. A caption file can be technically valid and still look awkward once the player renders it. Long lines may wrap strangely. Text can cover a face in a lower-third composition. A short review catches those issues before you send the link to family.
Here's a simple check list before you publish:
- Play the entire video once with captions on
- Watch on a phone if intended viewers typically watch on mobile
- Confirm names, dates, and places
- Check that the final caption doesn't disappear too early
This walkthrough can help if you want to see the process in action:
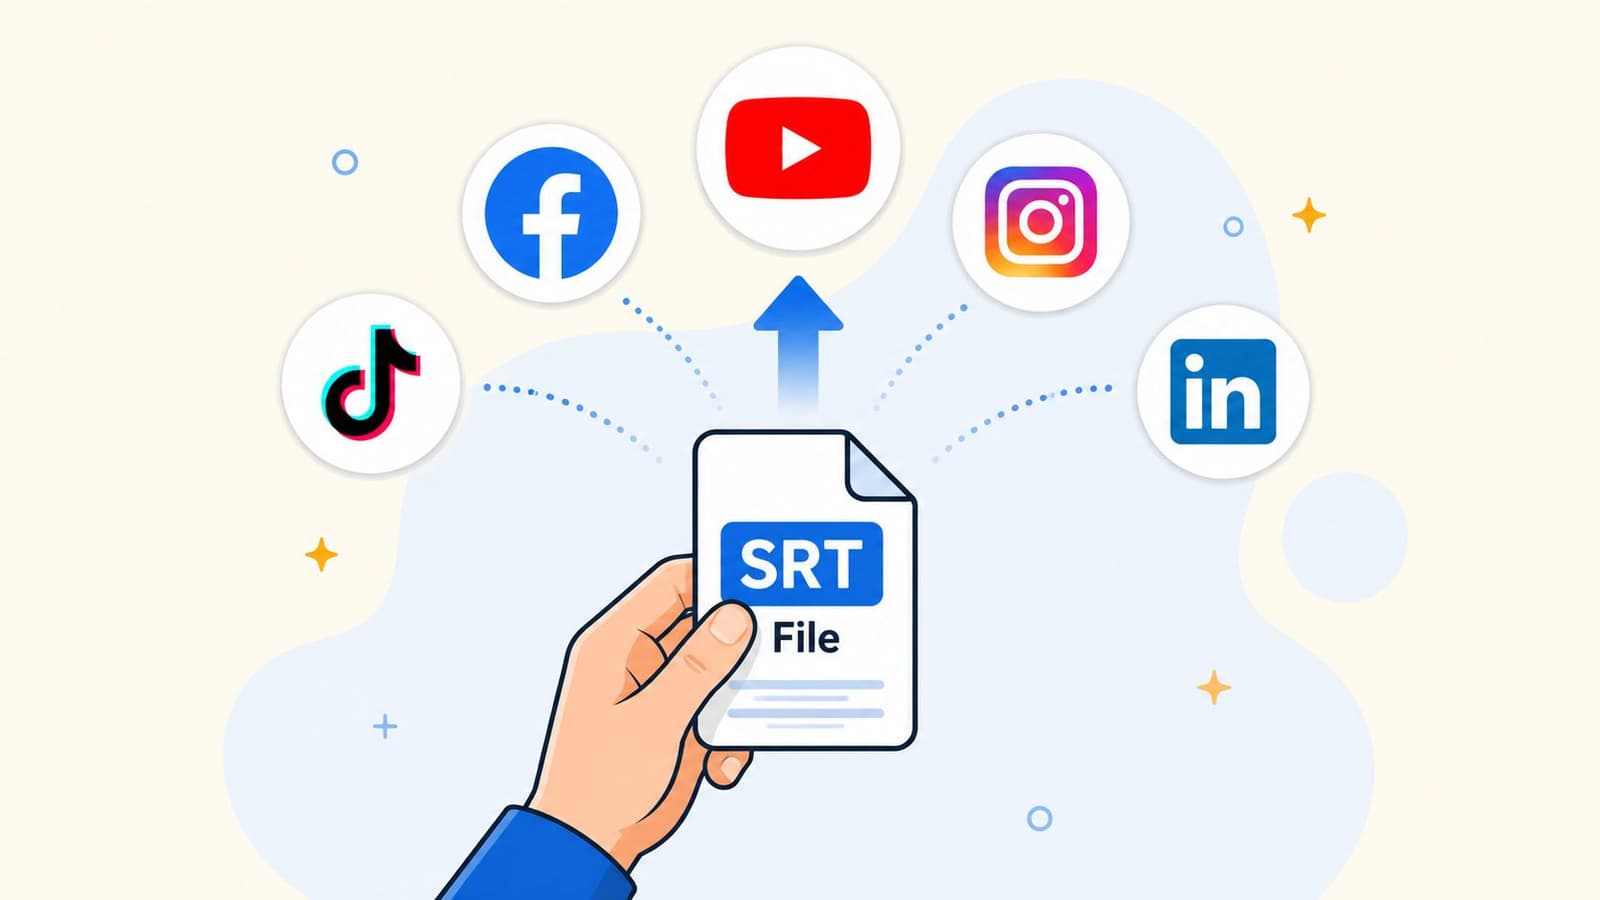
Social platforms and feed posts
Social posting is where closed captions and open captions often split.
For a hosted player like YouTube, a sidecar file is great. For many feed-based social posts, burned-in text is often more dependable because the platform may not present your uploaded captions the way you expect, or may not support them in the same way across every placement.
If your clip is headed to Instagram Reels, Stories, or a Facebook feed post, export a version with visible on-screen text if the message absolutely must be seen. For business uploads, ads, or pages with more advanced controls, you may be able to attach a caption file, but it's smart to verify support before relying on it.
If the platform makes captions optional for the viewer, ask whether your message can afford to be optional too.
That's the main delivery question. Closed captions give flexibility. Open captions give certainty.
Captioning Short Clips and Photo Animations
Short personal videos need a different mindset. A five-second photo animation usually doesn't need a full transcript. It needs the right words in the right place.

When the caption adds context instead of dialogue
A short memorial or family clip may have no speech at all. That doesn't make captions irrelevant. It changes their role.
On these videos, captions often do one of three jobs:
- Identify the subject
“Helen Carter, 1942 to 2024” - Anchor the moment
“Our wedding day, June 1978” - Carry the emotional message
“Forever loved”
That kind of text acts less like transcription and more like framing. It helps viewers understand what they're seeing immediately, especially if they're watching a short loop in a crowded feed.
If you want more control over visual text placement, timing, and style for this type of clip, this tutorial on adding text to video is a useful next step.
The fastest workflow for very short videos
For a very short clip, keep the process lean.
If the text is simple and won't need translation or platform-specific toggling, burned-in text is often the easiest route. You place the line once in your editor, export the video, and you're done. This works especially well for keepsake videos where the wording is part of the design.
If you want flexibility, make a one-block SRT. That file can be as simple as:
1
00:00:00,000 --> 00:00:05,500
In loving memory of Dad
A few choices help these clips feel tasteful:
- Use fewer words. Short videos don't give viewers much time.
- Place text where it won't cover a face. Lower center isn't always the best option on old portraits.
- Match the tone of the clip. A memorial line should look calm and readable, not flashy.
- Let the image breathe. Sometimes one quiet caption is enough.
For this category of video, restraint usually wins.
Caption Quality and Troubleshooting Tips
Good captions are clear, timed well, and dependable after upload. Great captions also survive the move from one app to another.
What to check before you publish
Run through a final quality pass before you share anything:
- Readability: Captions should stay on screen long enough to read comfortably.
- Sync: The text should appear when the moment happens, not noticeably before or after.
- Context: Add non-speech cues only when they help viewers understand the scene.
- Ending: Keep the last caption visible long enough that it doesn't vanish before the video finishes.
A lot of tutorials stop at “export captions,” but that isn't where real-life problems stop.
Why captions break after export
One of the most common issues is portability. A file that worked in one place may fail somewhere else because of format or encoding. Microsoft's guidance on creating closed captions is especially specific about WebVTT requirements, including the .vtt extension and UTF-8 encoding, in its support article on creating closed captions for video.
If captions break after upload, check these first:
- File extension: The destination may expect
.vttinstead of.srt - Text encoding: Wrong encoding can scramble punctuation or special characters
- Player support: Some hosting tools don't support the caption format you exported
- Formatting errors: A missing line break or malformed timecode can invalidate the file
Exporting the file is only half the job. Testing it in the destination player is the other half.
When in doubt, keep both versions: a sidecar file for platforms that support closed captions, and a burned-in version for places where you can't trust the upload workflow.
If you're turning a treasured photo into a short moving keepsake, Photo for Video makes that part simple. You can transform a single still image into a gentle, polished MP4 that's ready for tributes, anniversaries, birthdays, and memorial edits, then add the captions or on-screen text that give the moment its full meaning.