How to Get Audio from a Video: A Quick Guide for 2026
Learn how to get audio from a video on desktop, mobile, and online. Our step-by-step guide helps you extract sound for tributes, reels, and family keepsakes.
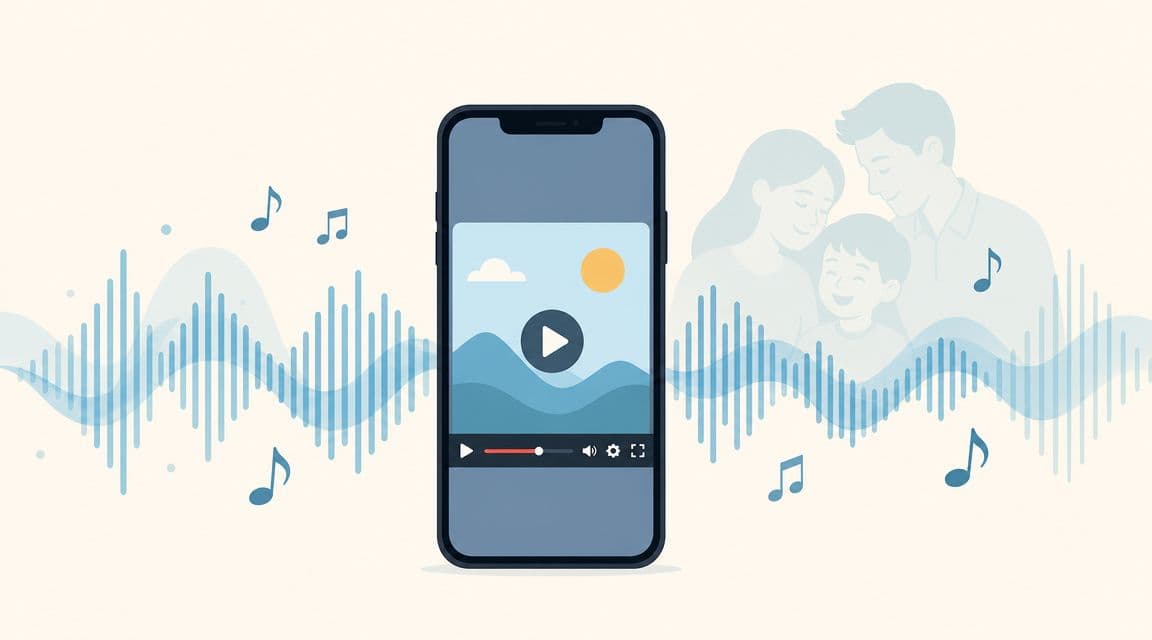
You've probably got a clip sitting on your phone right now that matters more for what it sounds like than what it looks like. Maybe it's a parent laughing off camera, a child saying something you didn't know you'd want to save forever, or a few seconds of room tone from a family gathering that instantly brings you back.
When you're making a tribute, memorial reel, or animated photo, that sound often carries the emotion. A still image can become powerful on its own, but the right voice, breath, or ambient noise is what makes it feel alive again. Knowing how to get audio from a video isn't just a technical step. It's a preservation step.
Table of Contents
- Why You Might Want to Save Just the Sound
- Choosing Your Tool A Quick Comparison
- Extracting Audio on Your Desktop with Free Software
- Using Online Tools and Mobile Apps for Speed
- Preparing Audio for Short Video Clips
- Putting It All Together with Your Animated Photo
Why You Might Want to Save Just the Sound
A lot of meaningful footage isn't visually impressive. It might be shaky, dim, vertical, or captured in a rush. But the audio can still be priceless.
That's especially true in tribute work. A few spoken words from an old video can carry more emotional weight than a full music bed. The same goes for the small sounds people overlook at first: a laugh, a greeting, the clink of dishes during a family dinner, a voice saying someone's name.
The good news is that extracting sound from a video usually isn't a hack or workaround. Modern video files typically store audio as a separate encoded track, which is why editors can isolate it and export it in formats such as AAC, MP3, or WAV, as described in Adobe's guide to extracting audio from video.
Why this matters for memory projects
When you understand that the audio is already its own track inside the video file, the process gets less intimidating. You're not trying to rerecord a speaker through your laptop microphone or capture sound playing through phone speakers. You're pulling the original track directly from the file.
That matters because direct extraction usually gives you cleaner results and fewer problems later when you place that sound under an animated photo or a short montage.
Practical rule: If the voice or ambiance matters emotionally, extract the original track first. Don't record it secondhand from speakers.
There's also a practical format question. If you're sending the file to someone, using it in a quick social clip, or keeping file size small, MP3 is often the easiest choice. If you want a higher-fidelity file for editing and archiving, WAV is often the safer pick. AAC is also common and widely compatible in modern workflows.
What people usually get wrong
The biggest mistake is assuming the whole video has to stay intact because the moment was captured that way. It doesn't. In digital editing, sound and picture can be treated separately.
Another common mistake is waiting too long to isolate the audio. If you know the spoken line or room sound is the part you care about, save it now as its own file. That gives you a clean asset you can reuse in future tribute edits, slideshows, keepsakes, or short looping clips.
Choosing Your Tool A Quick Comparison
The right tool depends on what you care about most. Some people want the fastest possible result. Others want control, privacy, or the ability to clean up the sound before using it.
For precious family audio, I usually lean toward desktop software first. For quick, low-stakes jobs, browser tools are often enough. Mobile apps sit in the middle when the source clip lives on your phone and you don't want to move files around.
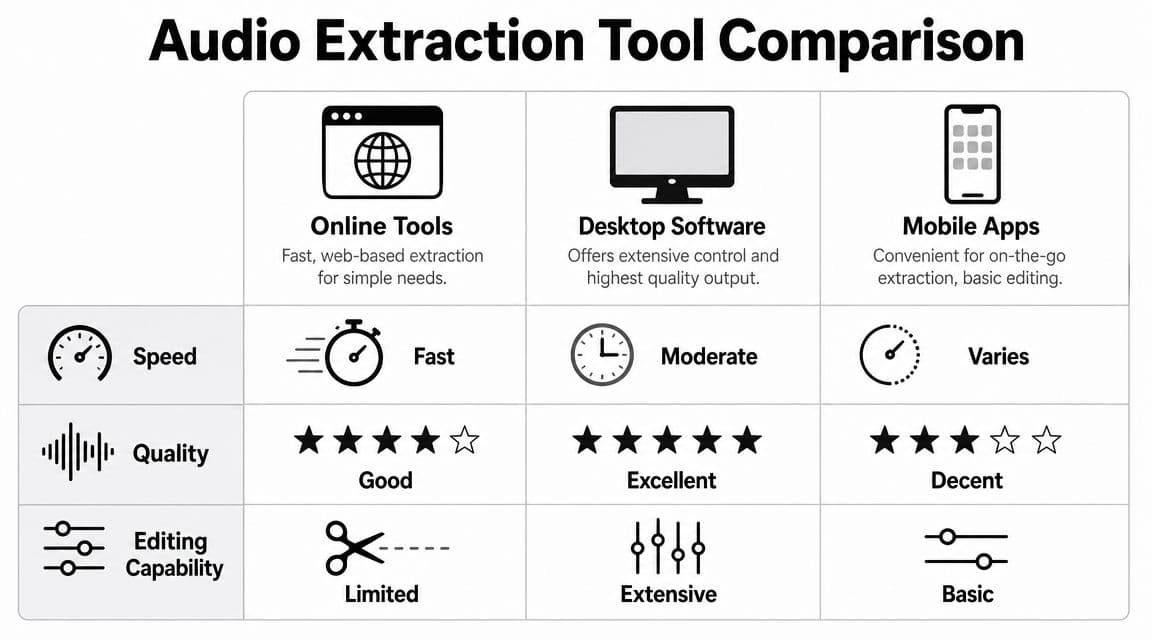
Audio extraction methods compared
| Method | Best For | Pros | Cons |
|---|---|---|---|
| Desktop software | Important clips, better control, cleanup work | Strong format control, editing options, better privacy | Requires installation and a little setup |
| Online tools | Fast one-off extraction | Quick, simple, no install | Limited control, privacy concerns, possible conversion changes |
| Mobile apps | Phone-based workflows | Convenient, easy access to camera roll | Features vary, editing is usually basic |
How to choose quickly
- Desktop software works best when the clip matters, you want to preserve quality, or you may need to trim, normalize, or clean the audio afterward.
- Online tools make sense when speed matters more than control and the file isn't especially sensitive.
- Mobile apps are useful when the source video is already on your phone and you want a direct, lightweight workflow.
Use the simplest tool that still protects the memory you're working with.
If the audio is emotionally important, avoid choosing only for convenience. A fast workflow is great, but not if it leaves you with a file that's harder to edit, harder to trust, or awkward to loop later.
Extracting Audio on Your Desktop with Free Software
Desktop tools give you the most dependable workflow when you want to save meaningful sound properly. Two free options cover most needs well: VLC Media Player for quick extraction and Audacity for extraction plus editing.
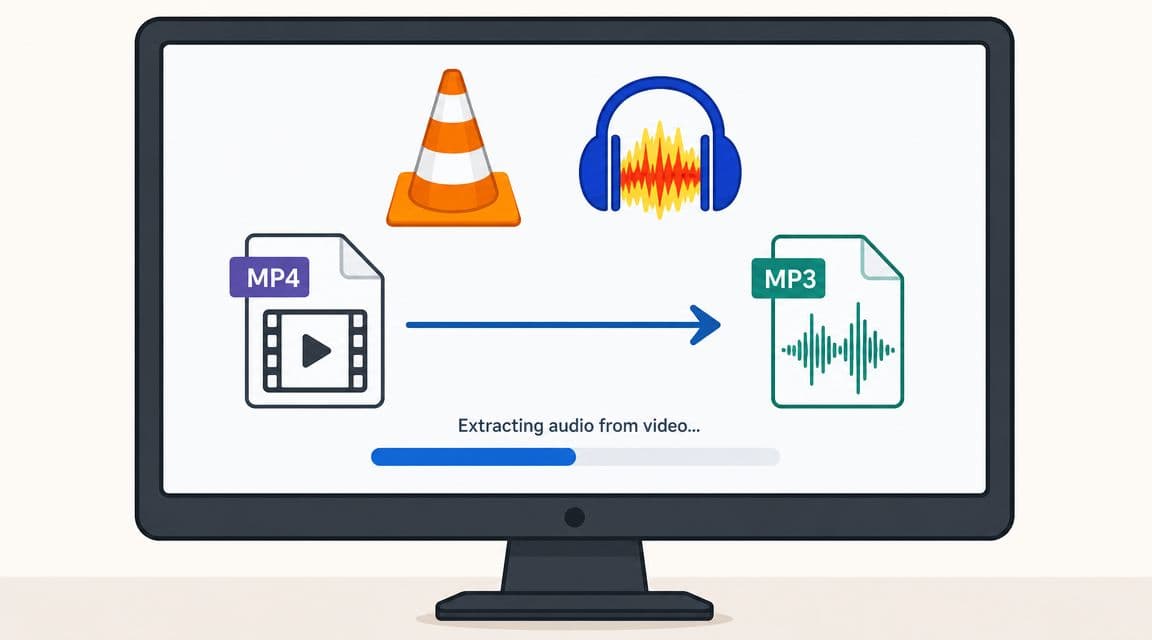
Use VLC when you want speed
VLC is one of the easiest ways to pull audio from a video without opening a full editing project. For a reliable audio-only workflow, the documented path is Media → Convert/Save, add your source video, choose a profile such as Audio - MP3, set an output filename with an .mp3 extension, and start the export, as outlined in this VLC extraction walkthrough.
Here's the practical version of that process:
- Open VLC: Go to the media conversion area rather than just playing the clip.
- Add your video file: Choose the original file from your phone transfer, downloads folder, or archive drive.
- Pick an audio profile: MP3 is the easiest for sharing and broad playback support.
- Name the output carefully: The filename extension needs to match the format you selected.
- Export and test it: Play the audio file right away so you catch any naming or profile mismatch.
VLC is best when you don't need to edit much. You just need the voice, music, or ambient sound pulled out cleanly and saved as a standalone file.
A small but common failure point is the export name. If the extension doesn't match the audio profile, some players won't recognize the file properly.
For anyone working with older video files or mixed formats, it also helps to understand common audio conversions. This short guide on converting MPEG to MP3 is useful if your source file isn't already in a format you handle often.
Use Audacity when you need editing control
Audacity is the better choice when extraction is only the first step. If you want to trim dead space, soften harsh volume jumps, or prepare a short emotional excerpt for looping, Audacity gives you that extra control.
To work with video files in Audacity, you need FFmpeg installed and linked inside the app. The setup path is Edit → Preferences → Libraries → Locate next to the FFmpeg Library. Once that's configured, Audacity can open common video containers and pull in the embedded audio stream, making the waveform available for editing, normalization, or cleanup, as explained in this Audacity extraction guide.
After setup, the workflow is straightforward:
- Open the video file in Audacity: If needed, change the file filter to show FFmpeg-compatible files.
- Let Audacity import the audio track: You'll see the waveform immediately.
- Listen through once before editing: Mark the words or moment you want to keep.
- Trim the excess: Remove long pauses, handling noise, or the camera operator speaking off to the side.
- Export to your final format: WAV for editing and archiving, MP3 for easy sharing.
Here's a visual walkthrough if you want to watch the process before doing it yourself.
If the clip is irreplaceable, use Audacity even if VLC would be faster. The waveform view helps you make careful decisions instead of guessing.
Audacity does take a little more setup, especially the FFmpeg step, but it pays off when the final use isn't just storage. It's especially useful when you're building a short tribute clip and need the audio to feel intentional, not just extracted.
Using Online Tools and Mobile Apps for Speed
Sometimes you don't want to install anything. You just need the audio out, fast, because you're assembling a memorial slideshow tonight or trying to finish a birthday reel before sending it off.
That's where browser tools and mobile apps earn their place. They reduce friction. They also come with trade-offs that matter more when the clip is personal.
When browser tools make sense
Current browser-based tools can extract MP3 from common formats like MP4, MOV, and AVI in a few steps, and the bigger question isn't whether they work. It's when they're the right choice, especially once you factor in privacy, file-size limits, and what happens to audio quality after web conversion, as noted in this discussion of browser-based extraction trade-offs.
The usual workflow looks like this:
- Upload the video file: Drag it into the browser tool or select it from storage.
- Choose the audio output: MP3 is the usual default because it's easy to use almost anywhere.
- Download the extracted file: Save it locally and listen immediately.
This is fine for low-stakes material. If it's a casual clip for social media or a temporary draft, speed may matter more than precision.
But if the video contains private family footage, a loved one's last voice note captured on video, or anything you wouldn't casually hand to a third party, stop and think before uploading.
Browser tools are convenient. Convenience and sensitivity rarely belong in the same workflow.
When mobile apps are the better fit
Mobile apps help when your source clip is already sitting in your camera roll and you don't want to move files to a laptop first. That can save time, especially if your project is also being assembled on the phone.
The trade-off is that mobile apps vary a lot. Some are little more than format converters. Others include trimming, fade tools, and basic export settings. Many are perfectly usable for simple tasks, but fewer give the control you get from a desktop editor.
A good rule is simple:
- Use mobile apps when you need convenience and the edit is basic.
- Use online tools when installation is the main barrier and the file isn't sensitive.
- Use desktop software when the audio matters enough that you'd regret taking shortcuts.
If you're building a short tribute clip after extraction, you may also need to tighten the original footage first. This guide on how to trim an MP4 video helps if you want to shorten the source before or after pulling the sound.
Preparing Audio for Short Video Clips
A tribute clip often lives or dies on the first few seconds of sound. If the voice takes too long to begin, if the room noise is louder than the words, or if the ending cuts off awkwardly, the feeling weakens fast.
Short emotional edits need audio that reaches the point quickly and still sounds natural. That usually means choosing one self-contained moment instead of trying to preserve a whole conversation.
Find the part people actually feel
Start by listening without editing. Look for the line, laugh, breath, or bit of room tone that still means something when separated from the full video. For animated photos and memorial-style clips, that emotional center is usually brief and obvious once you hear it.
I usually mark a few options first, then compare them back to back. The best choice is rarely the longest one. It is the one that feels complete fastest.
A practical way to narrow it down:
- Choose a clean start: Pick a moment that begins with a clear word, inhale, or natural sound, not a shuffle or camera bump.
- Cut the delay: Remove lead-in time that makes the viewer wait for the meaningful part.
- Leave a little tail: A short breath or room sound after the phrase helps the clip feel human.
- Test it at the final length: Audio that works at 20 seconds may feel slow at 6.
Shape the ending so a short loop feels deliberate
Very short visuals repeat. The audio has to survive that repetition.
A hard stop makes the loop feel mechanical, especially in a soft remembrance piece. A light fade-out can help, but fading is not always the best answer. If the clip contains a natural pause, a gentle exhale, or quiet room tone at the end, keep that first. Natural endings usually feel better than processed ones.
Normalization can help if the voice is too quiet, but restraint matters. Raising the level is useful. Heavy noise removal, aggressive compression, or too much EQ often strips away the texture that makes a loved one's voice sound familiar.
Preserve clarity first. Preserve character second. Do not polish the life out of it.
If you know the audio will sit under a subtle moving portrait, preview it with the motion early. A line that sounds fine by itself can feel rushed once paired with a looping visual. If you plan to animate a photo with gentle motion, give the sound enough space to breathe so the memory feels held, not squeezed into a template.
Putting It All Together with Your Animated Photo
Once the audio is trimmed and polished, the creative part gets easier. You're no longer staring at a file management task. You're shaping a moment.
For short animated photos, restraint usually works better than complexity. A subtle camera move, a gentle facial motion, or a quiet zoom pairs well with a brief spoken line or a small piece of natural room sound. If the movement is soft, the audio can carry more of the emotional load.
Match sound to movement
Think in terms of rhythm rather than effects.
- A spoken phrase works well with small portrait movement and a slow visual reveal.
- A laugh or candid sound pairs nicely with a warmer, lighter motion.
- Ambient room audio can give still imagery a sense of presence, even if nobody speaks.
If the clip is very short, avoid stuffing too much into it. One clear line or one meaningful sound often lands better than layered music, speech, and effects competing for attention.
Keep the memory recognizable
The best tribute edits don't feel overproduced. They feel honest.
That means keeping the original character of the voice, leaving a little natural space around the words, and choosing movement that supports the emotion instead of distracting from it. If a loved one says something tender, the image doesn't need dramatic motion. It just needs enough life to let the sound breathe.
When you're ready to pair your finished audio with motion, a tool like Photo for Video's animated photo maker can help turn a still image into a short living memory that fits naturally into tribute edits, reels, and keepsakes.
If you've got a favorite photo and a short audio clip that means something to your family, Photo for Video makes it easy to turn that memory into a polished moving keepsake. Upload one still image, guide the motion, and create a short MP4 that's ready for tribute videos, anniversaries, birthdays, and memorial projects.