How to Convert iPhone Videos to MP4: A Safe & Easy Guide
Learn how to convert iPhone videos to MP4 on iPhone, Mac, and Windows. Our guide covers safe methods that preserve the quality of your family videos.

You've got an iPhone video that matters. Maybe it's a birthday toast, a clip of a grandparent laughing, or a short piece of footage you need for a memorial slideshow. Then you try to play it on a Windows laptop, upload it to a website, or drop it into editing software, and it either fails, stutters, or gets rejected.
That's usually where people search for how to convert iPhone videos to MP4 and end up with bad advice. A lot of guides jump straight to “upload your file to this converter” without asking the most important question first. Do you need a full conversion at all? For family keepsakes, that question matters because the wrong method can waste time, reduce quality, and put private footage on someone else's server.
The safer approach is simpler. First, figure out whether your iPhone clip only needs a new container. Second, if you do need a true conversion, use a local method on your iPhone, Mac, or PC whenever possible.
Table of Contents
- Why Your iPhone Video Isnt Playing and What to Do
- The Easiest Conversion Method on Your iPhone
- How to Convert Videos on a Mac
- How to Convert Videos on a Windows PC
- Key Tips for Preserving Quality and Privacy
- Turning Your Videos into Lasting Memories
Why Your iPhone Video Isnt Playing and What to Do
You send a video of a birthday candle blowout or a grandparent telling a story. It plays fine on the iPhone. Then a laptop, TV, website, or older editing app refuses to open it.
In many cases, the problem is compatibility, not damage. iPhone videos often come in a MOV container, while many apps and devices are happier with MP4, especially when the video uses H.264 and the audio uses AAC.

The part that matters most is this. MOV is a container, not the video format itself. A container is just the file wrapper. The actual video and audio inside might already be compatible with MP4, which means you may not need a full conversion at all.
That distinction matters for family footage. A full re-encode can take longer and may lower quality, even if the loss is slight. A simple rewrap keeps the original video and audio streams intact and only changes the container, which is usually faster and safer for preserving detail.
Apple Community contributors have noted that some iPhone .mov files can be fixed by repackaging them into a different container instead of re-encoding, which helps avoid unnecessary quality loss, as discussed in this Apple Community discussion about rewrapping iPhone MOV files.
The fast diagnosis
Ask these questions before converting anything:
-
Does the clip play on your iPhone but fail on another device or app?
The target device may dislike the container, even if the video inside is fine. -
Does the app, website, or editor specifically require MP4?
If yes, the goal is compatibility. Start by checking whether a rewrap will solve it. -
Is this an irreplaceable memory?
If it is, choose the lightest fix first and keep the original file untouched as a backup. -
Are you tempted to use an online converter because it seems faster?
Be careful. Uploading personal family videos to a random web service creates a privacy risk that is easy to overlook.
If playback is the only problem, the better fix may be using a different player instead of converting the file. This guide on how to play an MOV file on different systems can help you check that first.
Why MP4 usually solves it
MP4 is the safest common denominator for sharing, uploading, editing, and long-term access across Apple and non-Apple devices.
The goal of converting an iPhone video to MP4 is usually simple. Get a file that opens reliably without putting extra wear on the original footage. In practice, that means choosing between two paths: rewrap when the video stream is already compatible, or transcode only when the receiving device, app, or website needs it.
The Easiest Conversion Method on Your iPhone
If you record a lot of family videos, the easiest fix starts before you press record. One setting can save you from repeating this whole problem later.
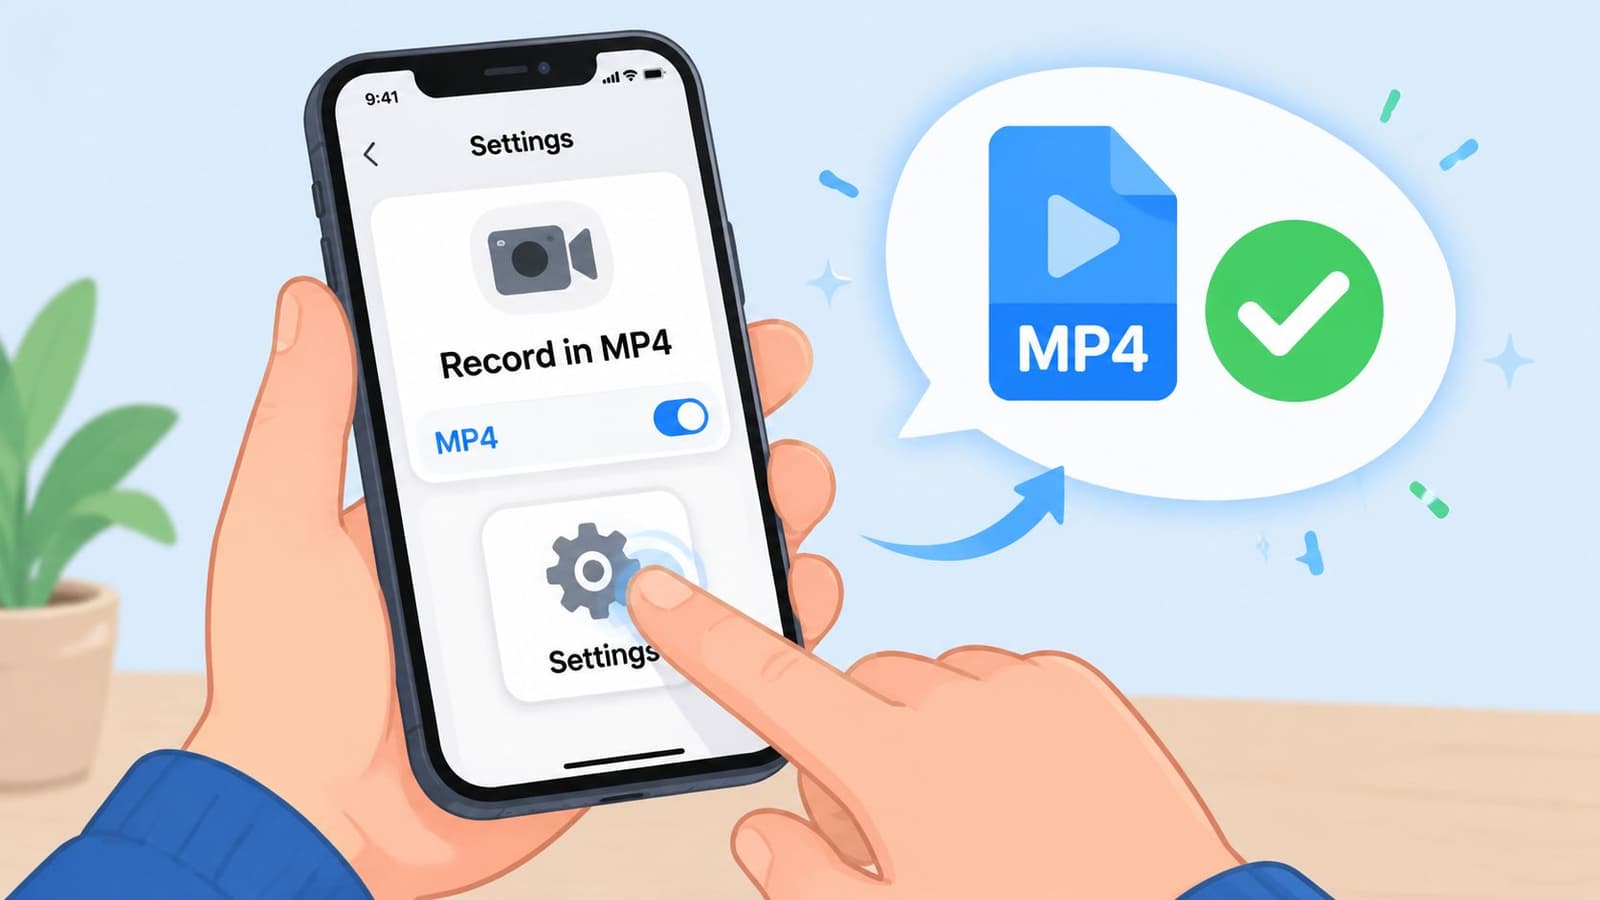
Change the recording format before you shoot
On your iPhone, go to:
Settings > Camera > Formats > Most Compatible
A practical guide notes that choosing Most Compatible saves videos directly as MP4 files, which can help you avoid later conversion entirely. The same guide also notes that large iPhone MOV files in the 800MB–1GB range can slow conversion, which makes this setting especially useful when you capture lots of footage or archive family clips in batches. That guidance appears in this MP4 format on iPhone guide.
This setting is the easiest long-term answer if you regularly send clips to relatives, upload to memorial platforms, or edit on mixed Apple and Windows devices.
Here's why it works well:
- Less cleanup later because future clips are already easier to share.
- Fewer compatibility surprises when someone opens the file on a non-Apple device.
- Less waiting if you work with longer videos.
For videos you already have
If the clip is already on your phone, keep expectations realistic. iPhone doesn't always give you a clean one-tap “convert this MOV to MP4” button for every file. What you can do is create a new exported copy through Apple's built-in sharing flow or move the file into the Files app and then test whether the exported copy works better with your target app or service.
A practical on-device routine looks like this:
- Open the video in Photos: Start with the original clip.
- Share to Files: Save a copy in a folder you can easily find.
- Try the destination again: Upload or send that saved copy first before doing more work.
- If it still fails: Move to a Mac or PC method below for a more controlled conversion.
This short walkthrough may help if you want to see an iPhone-based process in action:
For one or two clips, staying on the phone is often enough. For a folder of videos, a desktop tool is usually faster and more predictable.
How to Convert Videos on a Mac
A Mac is usually the safest place to handle iPhone videos that matter to you. You can do the whole job with Apple tools you already have, which keeps personal clips off random converter sites and lowers the chance of accidental quality loss.
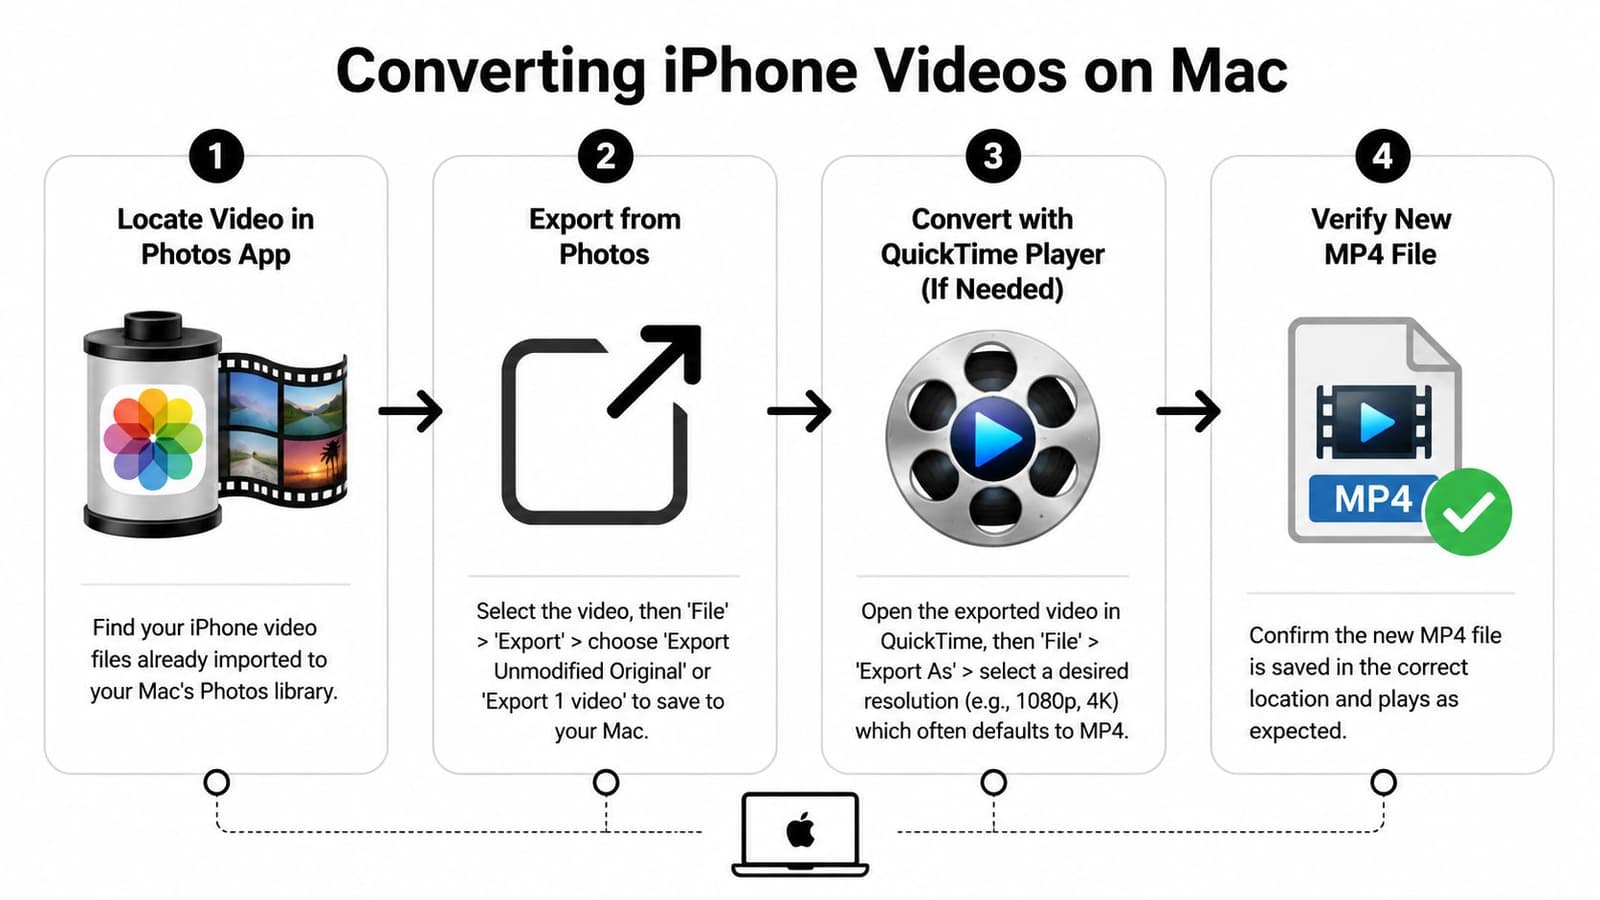
Use QuickTime Player first
QuickTime is the best first check because it helps answer the question that matters most. Do you need a full conversion, or just a new copy that your other device or app can read more easily?
Many iPhone videos use video and audio streams that already fit inside an MP4 file. In those cases, a Mac can sometimes create a compatible export without putting the clip through a heavy second encode. That saves time and avoids extra loss, which is the last thing you want with old family footage.
Try this:
- Open the MOV file in QuickTime Player.
- Click File.
- Choose Export As.
- Pick the resolution that matches your original or your destination.
- Save the file.
- Test the new copy in the app, website, or device that rejected the original.
Choose the output carefully. If the original is 4K and you export at 1080p, the file may be easier to share, but you are giving up detail. For a school recital, a birthday video, or the last clear clip of a grandparent, keep the original MOV even if the MP4 copy solves the playback problem.
For keepsakes, treat the MP4 as the sharing copy and the original MOV as the master.
Use Photos when your clips are already imported
Photos is the better starting point if the videos are already organized there by date, trip, or event. It also gives you a clean way to separate preservation from sharing.
These are the two export choices that matter most:
| Export option | Best use | Why | | | | | | Export Unmodified Original | Preserve the source file | Keeps the untouched original before you make any new copy | | Export 1 Video | Create a usable version | Better for sharing, testing compatibility, or light editing |
That difference matters. Export Unmodified Original is the safe choice when you are building a family archive. Export 1 Video is better when you need something another app will accept today.
If the exported file still works but feels too large to send or upload, this guide on how to reduce MOV file size without throwing away the master copy can help.
Use iMovie when you are already editing
iMovie makes sense when conversion is only part of the job. Maybe you are trimming the start and end, combining clips from several phones, adding names and dates, or making a memorial video that relatives can play on anything.
A simple workflow looks like this:
- Import the clip into iMovie.
- Make the edits you need.
- Use Share or Export File.
- Save the finished version in an MP4-friendly format.
This path takes longer than QuickTime, and it usually means a full re-encode. That is a fair trade when you need editing, cleaner playback compatibility, or one finished video instead of a pile of separate clips. It is not the best choice for pure preservation.
For most Mac users, the order is simple. Check QuickTime first. Use Photos if your library is already there. Use iMovie only when you want a finished project, not just a compatible copy.
How to Convert Videos on a Windows PC
Windows is where iPhone video issues show up most often. The fix is usually easy, but the internet tends to funnel people toward sketchy converter sites or bloated software bundles. You don't need either.
Two dependable choices stand out: VLC Media Player and HandBrake. They're familiar, widely used, and good enough for most home video jobs.
VLC for quick one-off conversions
VLC is known as the player that opens almost anything, but it also has a built-in conversion feature. That makes it a strong option when you've got a single iPhone clip that needs to become an MP4 for playback or upload.
The basic flow is:
- Open VLC.
- Go to the media conversion option.
- Add your MOV file.
- Choose an MP4 profile.
- Save the converted file.
- Test the result in the app or website that rejected the original.
VLC is best when you want something quick and don't want to think much about settings. It's less ideal when you need tighter control over file size, repeated jobs, or a batch of clips from the same event.
HandBrake for better control
HandBrake is the better choice when you have more than one file, or when you want a cleaner balance between quality and file size. It's especially useful for family video folders where you want consistent output.
A practical starting point is:
- Container: MP4
- Video codec: H.264
- Audio codec: AAC
- Preset: Fast 1080p30
That preset is a good default for many home videos because it gives you a broadly compatible MP4 without making you tune every setting manually.
If you're also trying to shrink a bulky video library after conversion, this walkthrough on how to compress a MOV file can help you decide when compression is worth it and when it isn't.
HandBrake is usually the better pick when you need consistency across a whole batch of clips.
A simple decision guide
Use this when you're not sure which Windows tool to open:
- Choose VLC if you have one clip and need a fast MP4.
- Choose HandBrake if you have several clips or want more predictable output.
- Skip web converters if the footage is private, emotional, or hard to replace.
Windows users also have a practical historical built-in path worth remembering. By 2020, tutorial content for Windows users showed a Photos workflow where trimming an iPhone-recorded clip and choosing “Save as type: MP4” could produce an MP4 without extra software, as demonstrated in this Windows Photos MP4 workflow video. If that option is available on your PC, it's worth testing before you install anything.
Key Tips for Preserving Quality and Privacy
This is the part most conversion guides rush past. For family keepsakes, quality and privacy matter more than convenience. A video of a child, a parent, or a memorial gathering isn't just another media file.
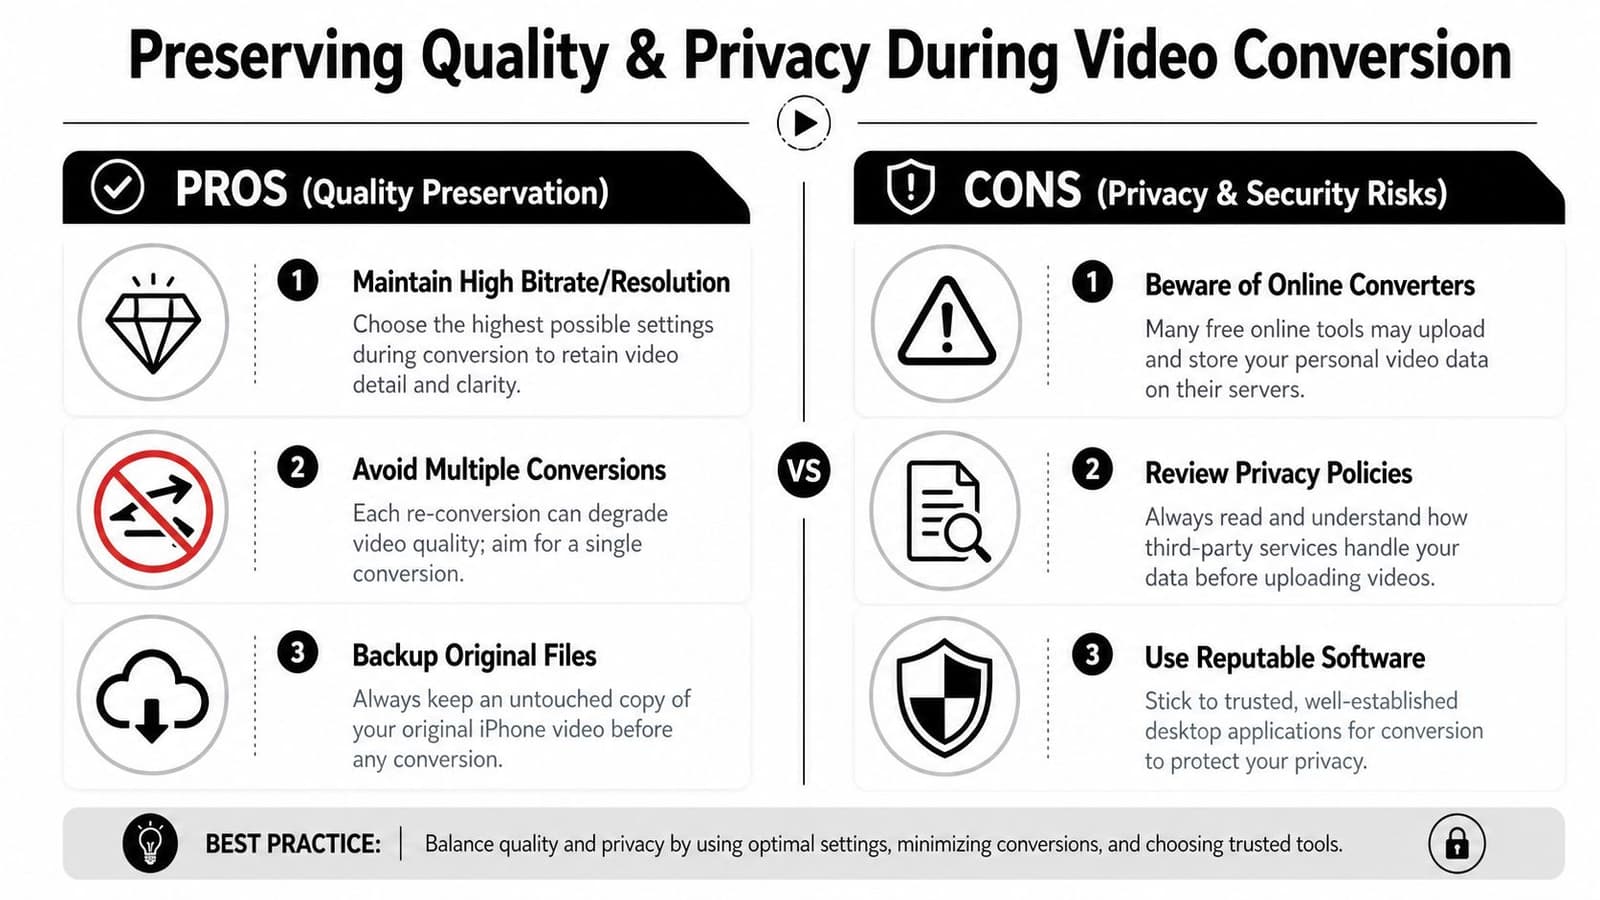
Know the difference between rewrap and transcode
There are two very different ways to “convert” a video.
| Method | What it does | Best result | | | | | | Rewrap or remux | Moves the existing video and audio streams into a new container | Preserves the original quality | | Transcode or re-encode | Recompresses the video into a new format | Useful when codecs are incompatible, but may reduce quality |
Apple Community guidance notes that if the MOV already contains MPEG-4/AAC or H.264/AAC data, you can copy those compressed streams into a new MP4 container without changing video quality. If the codecs differ, you need to transcode instead. That distinction appears in this Apple Community thread on remuxing MOV to MP4.
That's the core idea many people miss. If the clip already uses compatible streams, a heavy conversion is unnecessary.
Why online converters are risky for family videos
A lot of online tools are convenient because they ask almost nothing from you. Upload the file, wait, download the result. The trade-off is serious: your original video goes to a third-party server.
That risk is especially important for personal videos. Guidance around online converters often skips the privacy angle, even though these tools rely on browser upload-and-convert flows. For sensitive family footage, local on-device or desktop conversion is a far safer choice, as highlighted in this discussion of iPhone video conversion through online services.
Personal videos should stay on devices you control whenever possible.
For a school project or a throwaway clip, some people may accept that risk. For birthdays, memorials, baby videos, and family archives, I wouldn't.
A safer handling routine
If you want the lowest-risk workflow, keep it boring and local:
- Save the original first: Keep the untouched source file in a folder labeled clearly by date or event.
- Make one working copy: Convert or export only once if possible.
- Name files clearly: Include the event and date so you don't lose track of the master.
- Test before deleting anything: Confirm the MP4 plays where you need it.
- Avoid unnecessary uploads: If a desktop or phone method works, stop there.
A careful workflow doesn't take much longer. It just prevents the two mistakes people regret most later. Losing quality and losing control of a private video.
Turning Your Videos into Lasting Memories
The best answer to how to convert iPhone videos to MP4 depends on the situation. If you haven't recorded the video yet, changing your iPhone to Most Compatible is the easiest win. If you're on a Mac, start with QuickTime. If you're on Windows, use VLC for a quick file or HandBrake for a larger batch.
The more important lesson is that “conversion” isn't always the right word. Sometimes the file only needs a new wrapper. Sometimes it needs a proper transcode. Knowing the difference helps you protect image quality instead of accidentally softening an important clip.
For family memories, privacy should guide the tool choice just as much as convenience. Offline methods usually take a little more effort, but they keep personal footage on devices you control.
Once your videos are in MP4, they're much easier to share with relatives, include in tribute edits, archive for the future, or reuse in projects that need broad compatibility. That's the primary aim. Not changing a file extension. Making sure the moment stays watchable.
If you're turning family photos and clips into a tribute, slideshow, or keepsake video, Photo for Video is worth a look. It turns a single still image into a short living-memory MP4 with gentle motion, which is especially useful for birthdays, anniversaries, memorials, and family montage projects where one treasured photo deserves a little life.