How to Overlay Videos: A Practical Guide for 2026
Learn how to overlay videos on any device. Our guide covers core concepts, software choices, and troubleshooting for creating beautiful, layered video content.
You've probably got two clips open right now and one clear feeling behind them. One is the present moment, maybe a family gathering, a birthday toast, or a quiet shot of people standing together. The other is something you want to place gently on top of it, like an old video, an animated portrait, a logo, a reaction clip, or a small memory that changes the meaning of the whole scene.
That's what makes learning how to overlay videos worth doing well. You're not just stacking media. You're deciding what the viewer should feel first, what should stay in the background, and what should arrive like a memory. In tribute work especially, small choices matter. A soft picture-in-picture can feel respectful. A full-screen overlay with harsh audio can feel intrusive.
If you're building something personal, it helps to think of overlays as part of the story, not just an effect. The same mindset that helps you sequence photos for a memory slideshow also helps you decide when one video should sit over another, and when it shouldn't.
Table of Contents
- The Emotional Power of Layered Video
- Understanding the Building Blocks of Video Overlays
- Choosing Your Video Overlay Software
- Your Step-by-Step Overlay Workflow
- Troubleshooting Common Overlay Problems
- Case Study: Creating a Tribute with Photo for Video Overlays
The Emotional Power of Layered Video
A simple overlay can turn a straightforward clip into something far more personal. A family barbecue becomes a remembrance when an older image appears in the corner. A birthday message gains weight when a past moment briefly shares the frame with the present one. The technique is technical, but the reason people use it usually isn't.
In tribute editing, overlays work because they let two moments coexist without forcing one to erase the other. You keep the base clip intact, then add a second visual element that changes how the viewer reads it. A laugh on the soundtrack can stay exactly where it belongs, while a second image gives that laugh context.
Two moments in one frame
A memorial video often needs restraint. If every clip is full screen and every transition demands attention, the piece can feel overproduced. An overlay gives you a quieter option. You can let the main scene continue naturally while a smaller or softer visual appears for just long enough to register emotionally.
That's especially useful when you're working with imperfect source material. Old scans, phone footage, and archive clips rarely match in size, color, or motion. A layered approach helps those materials live together without asking them to look identical.
Keep asking one question: does this overlay deepen the memory, or is it just proving you know how to use the tool?
What works in tribute edits
A few overlay uses tend to hold up well in emotional projects:
- Picture-in-picture memories: A current family video plays full screen while a second clip appears in a corner.
- Soft ghosted overlays: A portrait or old clip sits over the base footage with reduced transparency.
- Practical information overlays: Names, dates, subtitles, or short captions support the story without interrupting it.
- Symbolic cutaways: Hands, places, letters, or home movies appear briefly over a spoken section.
What usually doesn't work is treating every moment like a social reel. Fast punch-ins, aggressive blend effects, and loud transitions can break the tone. For a keepsake, the edit should feel like care, not speed.
Understanding the Building Blocks of Video Overlays
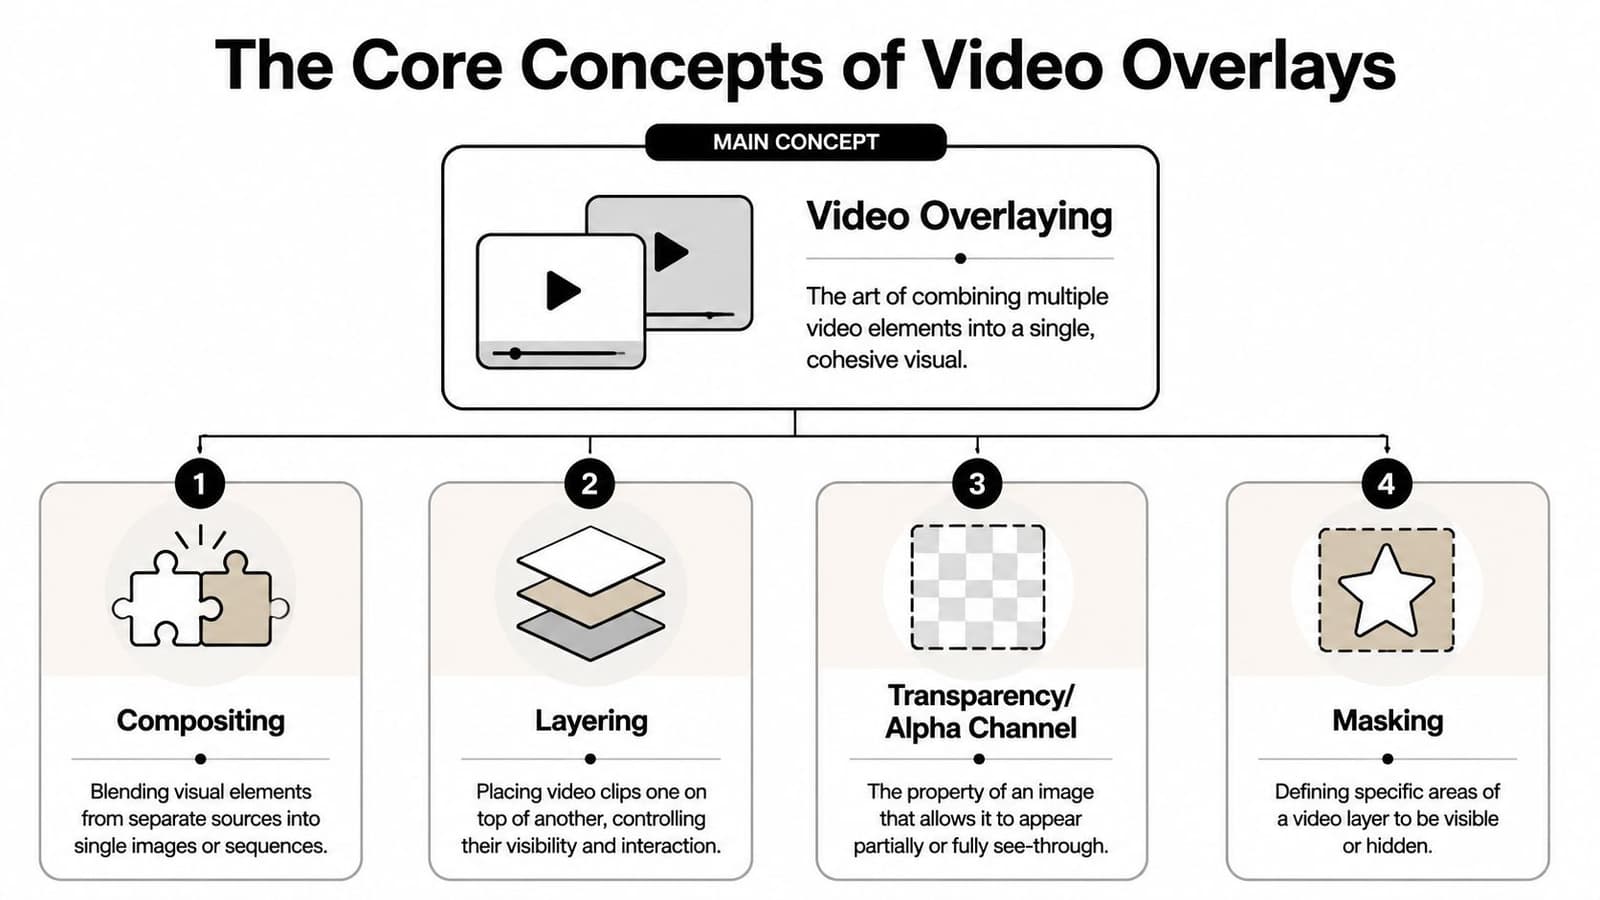
If overlay editing feels confusing, it usually isn't because the software is complicated. It's because the words make it sound more abstract than it is. Underneath all the menus, overlays are built on a very old and very practical idea: put one visual layer on top of another and control how much of each the viewer sees.
A clear explanation from Vizard's guide to what an overlay is in video editing describes the core method as layer-based compositing. Editors place text, graphics, images, or a second video over a base clip, then adjust size, position, timing, and transparency so the original footage remains visible. That's why most editors use a separate track above the main video, and why common workflows rely on opacity controls or keying.
Think in layers, not effects
The easiest mental model is tracing paper on a light table. Your main video sits on the bottom. Everything else sits above it. You can move the top layer, shrink it, cut part of it away, or make it more transparent.
That mindset helps because it works in almost every editor, from basic mobile apps to Premiere Pro and Final Cut Pro. The buttons change, but the logic doesn't.
If you've ever worked with a transparent image, the idea is similar. A moving overlay is just another layer with its own boundaries, visibility, and timing. If you want a useful visual reference for transparent assets, this guide on how to make a transparent GIF helps explain the same visual principle from a different angle.
The four controls that matter most
Most overlay decisions come down to four concepts.
- Compositing: This is the act of combining separate visual elements into one frame. It sounds advanced, but in everyday editing it often just means putting a clip on the track above another clip.
- Opacity: This controls how see-through the top layer is. In one example workflow, WeVideo shows an overlay lowered to 60% opacity as part of the effect, noted in the same Vizard explanation above.
- Blend behavior: Some editors let layers interact in different ways beyond plain transparency. These options can be useful, but they're easy to overuse in sentimental projects.
- Masking: This hides part of a layer so only the part you want remains visible. If you want a circular picture-in-picture instead of a rectangle, masking is often how you get there.
Practical rule: Learn opacity and masking first. Most meaningful overlays don't need fancy blend modes.
Here's the part many beginners miss. Overlays aren't just decorative. The same compositing approach drives subtitles, logos, callouts, and picture-in-picture layouts. Once you understand that, editing becomes less about memorizing one app and more about recognizing the same structure everywhere.
Choosing Your Video Overlay Software
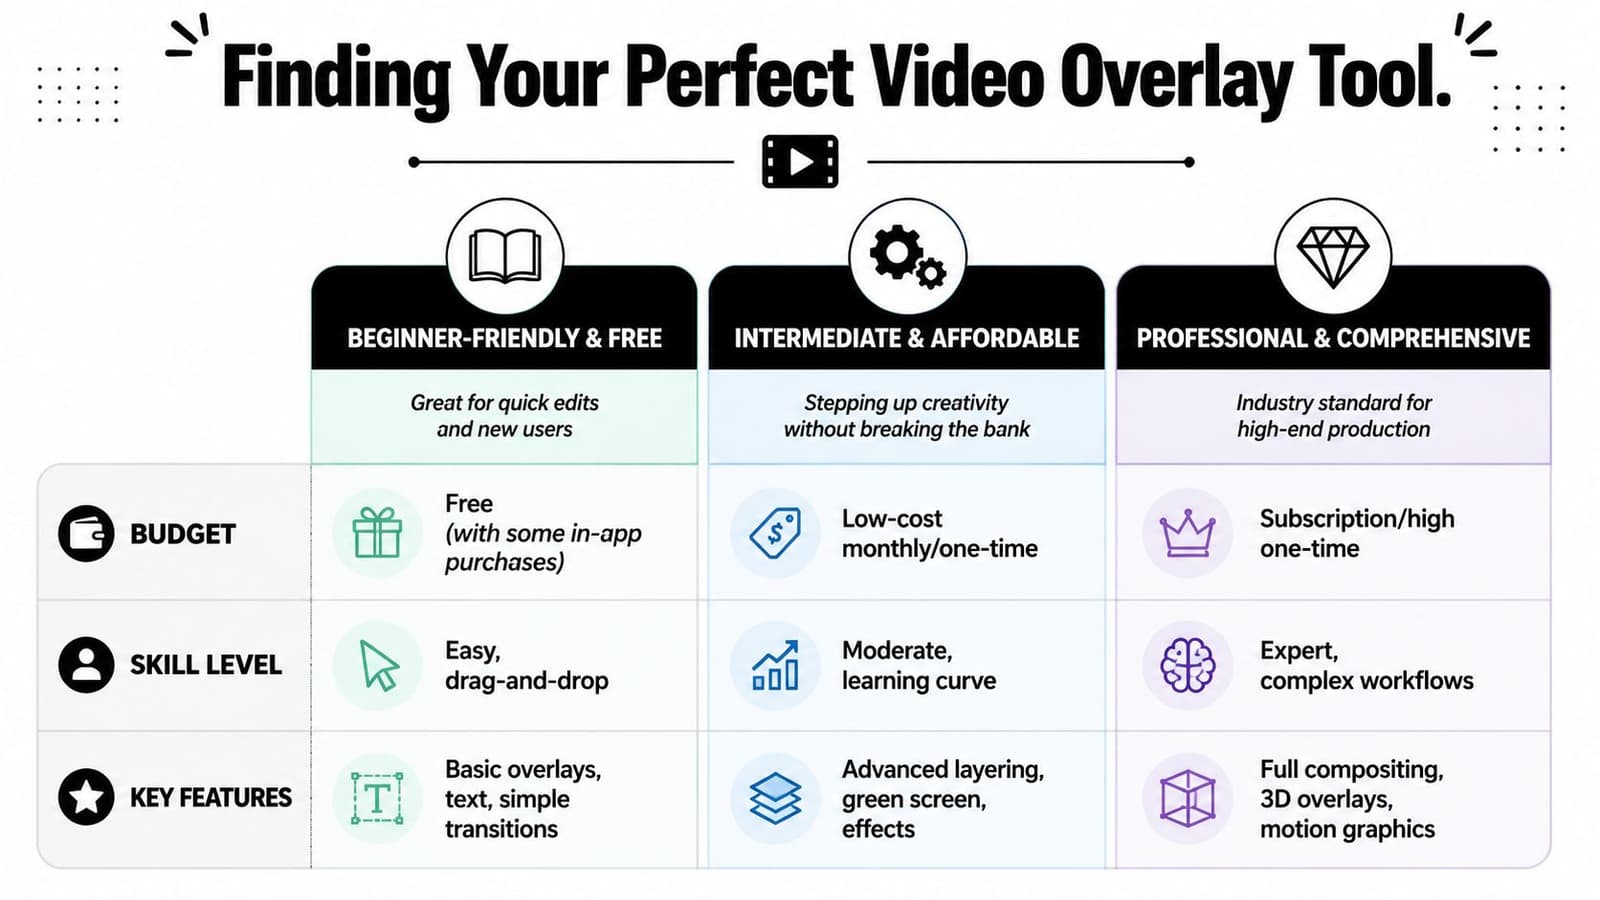
The best software for overlays depends less on “which app is best” and more on how much control you need before you lose patience. A quick birthday reel on your phone and a long memorial montage on a laptop are different jobs. They deserve different tools.
Good for quick edits
Mobile apps such as CapCut and InShot are often enough if you're making a short social post or a simple family clip. They're easy to learn because the controls are direct. Tap the main clip, add an overlay, pinch to resize, drag to position.
The trade-off is precision. Fine audio adjustments, detailed masks, and nuanced timing are usually harder on a phone. That doesn't make mobile wrong. It just means the tool favors speed over control.
Better for family projects
Lightweight desktop editors like Clipchamp and Canva usually sit in the sweet spot for non-professional editors. You get a proper timeline, visible layers, easier trimming, and enough room to think. For birthday videos, memorial slideshows, school tributes, and presentation-style edits, that's often the most comfortable place to work.
These tools also reduce a common beginner problem: not being able to see how elements stack over time. A desktop timeline makes that relationship obvious. If your project has multiple captions, a music bed, and a few picture-in-picture moments, the added visibility helps.
Best for deep control
Premiere Pro and Final Cut Pro make sense when timing, sound, color, and motion all need close attention. They're the right choice when you want exact keyframes, careful masking, stronger audio control, and a timeline that won't fight you once the project grows.
The cost is complexity. If you open a pro editor just to place one clip in the corner, it can feel like using a full workshop to hang one picture. But if your overlay has to land on a precise word, fade in gently, and sit well with layered audio, professional tools earn their keep.
Here's a simple comparison:
| Tool Type | Best For | Pros | Cons |
|---|---|---|---|
| Mobile apps | Fast social edits, simple greetings, quick reactions | Easy to learn, fast export, touch controls | Less precise timing, limited audio and masking |
| Lightweight desktop editors | Family tributes, presentations, keepsakes | Clear timeline, approachable workflow, better organization | Fewer advanced controls |
| Professional software | Detailed montages, client work, complex storytelling | Strong compositing, audio control, frame-level adjustments | Steeper learning curve, more setup |
Pick the simplest tool that still gives you control over timing and sound. Most overlay mistakes happen because the editor runs out of control, not because the user runs out of ideas.
Your Step-by-Step Overlay Workflow
Most editors teach overlays through buttons. It's more useful to think in sequence. If you understand the order of decisions, you can move between apps without relearning the whole craft.
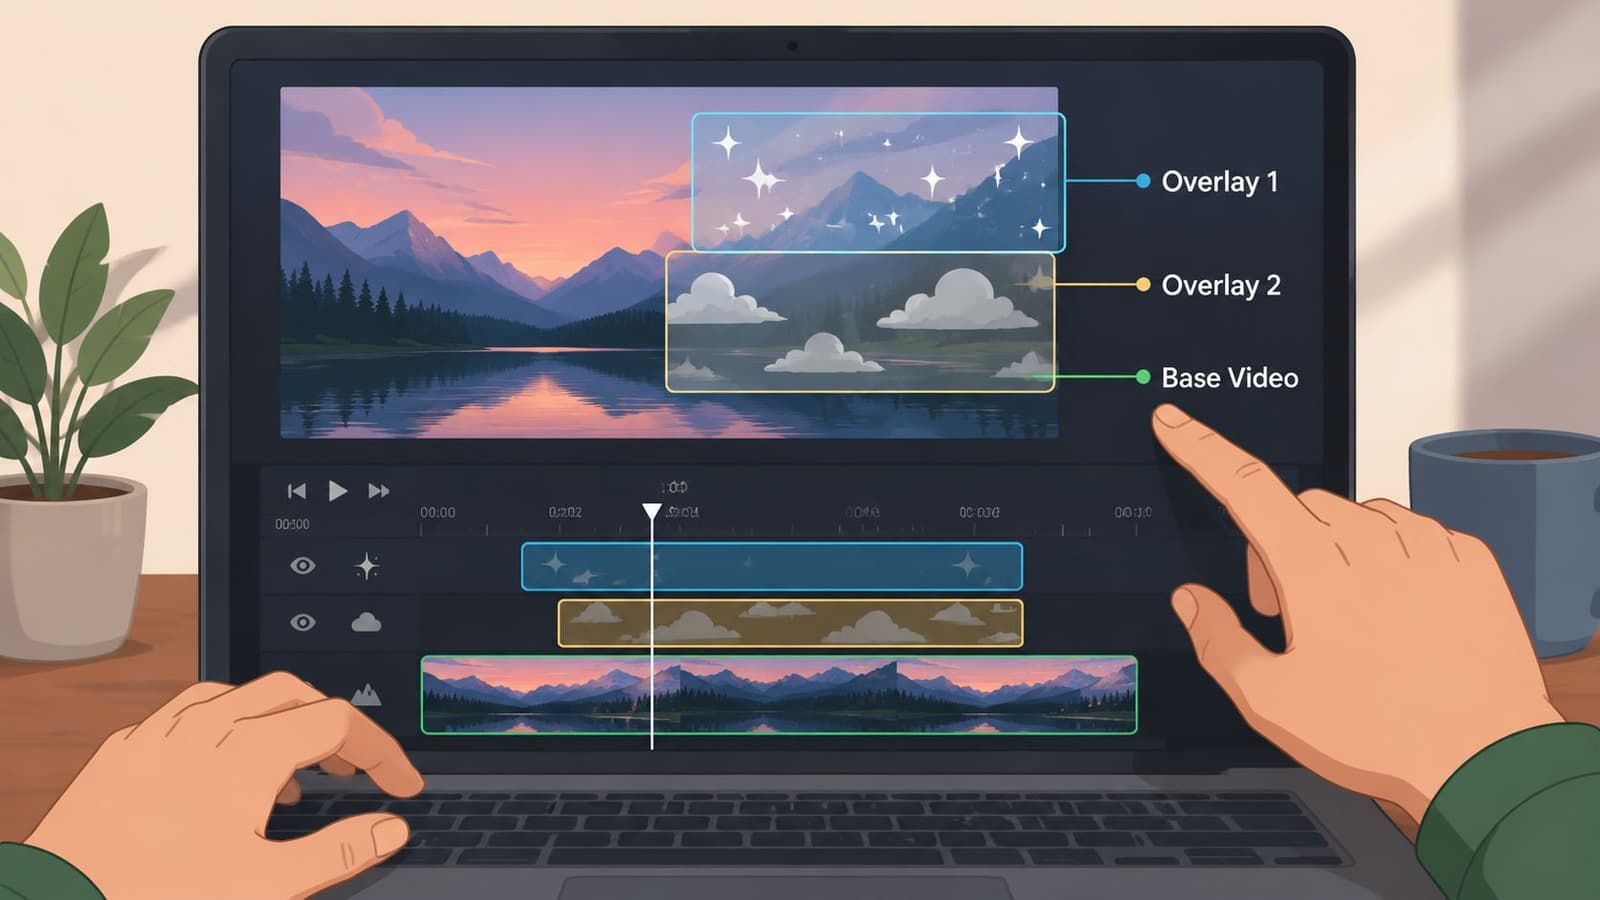
A practical workflow described in Project Aeon's step-by-step overlay guide is consistent across major editors. Put the base clip on the primary timeline, place the second clip on a higher video track, then use position, scale, and opacity or blending controls to integrate it. That same guide notes that Adobe Premiere Pro users can refine timing with frame-level nudges such as Option+[ / ] when matching picture-in-picture or reaction layouts.
The universal four-step method
Start with the structure, not the effect.
-
Place your base clip first
This is the footage that carries the main story. In a tribute, it might be the current family scene, the speaker, or the core slideshow segment. Build this track before adding anything above it. -
Add the overlay on a track above
Put the second video, animated photo, logo, or text on the layer above the base. If your editor supports many tracks, stay organized and keep related elements grouped. -
Adjust size, position, and timing
Decide where the overlay belongs. Corner placement works for supportive picture-in-picture. Center placement feels more declarative. Timing matters just as much as placement. A good overlay often enters a beat earlier than a beginner expects and exits sooner. -
Refine the integration
Lower opacity if the overlay competes with the base image. Add a fade if the entrance feels abrupt. Use a mask if the rectangle itself looks distracting. If you're also adding titles, this guide on adding text to video pairs well with overlay work because text often becomes the third layer competing for attention.
Desktop editors
Desktop timelines reward deliberate placement. You can see the base clip and the overlay together, trim both precisely, and line up transitions with actual breathing room. That's a big advantage when your project has emotional pacing.
A few habits help:
- Zoom into the timeline: Don't edit a delicate fade while fully zoomed out.
- Trim visually and aurally: Watch the overlay entrance, then listen to the line beneath it.
- Name your tracks: “Base video,” “overlay,” “titles,” and “music” sounds basic, but it prevents confusion fast.
- Use keyframes sparingly: A gentle move or fade usually feels better than constant motion.
Later in the process, it helps to compare versions.
Watch for one specific problem: overlays that technically fit, but emotionally interrupt. If a viewer starts tracking the motion of the overlay instead of listening to the voiceover or noticing the base scene, the layer is pulling too hard.
Mobile editors
Mobile overlay editing uses the same principles, but the gestures can make beginners rush. Because it's easy to drag and resize with your fingers, many edits end up slightly off-center or timed by instinct instead of by playback.
A better mobile workflow looks like this:
- Rough place first: Get the overlay into the right area of the frame.
- Play it back once without touching anything: You'll catch more than you do while dragging.
- Return for fine adjustment: Resize and reposition after you've watched it in motion.
- Check safe margins: Corner overlays can cover faces, captions, or important gestures.
A clean overlay almost always looks simpler than it was to place.
If you're editing on a phone for a personal project, keep the design modest. One or two well-timed overlays will usually land better than a screen full of moving elements.
Troubleshooting Common Overlay Problems
Overlay issues usually show up in three places: image quality, edges, and sound. The first two get attention in most tutorials. The third one often doesn't, even though it's where many personal edits start to feel amateur.
When the picture looks wrong
If the overlay looks blurry or pixelated, the problem often starts before you touch any effect settings. WeVideo notes in its guide to using filters and overlays in WeVideo that mismatched resolution can cause blurriness or pixelation, and mismatched frame rate can create stuttering or motion that doesn't feel right. The same guide shows opacity often reduced to about 60% and adjusted with multiple keyframe points when editors want changing transparency across a clip.
Use that as a diagnostic clue. If the overlay looks soft, check the source file and project settings before blaming the overlay tool. If motion feels choppy, compare how the clip was recorded to how the project is set up.
A quick checklist helps:
- Match resolution: Don't scale a low-quality overlay too large.
- Match frame behavior: If one clip feels smooth and the other feels jumpy, review frame-rate differences.
- Preview at full quality when possible: Some editors lower playback quality during editing.
When the edges look bad
Keyed overlays and cutout shapes can break the illusion fast. Jagged edges, green spill, and harsh mask boundaries all call attention to the edit.
The fix depends on the cause:
- For green-screen clips: Refine the key instead of accepting the first auto result.
- For masks: Add a little feathering so the cut edge doesn't look pasted on.
- For portraits or memorial elements: Softer boundaries often feel more natural than sharp geometric edges.
A technically perfect edge isn't always the goal. A believable edge is.
If viewers notice the border before they notice the memory, the edge needs more work.
When the audio falls apart
Many “easy overlay” tutorials frequently stop too soon. Visual placement is usually straightforward. Audio decisions are harder because two moving images often suggest two different sonic worlds.
A useful summary in Cloudinary's article on mastering the skill of video overlay points out an important gap: most beginner-facing guidance explains placement, trimming, opacity, and similar visual controls, but rarely addresses how to keep dialogue, ambient sound, and music coherent when overlays start and stop mid-scene. That omission matters most in tribute work, where emotional continuity often lives in the soundtrack.
Here's what works in practice:
- Mute the overlay audio if the base clip carries the scene. If the overlay is there to support the main moment, its sound often does more harm than good.
- Keep one primary voice. If both layers contain speech, choose which one the audience should understand and reduce or remove the other.
- Duck music under dialogue. If a song is fighting a spoken memory, lower the music during the line instead of lowering everything at once.
- Maintain room tone. If the base clip has quiet ambient sound, don't let the soundtrack drop into dead silence when an overlay enters or exits.
- Use fades on sound, not just picture. A visual dissolve with a hard audio cut feels clumsy.
For keepsakes and memorials, audio continuity is part of respect. People will forgive a slightly imperfect mask. They won't stay emotionally connected if the soundtrack becomes confusing.
Case Study: Creating a Tribute with Photo for Video Overlays
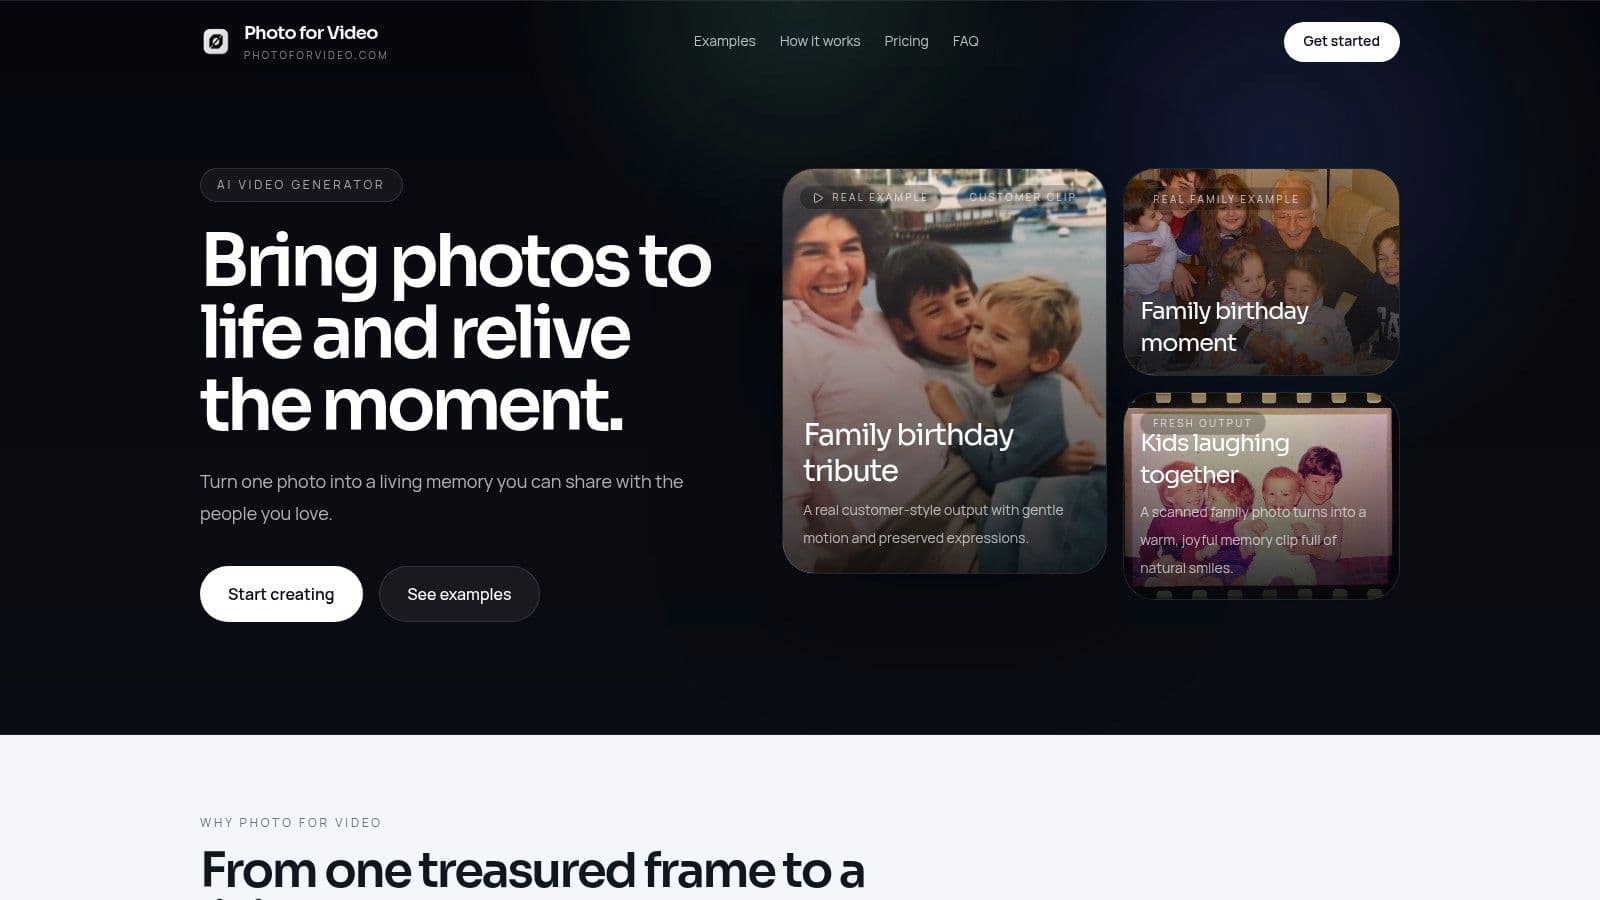
A practical tribute edit often starts with one strong base scene. Let's say you have a video of a family dinner. Someone is smiling, a candle is being lit, and the shot has enough stillness to hold attention. That becomes the foundation.
The overlay is an animated portrait clip made from a cherished photo. Instead of taking over the screen, it appears in the upper third as a picture-in-picture element. That placement keeps the current moment primary while letting the memory enter with intention.
Creative choices that keep it tasteful
The first choice is duration. The overlay shouldn't stay up just because it can. In a tribute, brief appearances often feel stronger because they resemble recollection rather than interruption.
The second choice is transition. A gentle fade-in and fade-out usually works better than a hard cut for memorial material. It lets the viewer absorb the appearance of the memory instead of reacting to a sudden change.
Then there's transparency. A lowered opacity can help the overlay feel integrated rather than pasted on. In this kind of sequence, many editors prefer a softer presence so the base footage still carries the emotional weight.
Audio decisions matter just as much
At this stage, the edit either becomes moving or starts to feel mechanical. If the family dinner clip has natural room sound, keep that as the anchor. If the animated overlay includes no meaningful original audio, there's no reason to introduce competing sound.
If someone is speaking in the base clip, protect that line. Lower music beneath it. Don't let the visual beauty of the overlay trick you into cluttering the mix. The viewer should feel like the memory arrived inside the moment, not on top of it.
The most effective tribute overlays don't announce themselves. They enter gently, add meaning, and leave before they overstay.
Used this way, overlay editing becomes less about software technique and more about restraint. That's what gives the final piece dignity.
If you want an easy way to turn a still portrait into a short animated clip that works beautifully in tribute edits, Photo for Video is built for exactly that kind of storytelling. It helps you transform a single family photo into a living memory you can place as an overlay in montages, memorials, birthdays, and anniversary videos without making the edit feel flashy or overdone.