How to Remove Shadow from Photo: Tools, Steps and Fixes
Discover how to remove shadow from photo using Photoshop, Lightroom and mobile apps, and when keeping the shadow gives a more faithful result.

The popular advice on how to remove shadow from photo files is simple, and it's usually wrong. Brush over the dark patch, click remove, and trust the fill. That works on a plain wall. It fails on a face, a line of text, hair, or a scanned print where the shadow is carrying real detail.
I would start somewhere less exciting. Name the shadow first. Decide whether it should disappear, soften, or stay mostly as it is. Then match the method to the surface underneath. Most bad repairs aren't tool failures. They're classification failures.
Table of Contents
- Pick the Right Method for Your Shadow
- When to Keep the Shadow Instead
- How to Remove a Cast Shadow in Photoshop
- Lift Shadows in Lightroom and Mobile Apps
- Fix Halos, Ghosts and Repeated Texture
- Export, Animate and Confirm the Result
Pick the Right Method for Your Shadow
The shadow type decides the tool. A hard cast shadow on plain ground is a pixel replacement job. A soft shadow across skin is a tonal job, and treating it like a hole to fill is why faces end up flat and gray.
Say you're working on a scanned birthday photo. There's a photographer's shadow on the lawn and a hat shadow over someone's eyes. Those are two different repairs in one frame, so don't run one automated pass over both. If you're comparing editors before you start, a quick review of free online photo retouching options will help you spot which tools give you masks and layers rather than a single remove button.
| Shadow type | Best method | Tool | Main risk |
|---|---|---|---|
| Hard cast shadow on plain background | Content-Aware Fill or Patch | Photoshop | Ghosting at the soft edge |
| Soft shadow on face or skin | Dodge and burn, or low-opacity lift on a mask | Photoshop or Lightroom | Flat, gray skin |
| Shadow across text or a document | Clone Stamp or Healing Brush | Photoshop | Bent lines and lost letters |
| Dark corner of a scanned print | Shadows slider with a luminosity mask | Lightroom | Washed-out paper grain |
| Quick fix on a phone | Selective brightening brush | Phone editor or mobile app | Limited control at 100% zoom |
Read the risk column before you touch the photo. Content-Aware Fill is fast, but it invents texture, so it can't be trusted where the detail matters. A mask and a gentle lift are slower, but they keep what's there.
Match your photo to one row, then save a copy. Keep the original file untouched from this point on, because every method below assumes you can compare against an unedited version.
When to Keep the Shadow Instead
Removing every shadow is often the wrong goal. A shadow is information. It tells you where the light was, how a face is shaped, and sometimes how old the print is. Erase all of it and you haven't restored the photo. You've relit it.
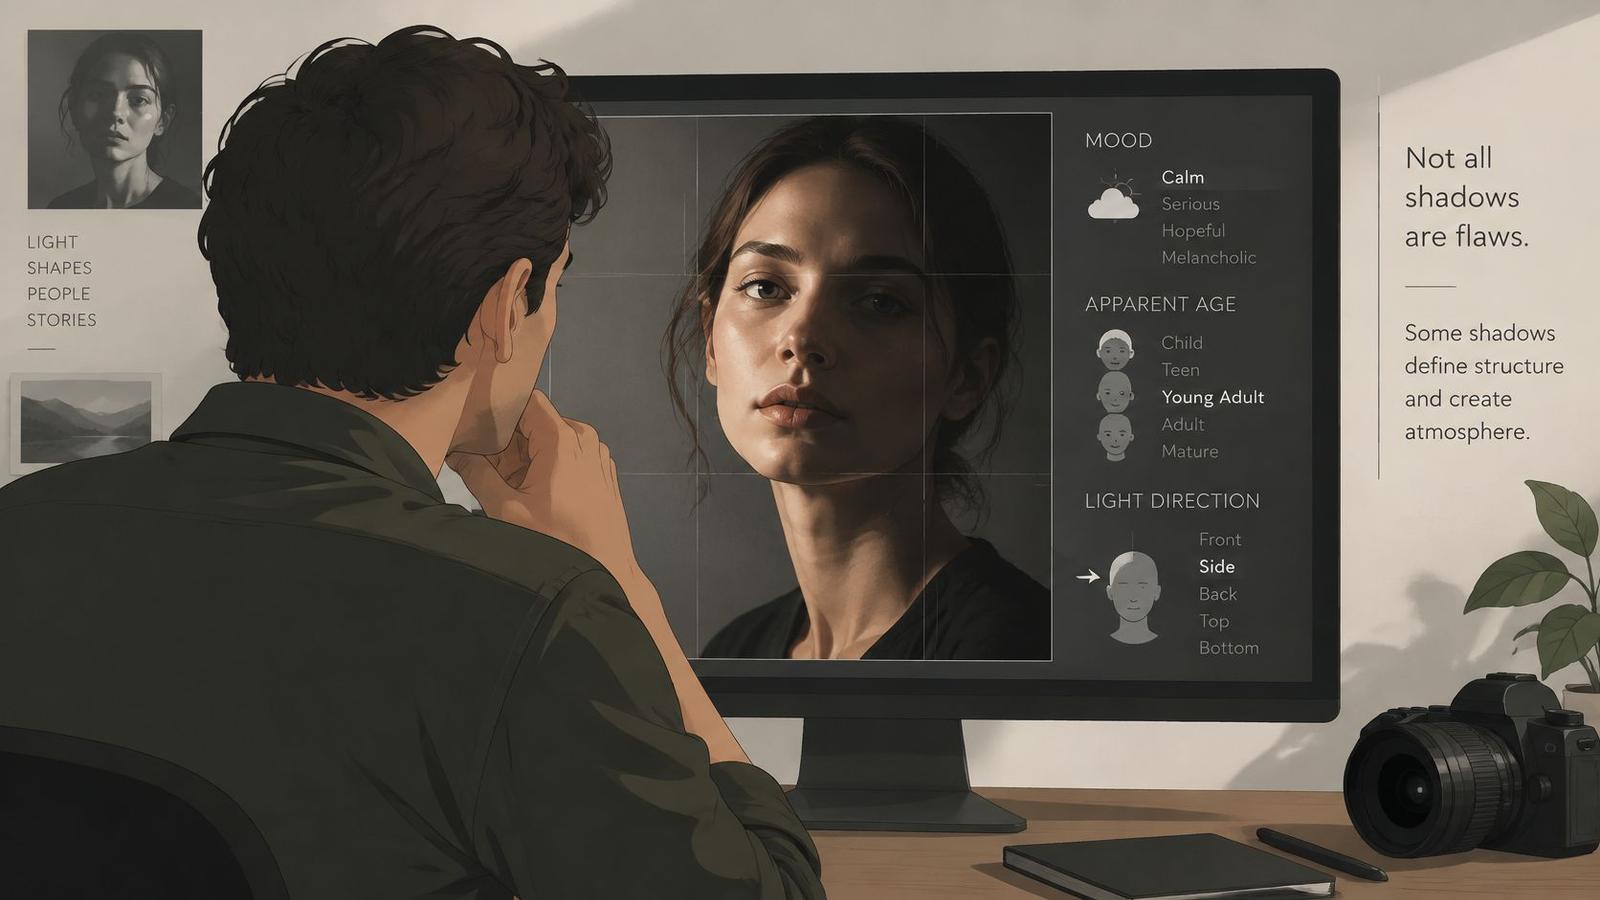
Adobe's Photoshop shadow removal guidance separates fully removing a shadow from softening one with brightness, opacity, and temperature adjustments. That distinction matters more than any tool choice, because softening preserves form while removal replaces it.
A Simple Keep or Remove Test
- Keep shadows that describe shape. The line under a cheekbone, the depth under a chin, and shading around the nose tell the viewer the face is three-dimensional.
- Lift shadows that hide readable detail. If the eyes are unreadable or a name on a cake is lost, raise that area locally until it's legible, then stop.
- Remove cast shadows that sit on empty backgrounds. A photographer's silhouette across a wall or lawn adds nothing and pulls attention from the subject.
- Compare at full size before exporting. Toggle between the edit and the original and ask whether the face still looks like the person.
H3 trade-offs show up fast on skin. Push a facial shadow too far and the skin turns gray, because you've lifted dark pixels without restoring the color that sits in them. Push the whole frame and highlights clip, so a white shirt or a window loses detail you can't get back.
For memorial, birthday, and anniversary photos, mood is part of the record. Window light falling across a kitchen table in a 1980s print is part of why the picture feels like that kitchen. Cleaning it into flat, even light makes it look newer and less true.
Scanned Prints Need Local Work
Don't raise overall exposure on a scan. A global lift washes out paper grain and the faded highlights that make a print look like a print. Use a local mask over the dark area instead, and leave the rest of the tonal range alone.
A partial correction is usually the faithful one. Cleaner doesn't mean more accurate.
This matters if the still will later be animated. Motion draws the eye to inconsistencies, so a flattened face or a faint halo that's tolerable in a still can become the first thing a viewer notices once the frame starts moving.
How to Remove a Cast Shadow in Photoshop
Use this route for a hard cast shadow on a wall, floor, path, or lawn, where the surface underneath is predictable. It's the most controlled method for how to remove shadow from photo files, and it's also the easiest to overuse.
The Repair Sequence
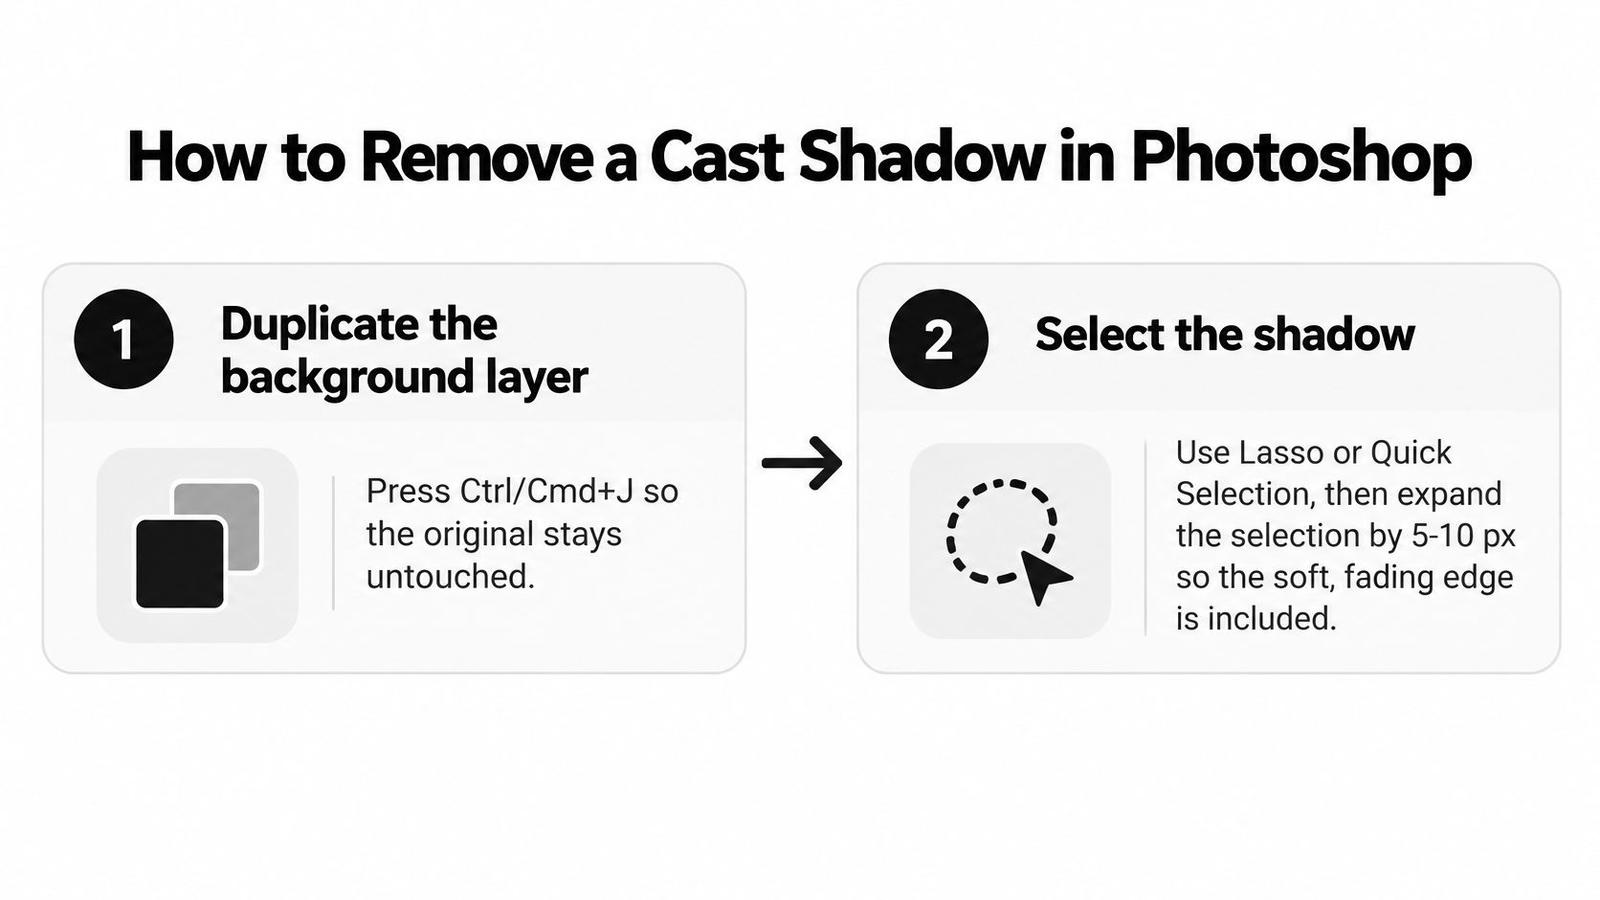
- Duplicate the background layer. Press Ctrl+J on Windows or Cmd+J on Mac. Every repair happens on the copy, so the original pixels stay available for comparison and for recovery if a fill goes wrong.
- Select the shadow, then expand the selection. Use the Lasso for a loose shape or Quick Selection for a defined edge. Go to Select, then Modify, then Expand, and add 5 to 10 px so the soft fading border is inside the selection. Stop at the dark core and you'll leave a pale ghost fringe.
- Run Content-Aware Fill. Choose Edit, then Content-Aware Fill, and paint the sampling area over nearby ground with the same texture and light. Check the preview before you commit, and exclude anything with a pattern or an edge you don't want copied.
- Switch to Patch or Clone Stamp if the fill smears. Undo rather than patching over a bad fill. Work on a new empty layer with Sample All Layers turned on, and sample from a clean area with matching grain, close to the repair.
- Restore the light with Curves. Add a Curves adjustment layer clipped to the repair and lift the midtones gently. Sample the surrounding ground with the eyedropper and aim to match those values instead of guessing by eye.
- Blend the seams with dodge and burn. Create a layer filled with 50% gray, set it to Soft Light, and paint with a soft brush at low opacity. You're evening out small brightness differences, not repainting the surface.
- Inspect at 100% magnification. Zoom in and move slowly across the repair boundary. Look at the transition from several angles, because seams that hide at fit-to-screen show up immediately at full resolution.
Settings That Keep You Out of Trouble
Keep your brush hardness low on tonal work. A hard-edged brush on a dodge and burn layer leaves visible strokes, especially on smooth walls and out-of-focus backgrounds. Lower the opacity and build the change in passes.
Watch your sample point distance. Texture sampled from far across the frame often carries a different scale, focus, or light direction, so it reads as a patch even when the color matches. Sample near, and resample often.
- Feather lightly on soft edges. A small feather helps a selection blend into a gradual shadow boundary, but too much feather blurs texture.
- Keep repairs on separate layers. Separate layers let you reduce one fix without undoing everything around it.
- Check color after brightness. A lifted area that's the right brightness can still be too blue or too warm.
What a Good Result Looks Like
The shadow edge should be invisible without you needing to know where it was. Texture should run continuously across the repaired area, with no repeated clumps of grass, grain, or paving. Nothing in the frame should be new.
That's the test that matters. If a viewer can't find the repair but can still read the original surface, you've removed a shadow rather than manufactured a background.
One firm limit. Don't run Content-Aware Fill across skin or hair. It will happily generate plausible-looking detail that was never photographed, which is a real problem in a family portrait. When a cast shadow crosses a face, stop this workflow and use a masked tonal lift instead.
Lift Shadows in Lightroom and Mobile Apps
Lightroom is safer than Photoshop when the shadow sits on something you shouldn't replace. You're adjusting tones rather than generating pixels, so the underlying detail either comes back or it doesn't. Nothing gets invented.
The Mask Then Slider Routine
Draw a brush mask over the shadow, or use a luminance range mask if the dark area is a distinct tonal band. Raise the Shadows slider in small steps, usually somewhere in the +10 to +30 range, and leave Whites and Highlights where they are.
Watch the blacks as you go. If the lifted area turns gray and the image starts to look washed out, you've gone too far. Pull the slider back and reduce the mask opacity instead, which softens the correction without changing its shape.
Size changes the approach. Give a large cast shadow a broad mask with a soft feather, and give a narrow edge shadow a small brush so you don't brighten the lit surface beside it. When a shadow crosses two different objects, use separate masks, because skin and a tablecloth rarely want the same lift.
The same selective thinking applies outside family photos. Room images have identical problems with dark corners and window contrast, which is why photo editing guidance for listing agents is worth reading if you're correcting interior shots as well as portraits.
Working rule: Lift the shadow, not the whole photo.
Phone Editors and AI Removal
- iPhone Photos. Use the Light adjustments for a general lift, then Selective edits where available to target one dark area.
- Google Photos. The shadow control sits in the tune adjustments, and it's quick for mild underexposure on one side of a frame.
- Snapseed. The Selective brush lets you paint brightness back into a single region and control the falloff.
For an AI removal pass, brush over the shadow and include its soft fading edge in the selection. Then review the regenerated texture zoomed in. If it has invented detail on skin, lettering, or hair, undo it and switch to Patch or Clone Stamp on a clean layer.
Mobile editors handle small, simple shadows well. For a large shadow, a patterned surface, or anything crossing a face, move to a desktop tool where you can see what you're doing.
Fix Halos, Ghosts and Repeated Texture
Most tutorials stop at the remove step. The harder question is whether the repair destroyed information, and you can only answer that by inspecting the result properly.
Start at 100% magnification, then toggle the edited layer off and on against the unedited original. Look specifically for halos, bent lines, repeated texture, altered facial features, missing lettering, and mismatched color temperature. Instasize's shadow removal guide makes the same point about including the soft fading edge in a selection, since a selection that ends at the dark core leaves a visible ghost fringe behind.
Match the Symptom to the Fix
| Symptom | Likely cause | Fix |
|---|---|---|
| Ghost fringe at the shadow edge | Selection missed the soft fading border | Expand the selection by a few pixels and repeat on a duplicate layer |
| Repeated or smeared texture | Fill sampled too large an area | Use smaller passes sampled from matching nearby texture |
| Bent lines or distorted text | Fill crossed a straight edge | Switch to Clone Stamp on a clean layer |
| Gray or flat skin | Face lifted too far | Restore with lower opacity on a mask |
| Halo around an object | Edge brightened too hard | Reduce dodge opacity and check at 100% |
| Mismatched color | Shadow lifted without color correction | Match temperature with Color Balance or Selective Color |
Smaller passes fix most of these. When a shadow crosses important detail, repair it in sections and check each one before moving on, rather than filling the whole shape and hoping the algorithm respects a table edge or a line of bricks.
High Risk Surfaces
Separate document shadows from portrait shadows in your head. On a document, the priority is that every letter survives unchanged, so manual cloning beats any fill. On a portrait, the priority is that the person still looks like themselves, so a partial lift beats a clean removal.
If you're removing an object, treat its shadow as part of the same job. An object with no shadow, or a shadow with no object, both look wrong. This is also where it helps to understand how editors rebuild empty space, and the walkthrough on how to replace photo backgrounds using GIMP shows the selection and edge work involved.
Work nondestructively throughout. Duplicate layers, keep repairs separate, and combine Patch, Clone Stamp, Healing Brush, and Content-Aware Fill rather than trusting one automated pass to handle every surface in the frame.
Finally, resist the urge to sharpen your way out of a soft repair. If the filled area looks mushy, the fix is better sampling, not more contrast on the edges. Read up on sharpening an image without creating artifacts before you apply it across a repair, because sharpening will outline every seam you've just hidden.
Keep the original scan. Export a corrected copy under a new name, and never overwrite the only version of a family photo with an edit that invented detail.
Export, Animate and Confirm the Result
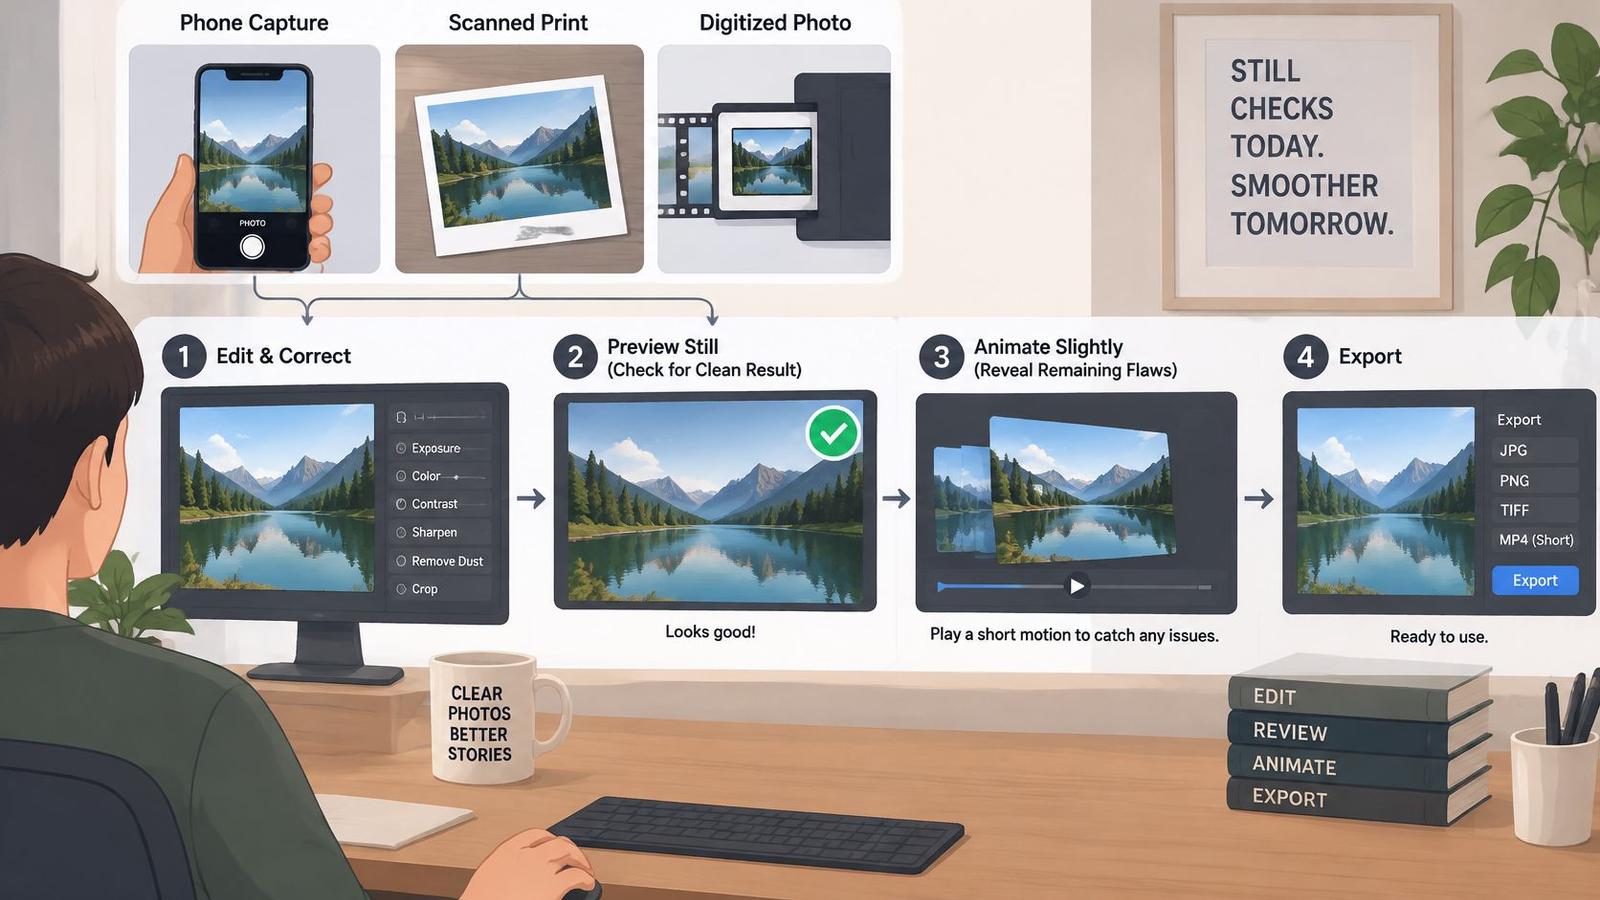
Animation is unforgiving. A fringe that looks minor in a still can flicker across frames, and a slightly flattened face becomes obvious the moment it moves. So the corrected still has to be clean before any motion is added.
The four-step export and animation flow below is the order I'd use for a keepsake image.
Prepare the Corrected Copy
Scanned photos, phone captures, and digitized prints can all be used as the starting photo, and cleaner images usually produce better motion. Keep your original scan untouched, flatten a working copy, and export that copy for animation.
Source images must be JPG, PNG, or WebP files up to 3.00 MB, and larger photos are optimized automatically. That automatic optimization can soften fine grain, so it's worth exporting under the limit yourself rather than letting a resize decide how much texture survives.
Check color before you export, too. A shadow lift often shifts temperature in one region, and that mismatch is easier to fix now than after motion is applied. A short pass through image color calibration basics will help you match the repaired area to the rest of the frame.
Add Motion and Review It
For old family portraits, choose a subtle motion direction rather than an extreme one. Describe it in one short line when you upload, covering the movement you want and the tone you're after. A front-facing image with clear faces and even lighting tends to give the most trustworthy result.
If you're preparing product images for motion instead, the wording you use to describe the shot matters just as much as the edit. Browsing visual content prompts for online sellers is a useful way to see how specific descriptions produce more controlled results.
Watch a finished example before you commit your own photo, so you know how much movement to expect.
Confirm Before You Share
Compare the corrected image with the original at the size it will be seen. A repair that looks fine on a large monitor can show up on a phone screen, and the reverse is also true. Check both if the photo is going into a printed order of service and a phone montage.
Save the corrected file under a new name and keep the original in a separate folder. Then download the finished MP4 right away, because uploaded photos and generated videos are automatically deleted after 7 days.
Close with one honest test. Pick a single photo with one clear cast shadow, apply one method matched to that shadow type, and judge the result against the original. If you can't find the repair and nothing has been invented, you've learned how to remove shadow from photo files properly.
Once your corrected copy looks faithful at full size, Photo for Video can turn that single still into a short MP4 with gentle, natural motion for a birthday, memorial, or anniversary tribute. Upload the corrected version rather than your original scan, add one short line describing the movement you want, and download the finished clip to share or drop into a montage.