How to Merge Photos Into One Photo: A 2026 Guide
Learn how to merge photos into one photo using Photoshop, Canva, and mobile apps. Our step-by-step guide covers seamless blending, color matching, and quality.
You're usually trying to solve one of two problems when you want to merge photos into one photo.
The first is practical. One frame wasn't wide enough, one snapshot missed a person, or one scan didn't tell the full story. The second is emotional. You're building a birthday slideshow, a memorial tribute, an anniversary reel, or a keepsake from old family prints, and a single image doesn't carry enough context on its own.
That's why photo merging matters. It can be technical, but the best results come from starting with intent. Are you trying to make a smooth panorama? A clean collage? A layered composite that feels more like memory than documentation? The answer changes everything, from the tool you open to the file format you export.
Table of Contents
- Why Merge Photos in the First Place
- Choosing Your Photo Merging Method
- Creating Seamless Panoramas in Photoshop and GIMP
- Making Quick and Stylish Collages with Canva
- Essential Tips for a Flawless Photo Merge
- From Still to Story Animating Your Merged Photo
Why Merge Photos in the First Place
A wide mountain view is the obvious example. You shoot left, center, right because one frame can't hold the whole scene. Later, stitching those photos together gives you the image you meant to capture in the first place.
But the more meaningful use case is often personal. You may have a handful of scanned prints from different decades. One shows your grandparents at a table, another captures the room, another has the only clear smile from that day. Merging photos into one photo lets you build a single image that feels complete enough to use in a tribute video or memorial montage.
Three creative goals show up again and again:
- Panoramas: Best when the scene is too wide or tall for one frame.
- Collages: Best when each photo deserves its own space, such as birthdays, anniversaries, event recaps, or memorial boards.
- Composites and overlays: Best when you want atmosphere, motion, or an impressionistic result rather than a literal record.
The mistake I see most often is choosing the method based on the app, not the outcome. Photoshop, GIMP, and Canva can all help, but they solve different problems. If you pick a collage tool for a panorama, you'll spend your time forcing edges together that were never meant to sit in a grid. If you use a stitching workflow on unrelated family photos, the software will look for overlap that doesn't exist.
Merge with a purpose first. The software choice gets much easier once you know whether you need continuity, structure, or visual blending.
That creative intent also affects quality decisions. If the final merged image might be animated later, every seam, compression artifact, and tonal mismatch becomes more visible. A still image can hide small flaws. Motion tends to reveal them.
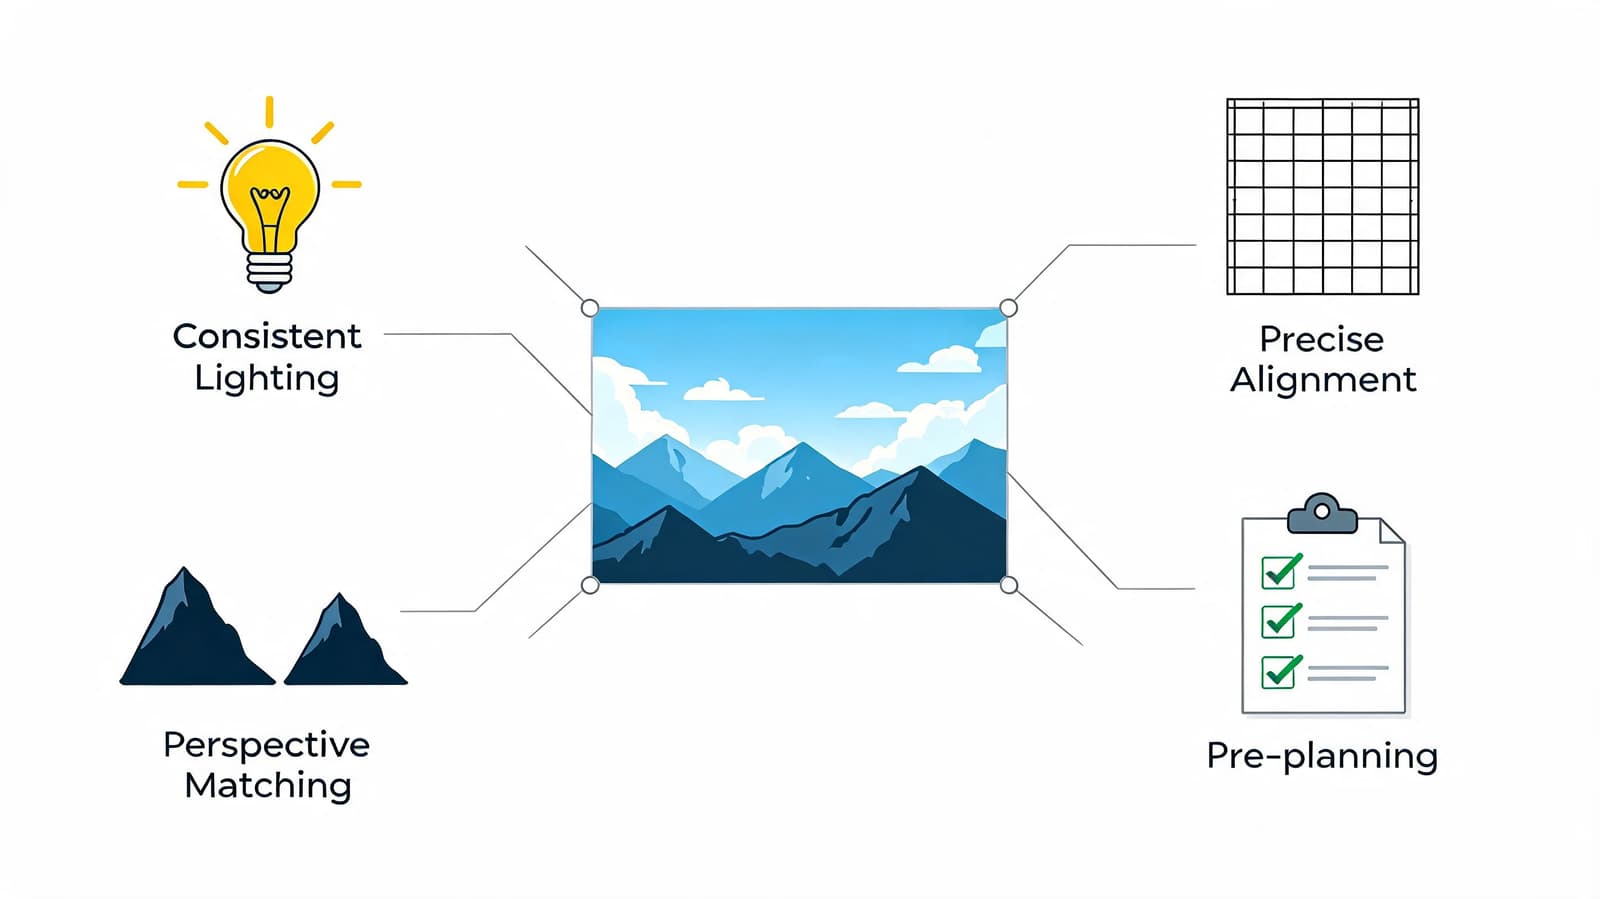
Choosing Your Photo Merging Method
Before you touch any sliders, choose the merge style that fits the job.
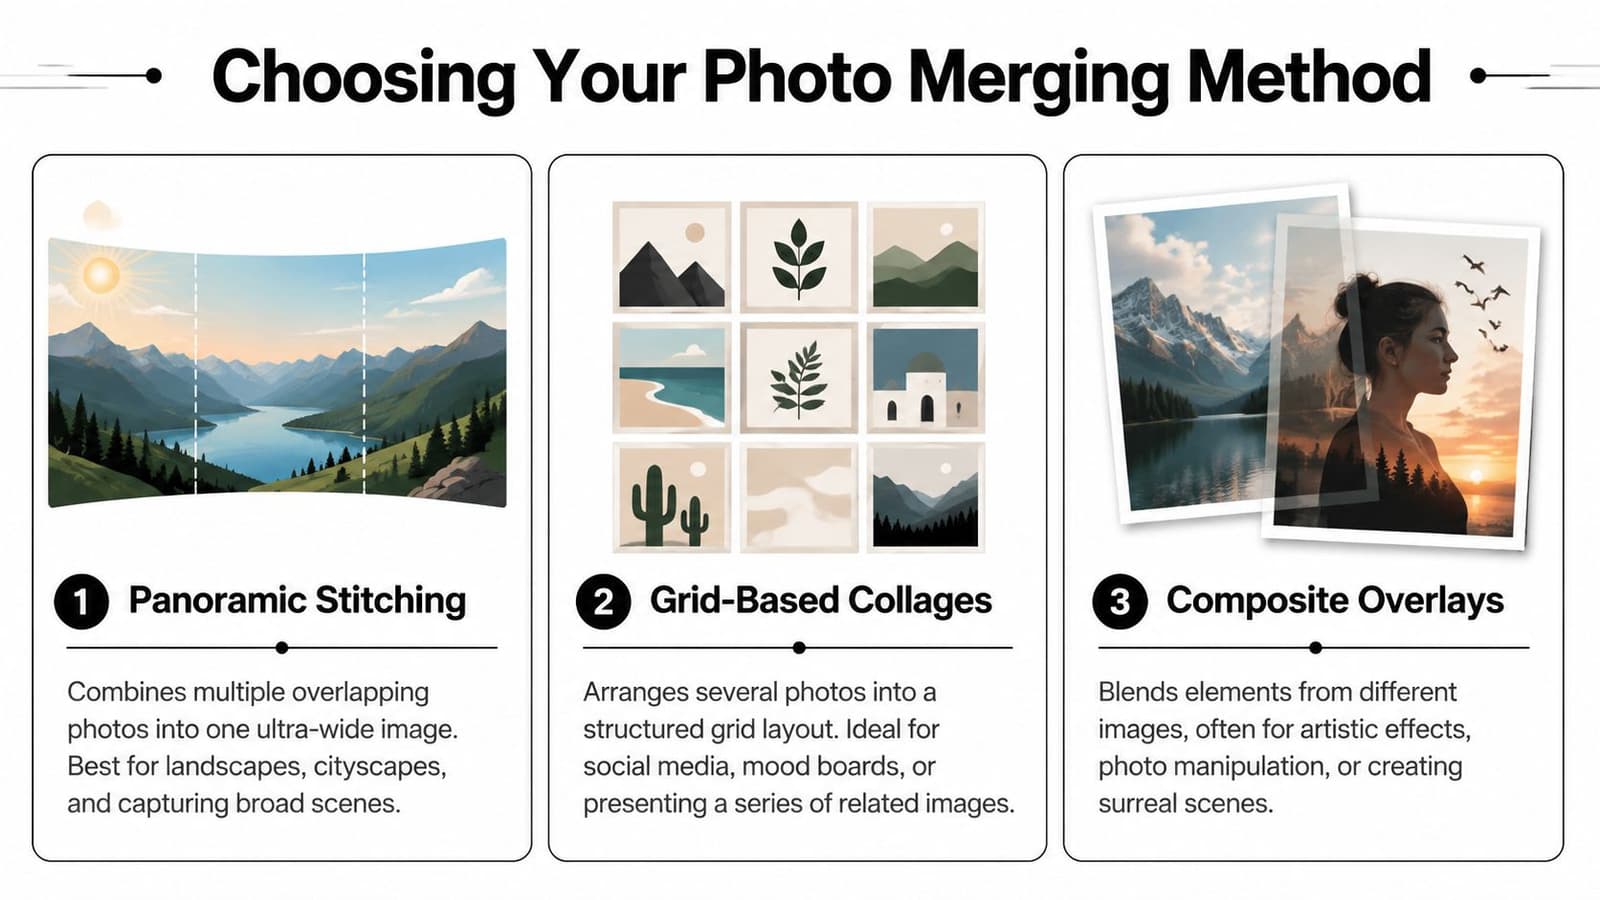
Panoramic stitching
Use stitching when your images overlap and belong to the same scene. Scenic outdoor views, interiors, city skylines, and travel views fit here. The software analyzes shared detail, aligns matching features, and blends the seams into one continuous image.
This is the best choice when you want the final result to feel like one photograph, not several photos placed together. Photoshop is the usual first stop. If you prefer free tools, GIMP can handle the manual side well, especially when you're comfortable with layers and masks.
Grid-based collages
Use a collage when the photos don't overlap and you want each one to remain distinct. A memorial board with six scanned prints, a birthday recap, or a before-and-after layout belongs here.
Canva is strong for this because it makes spacing, text, and clean layout decisions easy. You can keep things structured with frames, or loosen the design with overlapping images, torn-paper shapes, and captions. If your next step involves layered motion design, it also helps to understand how transparency works in exported assets, which is why a guide on making a transparent GIF for layered visuals can be useful alongside collage work.
Composite overlays
Use overlays when the goal is less documentary and more expressive. This includes double-exposure style images, blended portraits, or a tribute image where one photo softly sits inside another.
A practical version of this comes from multiple exposure photography. One documented workflow explains how to load a sequence into Photoshop layers through Adobe Bridge or Lightroom, then apply Lighten or Screen blend modes layer by layer to build motion trails or impressionistic blends with strong control over opacity and tone (multiple exposure workflow details).
| Method | Best for | Main tool style | Trade-off |
|---|---|---|---|
| Stitching | One continuous scene | Automated alignment plus manual cleanup | Fails fast if overlap or perspective is poor |
| Collage | Multiple separate memories | Layout and design tools | Can look busy if spacing and hierarchy are weak |
| Overlay | Artistic or emotional blending | Layer masks and blend modes | Requires more taste and restraint |
Decision shortcut: If the viewer should read it as one camera view, stitch it. If the viewer should see several moments at once, build a collage. If the viewer should feel a mood, blend layers manually.
Creating Seamless Panoramas in Photoshop and GIMP
Panoramas look easy when they work. They become frustrating when the camera moved too much, the overlap was thin, or foreground objects shifted between frames.
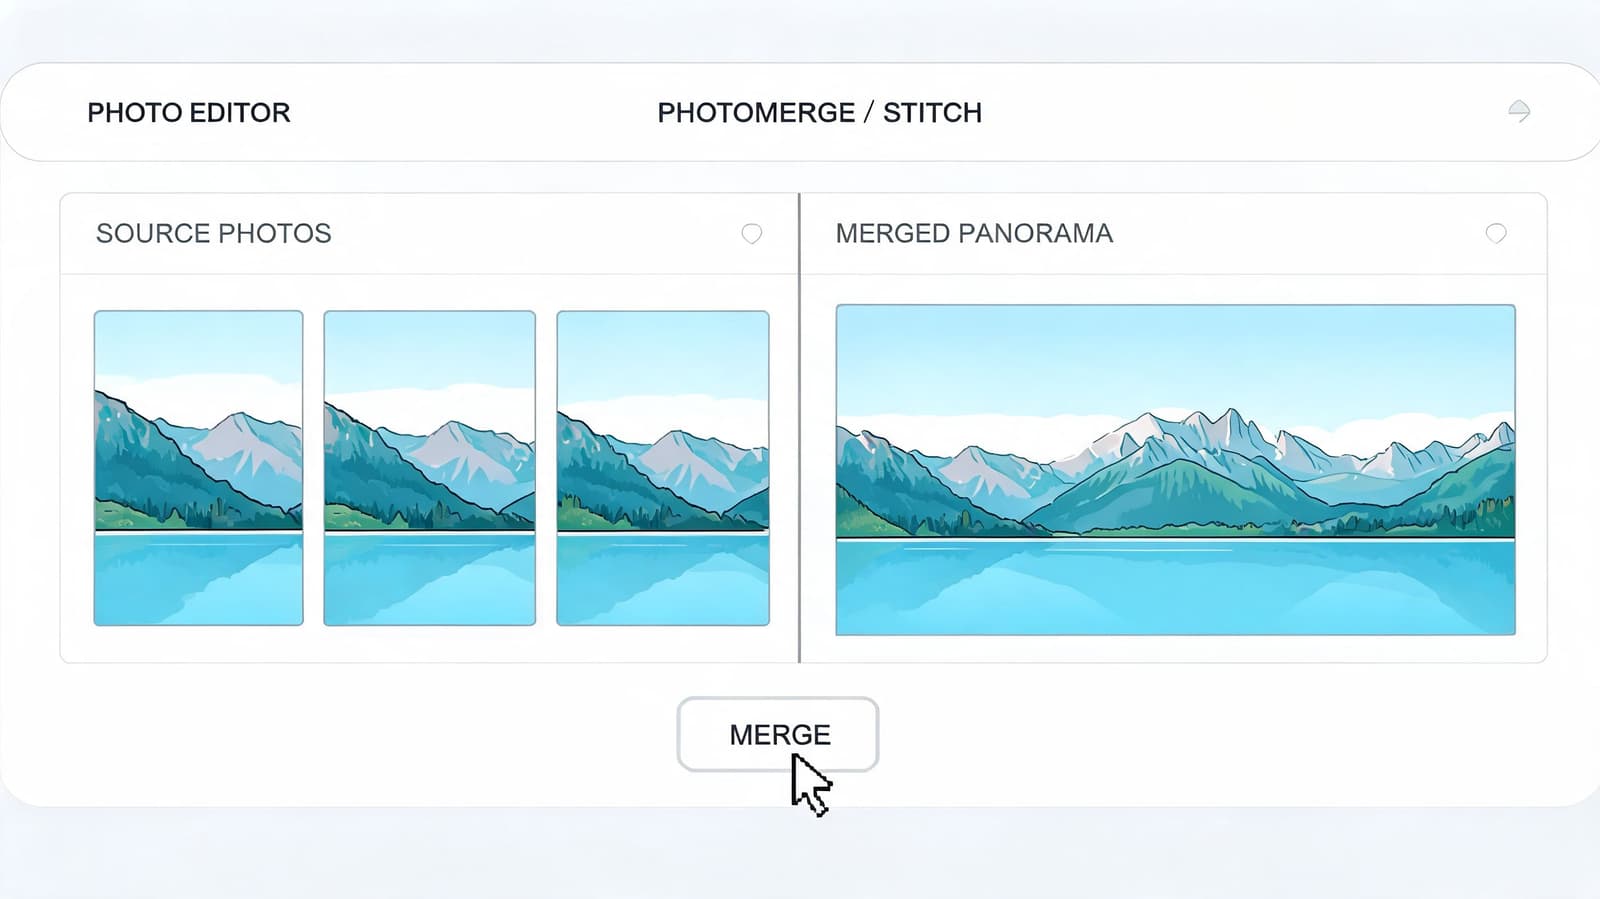
When stitching is the right choice
Stitching software looks for repeated visual features across overlapping photos. In open-source pipelines, the process starts by detecting thousands of keypoints such as SIFT features, then projecting those images onto a shared model. Modern pipelines can hit an 85% fully automatic success rate on sets of 20+ images, but handheld parallax still causes 18% of urban shots to show seam ghosts (stitching algorithm notes and benchmarks).
That explains a lot of real-world failures. If you photographed a room from slightly different body positions instead of rotating from one point, the sofa in the foreground may not line up with the wall behind it. The software isn't broken. The perspective changed.
Multi-row interiors are where people get stuck most often. A simple left-to-right sweep can work outdoors, but a cramped hotel room or bedroom often needs several vertical frames stacked across rows. Those merges are more fragile because perspective errors build in two directions, not one.
A practical Photoshop workflow
Photoshop's Photomerge is still the fastest route for many users.
- Select the source files. Pick images shot in sequence with visible overlap.
- Open Photomerge. In Photoshop, go to File > Automate > Photomerge.
- Choose an auto layout first. Let Photoshop attempt the projection before forcing perspective modes.
- Keep layers editable. Don't flatten immediately. You'll want masks available.
- Inspect the seam areas at high zoom. Windows, door frames, railings, and horizon lines reveal problems fastest.
- Repair seams with layer masks. Paint softly into the cleaner edge rather than trying to clone aggressively.
- Crop only after seam repair. Early cropping removes useful margin when you need to reposition.
For interior shots, I usually trust the automated alignment only up to a point. If ceiling lines bend or furniture duplicates, I switch from “accepting the panorama” to “editing the panorama.” That means nudging layers, masking by hand, and sometimes sacrificing the extreme edges to keep the center believable.
Don't judge a panorama by the thumbnail. Seams that look invisible at fit-to-screen often break apart once you zoom in.
Doing the same job in GIMP
GIMP doesn't mirror Photoshop's Photomerge workflow one-for-one, but it can still produce a strong result.
A reliable manual method looks like this:
- Load each source image as a layer: Keep the widest or middle frame as your anchor.
- Reduce layer opacity temporarily: This helps you line up edges visually.
- Use move and rotate tools carefully: Start with background lines or architectural features.
- Add layer masks: Reveal the cleanest section from each frame instead of erasing pixels.
- Blend the overlap gradually: Hard transitions almost always show.
- Correct edge distortion at the end: Stretching too early makes alignment harder.
If your panorama fights you the whole time, check the source rather than pushing the software harder. Interior shots captured handheld in tight spaces often need a reshoot with more deliberate overlap and a steadier pivot point.
One more practical note. Not every merge should become a panorama. If the scene lacks enough shared detail, or the perspective shifts are obvious, a split-panel design or collage may look better than a technically “merged” image that never feels coherent.
Making Quick and Stylish Collages with Canva
Not every photo merge needs to be surgical. Sometimes you just need something clean, fast, and good-looking enough for a tribute slide, event recap, or family post.
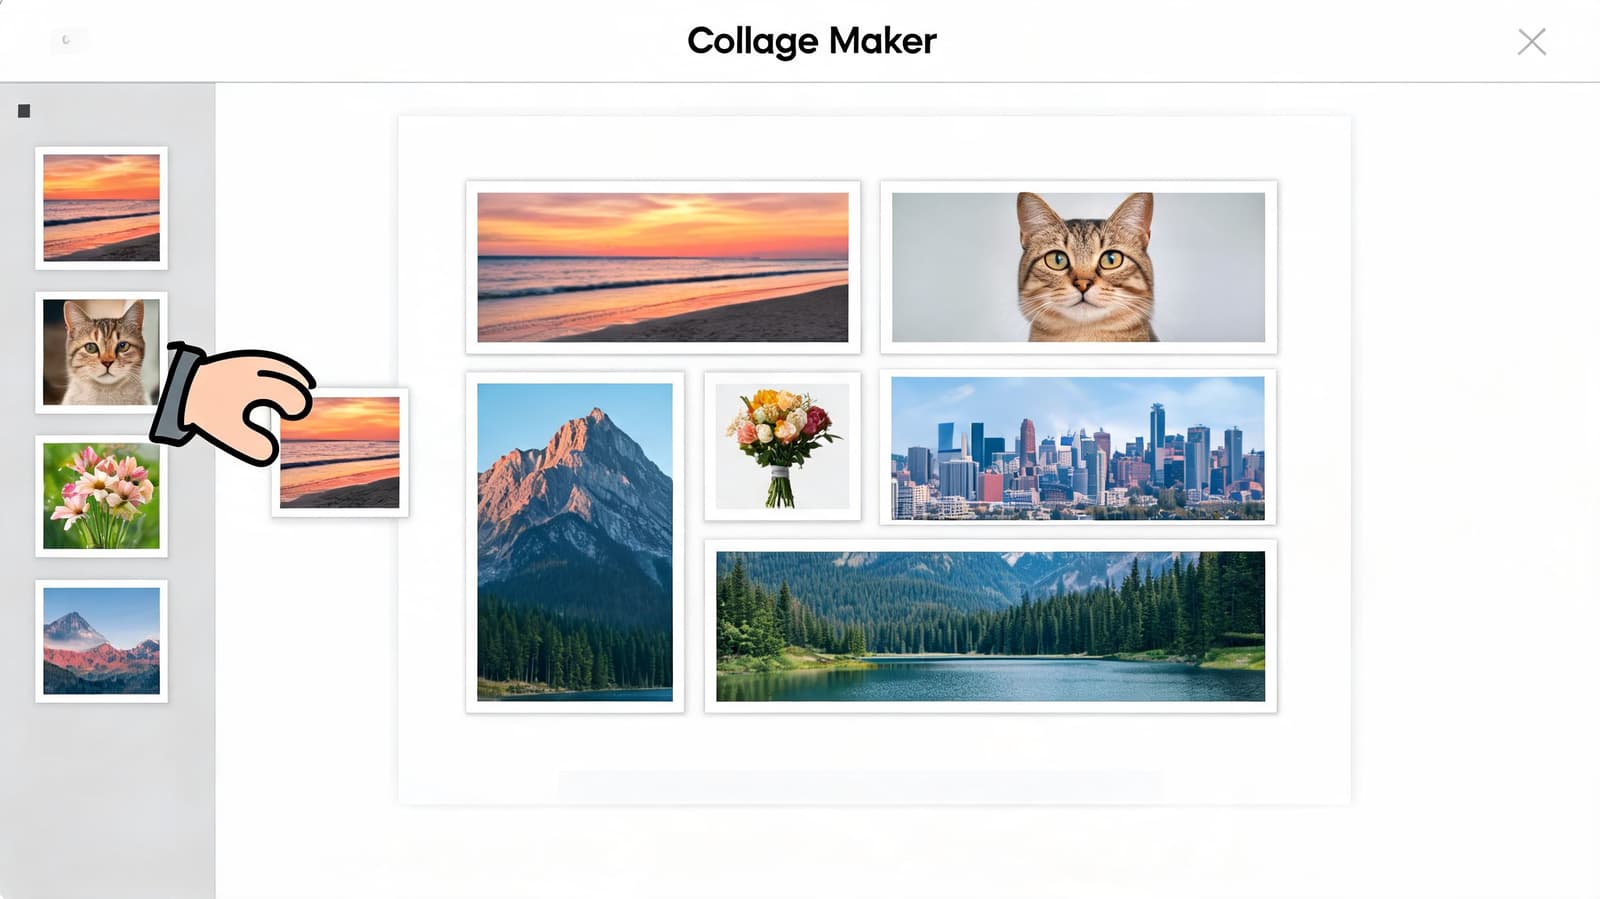
Canva is useful because it removes a common challenge, which isn't masking or retouching. It's layout judgment. The built-in frames, spacing controls, and drag-and-drop editing make it easy to merge photos into one photo without making the result feel chaotic.
Use grids when clarity matters
If you're making a birthday tribute, memorial board, or anniversary timeline, start with a grid. Grids create order instantly.
A practical workflow looks like this:
- Pick the canvas size first: Design for the destination. A vertical canvas works better for reels and phone viewing.
- Choose a frame layout before uploading everything: This prevents overfilling the design with too many images.
- Lead with the strongest image: Give the hero photo the largest cell or most central placement.
- Keep spacing consistent: Uneven gaps make collages look accidental.
- Use a quiet background: White, black, or a muted tone usually lets old scans breathe.
If the images come from different decades, don't over-correct them into looking identical. A little tonal variation can feel honest. The trick is to keep the layout coherent even when the photo stock, scan quality, and color age differ.
Build a looser collage when you want mood
A freeform collage works better when memory matters more than order. Think layered prints, soft overlaps, or a scrapbook feel.
In Canva, that means dragging images off the grid system and arranging them manually. Resize them with intention. Let one image overlap another slightly. Add a date, a name, or a single line of context only if it helps the viewer read the set.
This video gives a quick visual sense of the editing flow:
A few design choices make a bigger difference than people expect:
- Rounded corners soften casual family collages.
- Straight edges feel cleaner for memorial and event use.
- One font is usually enough.
- A little negative space is better than one more photo crammed in.
If you're making a tribute collage, leave room for the viewer to pause. Crowded layouts don't feel rich. They feel rushed.
Canva is less suited to precision merging when edges must align perfectly or when you need full control over masks and source resolution. But for story-first layouts, it's often the quickest way to get a polished result without wrestling with advanced software.
Essential Tips for a Flawless Photo Merge
The tool matters less than the habits. Strong merges come from good source handling, careful alignment, and restraint during export.
Protect image quality before you start
Old scanned family photos need extra care because every save decision compounds. A lightweight web tool may be convenient, but convenience often hides compression.
JPEG recompression can cause a 15% to 30% loss of detail with each merge cycle, and for higher-fidelity output, it's better to export the final merged image as a 16-bit TIFF or convert sources to DNG before merging, which can boost detail retention by over 25% (quality preservation guidance for merged images).
That matters even more if the merged photo is headed into motion later. Fine paper texture, grain, and edge softness often give old prints their character. Once those details are compressed away, they don't come back.
If you're working with low-quality scans, it helps to fix the source dimensions before layout work. A practical reference is this guide on how to fix resolution in scanned or small images.
Preservation rule: Keep the highest-quality file untouched. Make a working copy for edits, and export a final version only once.
Get alignment and blending right
Most merge failures look like software problems but begin as alignment problems. In a panorama, that means not enough overlap or too much perspective shift. In a collage or overlay, it usually means edges that don't share the same visual weight.
A few habits help across every tool:
- Match scale early: If one portrait is visibly larger in head size than the others, the merge feels off even if the edges are clean.
- Use masks, not erasers: Masks let you revise transitions instead of committing to a destructive cut.
- Blend gradually: Feathered transitions usually beat hard joins unless you want a deliberate cutout style.
- Check at multiple zoom levels: Fit-to-screen tells you about overall balance. Close zoom reveals technical flaws.
For multiple exposure style composites, non-destructive edits are especially useful because opacity changes can rescue a blend without forcing a full rebuild. That's one reason layered workflows remain better than flattening too soon.
Match tone so the final image feels whole
A merged image can be technically aligned and still feel wrong. The culprit is often tone. One image is warm, another cool. One scan is flat, another contrasty. One black-and-white print leans magenta because of the scanner.
Use a simple finishing pass:
| Check | What to look for | Fix |
|---|---|---|
| Brightness | One image grabs too much attention | Lower highlights or midtones on the louder frame |
| Color cast | Whites don't agree across images | Neutralize each file before the merge |
| Contrast | Some photos feel punchier than others | Bring them closer in overall intensity |
| Texture | One file looks over-smoothed | Reduce noise reduction or use a less processed source |
Sometimes the best merge isn't the most invisible one. In tribute work, slight edges, film grain, and aged paper can support the feeling of memory. The goal is coherence, not sterilization.
A flawless merge doesn't mean the image looks new. It means every part looks like it belongs in the same finished piece.
From Still to Story Animating Your Merged Photo
A strong merged image already does a lot. It restores a wide scene, gathers several moments into one frame, or gives scattered family photos a shape that people can sit with.
That's also why merged images make such good starting points for motion. A panorama can become a slow camera drift across a place that mattered. A collage can turn into a gentle push across faces and details. A carefully rebuilt scanned photo can hold attention longer once there's a little movement and breathing room in the frame.
If you want to take that next step, the main thing is to start with a clean master file. Keep the merge high quality, preserve texture, and avoid heavy compression. Motion tends to emphasize whatever is already in the still, whether that's a beautiful paper grain or a seam you hoped nobody would notice.
For turning a still image into a short animated memory, you can animate a photo with a gentle camera move. That works especially well for tribute edits, memorial reels, anniversaries, and birthday keepsakes where a static frame feels too brief but full video isn't available.
If you've taken the time to merge photos into one photo carefully, Photo for Video can turn that final image into a short living memory with subtle motion, natural tone, and export-ready results for tribute montages, family keepsakes, and celebration reels.