How to Fix a Low Resolution Photo for Video & Tributes
Don't let a 'low resolution photo' warning stop you. Learn what it means, how to fix blurry or pixelated images, and prepare them for beautiful video tributes.

You finally find it. A photo that feels irreplaceable. Maybe it's your parents on their wedding day, a grandparent holding you as a baby, or a faded birthday snapshot that belongs in a tribute video. You upload it, full of hope, and the site pushes it back with a cold message: image resolution is too low.
That moment stings because the problem sounds technical, but what's really at stake is emotional. You're not trying to rescue “a file.” You're trying to preserve a memory that matters.
You're also not alone. Smartphones now capture 92.5% of all photos globally, and people take over 2 trillion photos annually, which means huge personal archives are filled with images that were saved, shared, or compressed in ways that can leave them looking soft or blocky later on, especially when enlarged for tributes or video according to this mobile photography statistics roundup.
Table of Contents
- Introduction Why Your Favorite Photo Might Be Rejected
- What Makes a Photo Low Resolution
- How to Check Your Photo's Quality in Seconds
- Three Ways to Rescue Your Cherished Photos
- Best Practices for Animating Old Photos
- Example Workflow From Faded Print to Moving Tribute
- Conclusion Bringing Your Memories Back to Life
Introduction Why Your Favorite Photo Might Be Rejected
A low resolution photo usually gets rejected at the worst possible time. You're building a memorial slideshow, an anniversary reel, or a birthday tribute. You choose the one image everyone loves. Then the upload tool flags it as blurry, too small, or not suitable for motion.
Old family photos are especially vulnerable. Many were scanned years ago on basic settings, sent through email, downloaded from social media, or cropped over and over until the remaining file just doesn't hold enough visual information. Even a photo that looks “fine” on your phone can fall apart when a platform tries to enlarge it.
Practical rule: A rejection message doesn't mean your memory is unusable. It usually means the current version of the file isn't the best version available.
That's an important distinction. The moment can still be saved. Sometimes you need a better scan. Sometimes you need to adjust the file's print settings. Sometimes you need an AI upscaler that can rebuild lost-looking detail more gracefully than older enlargement tools.
If your goal is a tribute, this matters even more. A still image can hide flaws. Motion exposes them. Tiny faces become smudges. Hair and clothing lose texture. Gentle camera moves can make jagged edges more obvious. The good news is that once you understand what “low resolution” means, the problem gets much less mysterious and much more fixable.
What Makes a Photo Low Resolution
A low resolution photo isn't just “a bad photo.” It's a photo that doesn't have enough usable detail for the way you want to display it. That display might be a print, a full-screen video, or an animated tribute clip.
Pixels are the building blocks
Think of a photo like a mosaic. Pixels are the tiny tiles. If you have lots of small tiles packed tightly together, the picture looks smooth and detailed. If you have fewer, larger tiles, the image starts to look blocky.
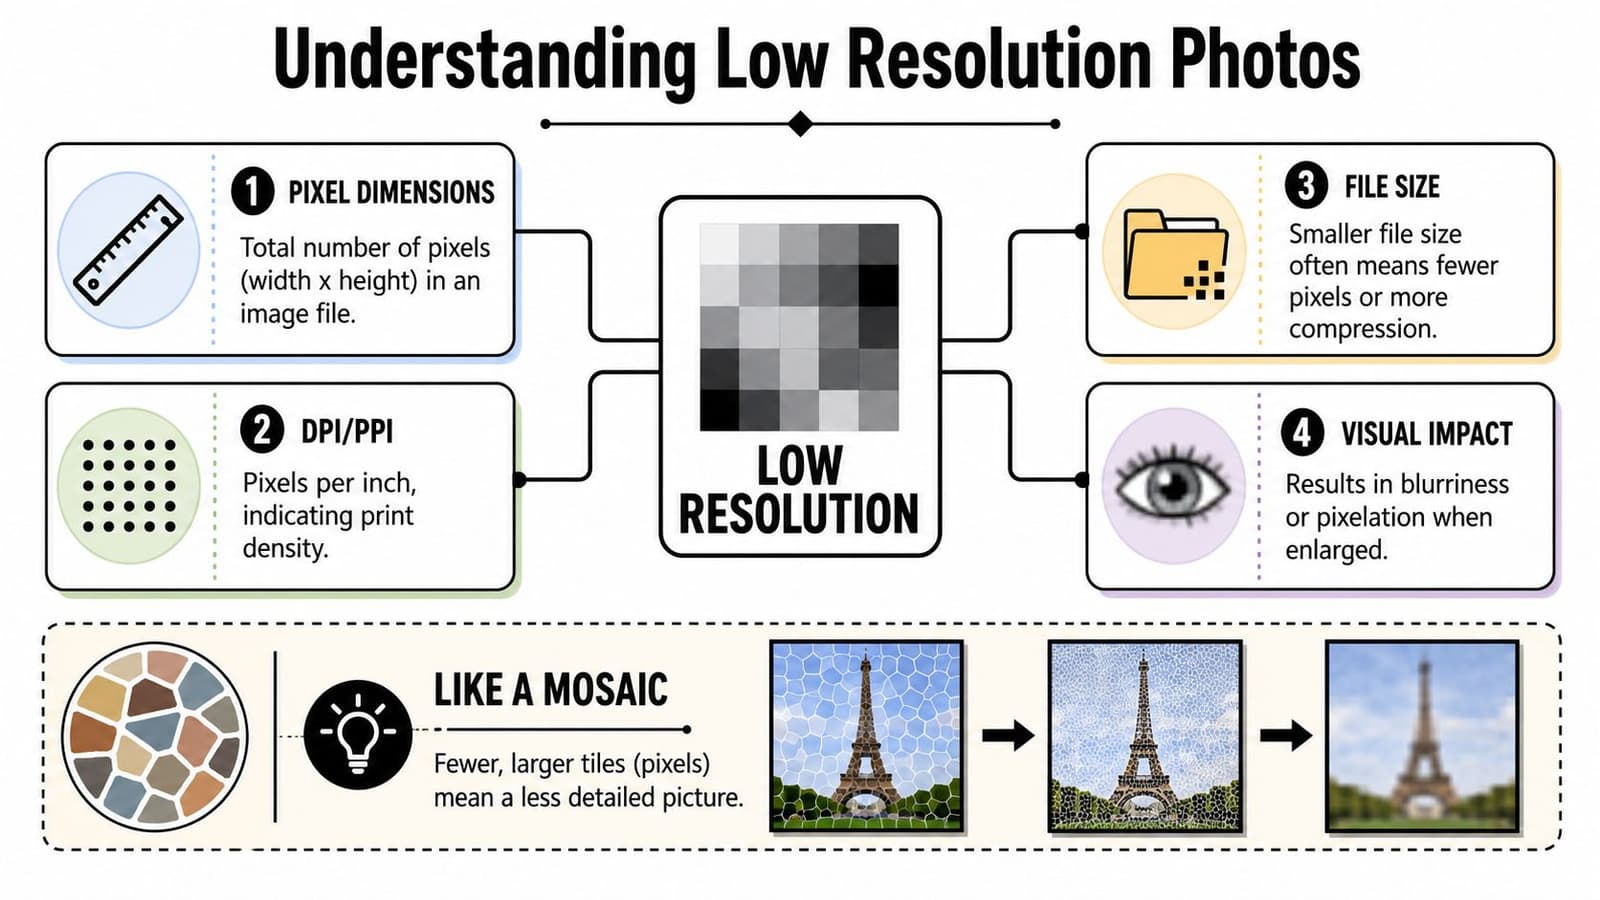
Three terms cause most of the confusion:
- Pixel dimensions mean the width and height of the image, such as 600 x 400.
- File size means how heavy the file is. A bigger file isn't always sharper.
- PPI or DPI describes how densely image detail will be placed in physical output.
A lot of people assume these all mean the same thing. They don't. You can have a file that isn't very large on disk but still looks okay on a phone. You can also have a photo with high pixel dimensions that still gets flagged because the output settings don't match your intended use.
Why screens fool us
One major source of confusion is screen viewing. An image at 72 PPI can look fine on a display, but a high-quality 6 x 4 inch print needs at least 300 DPI to avoid looking blurry or pixelated as explained in Vanderbilt's image resolution guide.
That's why a photo can seem perfectly sharp in your gallery app and disappoint the second you print it or stretch it across a video frame.
Here's a simple way to consider this:
| Situation | What happens |
|---|---|
| Small phone screen | Even a modest file can appear sharp |
| Printed photo | Weak detail becomes obvious fast |
| Animated video frame | Soft edges and missing detail stand out even more |
A low resolution photo is often not “wrong.” It's just being asked to do more than it was built to do.
There's another wrinkle. Compression can subtly degrade quality. If a photo was shared through social media, messaging apps, or email, the version you saved may contain fewer useful pixels than the original. Once that detail is gone, ordinary resizing tools can't bring it back. They can only stretch what remains.
This is also why a family member might send you “the same photo” and one version looks much worse than another. It isn't the same file at all. It's the compressed copy.
How to Check Your Photo's Quality in Seconds
You don't need Photoshop to do a first check. Your device already gives you enough information to make a good call.
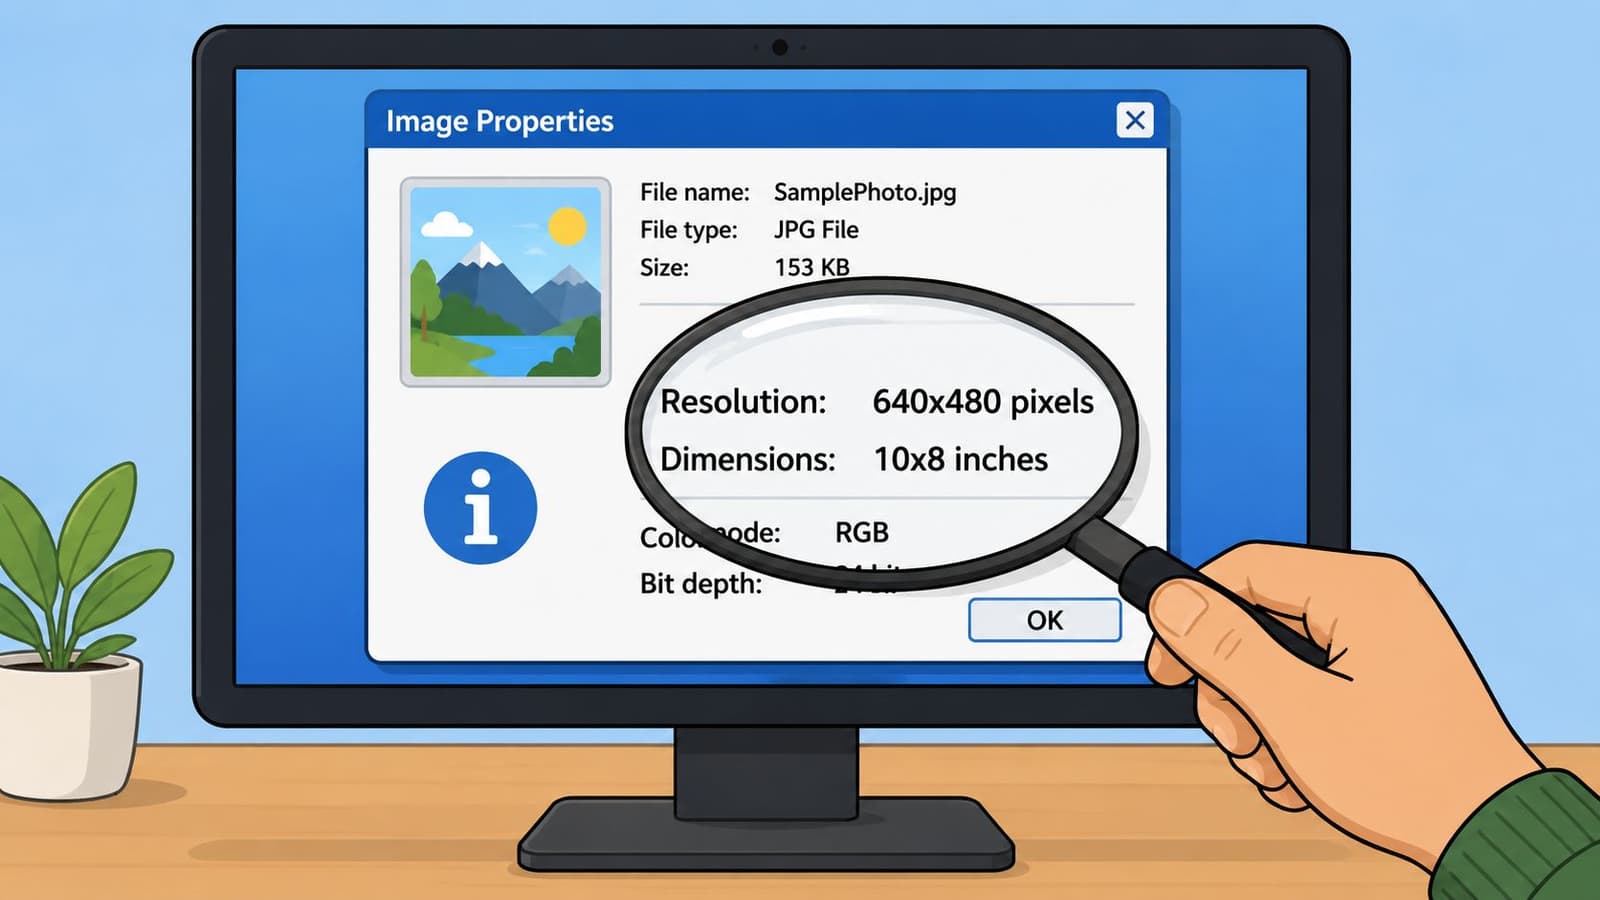
Where to find the dimensions
Try this on the file you plan to use:
- On Windows: Right-click the image, choose Properties, then Details.
- On macOS: Right-click the image, choose Get Info.
- On iPhone or iPad: Open the image in Photos and look for image info, or check in Files if that's where it's stored.
- On Android: Open the image and view Details or Info from the menu.
You're looking for the image's width and height in pixels. Write those down.
If you're working from an old printed photo, check the scanned file itself, not just the print size. A physically large print can still produce a low resolution digital file if it was scanned poorly.
What the numbers are really telling you
People get tripped up when a file seems “big enough” but still triggers a warning. A common example is a photo with large dimensions like 6000 x 4000 that still gets flagged because its embedded PPI is something low like 72, which may need to be adjusted before printing or animating as discussed in this photography thread about resolution confusion.
That doesn't mean every 72 PPI image is doomed. It means you have to judge the file by how it will be used.
Use this quick reading guide:
- Very small dimensions: Good for tiny web use, risky for tribute video.
- Moderate dimensions: May work if you avoid heavy cropping and keep motion subtle.
- Larger dimensions: A better starting point for enhancement and animation.
If the face in the photo occupies only a small part of the frame, cropping can turn a decent file into a low resolution photo very quickly.
Also zoom in. Not a little. Zoom in enough to inspect eyes, hair, clothing edges, and background lines. If those areas dissolve into square blocks or mushy smears, the file probably needs help before you animate it.
This fast check helps you sort your images into three groups: ready to use, worth rescuing, and worth rescanning.
Three Ways to Rescue Your Cherished Photos
A tribute photo does not need to look brand new. It needs to still feel like your person.
That changes the goal. You are not chasing perfect sharpness for its own sake. You are trying to recover enough detail for a gentle animation, while keeping the small signs that make an old family photo feel true, such as paper grain, soft contrast, and familiar facial features.
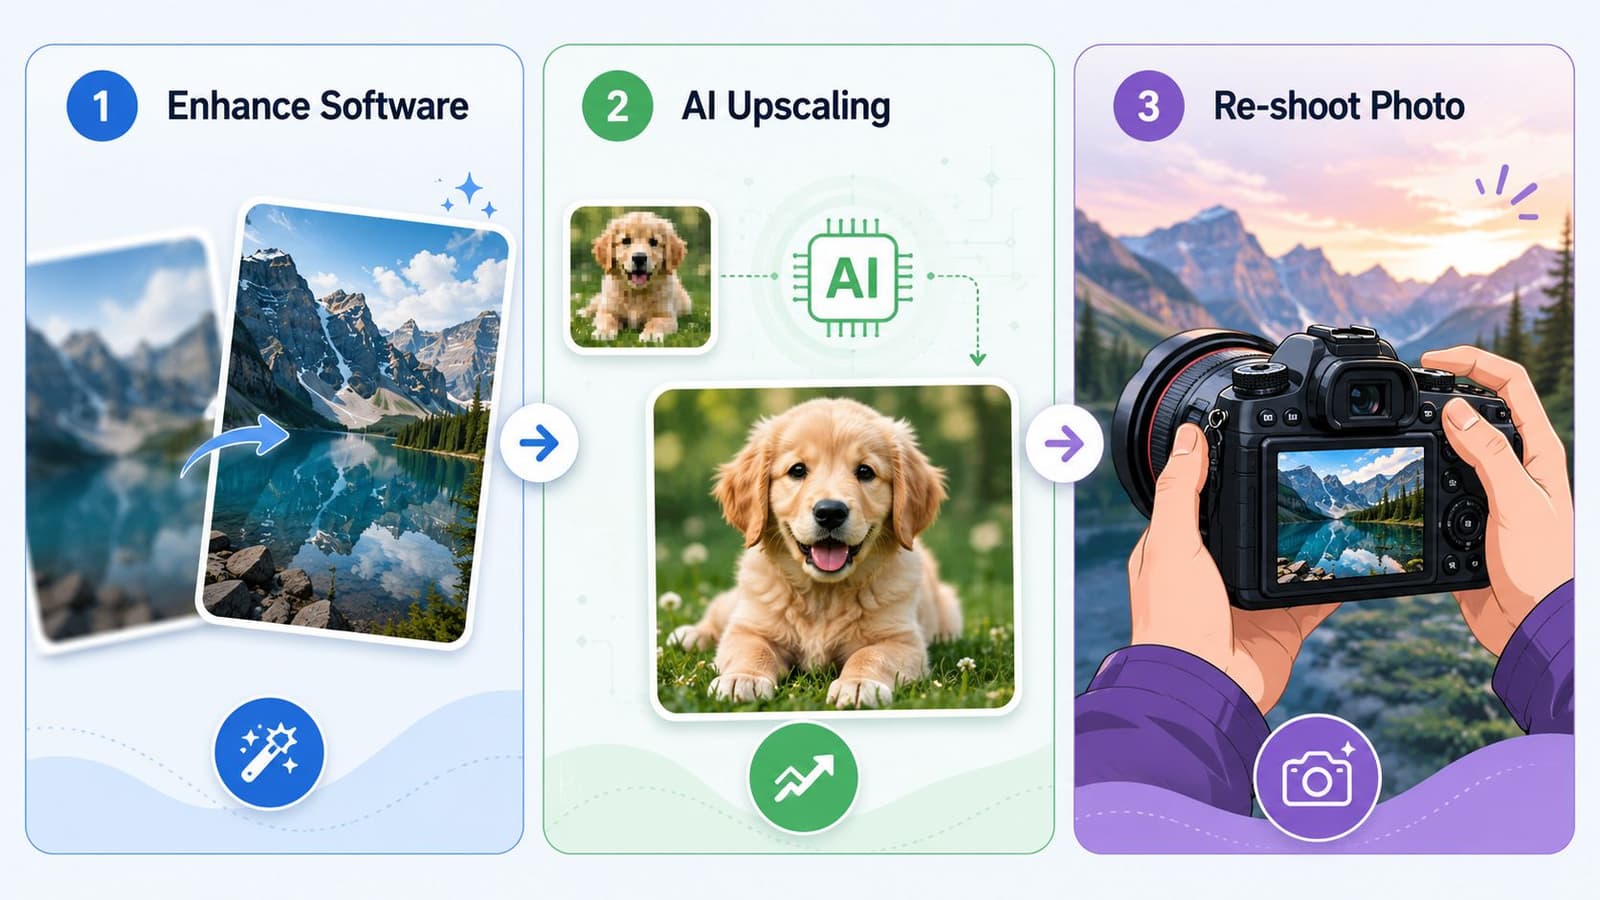
Option one start with a better scan
If the original print, negative, or slide still exists, begin there. A new scan often gives you more real information to work with than an old file that was texted, compressed, or saved from social media years ago.
Scanning works like rereading the original page instead of copying a copy. You may not gain brand new detail, but you can recover fine texture and cleaner edges that matter later when a video tool tries to animate a face, a hand, or a piece of clothing.
Use a careful setup:
- Clean the print gently: Dust and tiny fibers become much more visible after enhancement.
- Scan at a high setting: Give yourself room to crop and restore without thinning out the image.
- Save one untouched master file: If an edit goes wrong, you still have the clean source.
This path is often the best choice for tribute projects because it preserves the photo's original character before any software starts filling in gaps.
Option two manual restoration
Some damage needs a person, not a button.
Creases across a face, silvering, stains, fading, and torn corners often need selective repair. Manual restoration lets you fix the problem area without changing everything else. That matters if you want Grandpa to still look like Grandpa, instead of a polished AI version with unfamiliar skin texture or altered features.
A patient edit can repair surface damage, rebalance tones, and protect important details such as eyes, smile lines, jewelry, or military uniform textures. It takes more time, but it gives you control over what stays authentic.
If you want a clearer foundation before editing, this guide on how to fix photo resolution before restoration or animation can help you sort out the file quality side first.
Option three AI upscaling
AI upscaling helps when the only photo you have is already digital and already small.
Standard enlargement makes the canvas bigger, but it usually stretches the weakness too. AI upscaling tries to rebuild believable detail instead of spreading pixels apart. That can be useful for tribute work, especially if you need enough clarity for subtle motion in an AI video generator.
Still, use it with restraint. Old photos carry texture from film, paper, age, and scanning. Strong enhancement can erase that history and replace it with skin that looks waxy, hair that looks painted on, or patterns that bend in strange ways once the photo starts moving.
Check the result closely in these areas:
- Eyes and mouths: Small errors here can make motion feel unnatural.
- Hair, lace, and fabric: Good results look soft and believable, not crunchy.
- Hands and jewelry: AI often invents shapes in detailed areas.
- Background lines: Frames, wallpaper, and furniture edges reveal distortion quickly.
A quick video explanation can help make the difference clearer:
For many families, the best rescue plan is a combination. Start with the strongest scan you can get, repair what distracts from the memory, then use light upscaling only if the file still needs more strength for animation. That approach usually keeps the photo recognizable, emotionally honest, and ready for a moving tribute.
Best Practices for Animating Old Photos
A still photo can hide problems that become obvious the moment it starts to move. The face may look fine at first glance, then the eyes flicker, the jawline shimmers, or the background seems to crawl. That matters even more in a family tribute, where small visual mistakes can pull attention away from the person you are trying to honor.
Motion asks more of the image
AI video tools have to do more than display a picture. They try to predict how edges, facial features, clothing, and background details should behave from frame to frame. If the photo does not contain enough usable detail, the model fills in gaps with guesses. Those guesses often show up as unstable cheeks, twitching hair, or motion that feels slightly off even if you cannot immediately explain why.
For tribute work, a stronger file usually gives you more natural motion and a more respectful result. Larger images tend to hold together better, especially when the animation includes a gentle push-in, a blink, or subtle facial movement. Very small files can still work, but they usually need more careful preparation before upload.

A useful way to judge readiness is to ask a simple question. If you zoom in on the face to the size it might appear in the final video, do the eyes, mouth, and outline still look stable? If they already look blocky or smeared in the still image, motion will usually make that weakness easier to see.
Prepare the photo for believable movement
Old photos often respond best to a light hand. You are not trying to make a 1950s print look like it was shot on a new phone. You are trying to give the animation model enough clarity to work with while keeping the original character of the photo.
A practical prep routine looks like this:
- Strengthen the image before animation. If the file is soft, improve clarity first instead of asking the video generator to fix everything on its own.
- Crop with restraint. Keep the emotional center clear, but leave enough surrounding detail so the model can interpret posture, clothing, and space.
- Choose subtle motion. Old portraits usually look more believable with a slow push, slight head movement, or gentle expression changes than with sweeping camera effects.
- Check faces at full size. Eyes and mouths are the fastest places for artificial motion to show.
If the problem is softness rather than tiny dimensions, this guide on how to sharpen an image before animation can help you improve clarity without stripping away detail that gives the photo its age and warmth.
Preserve the texture that makes the memory feel real
An old print carries history in its surface. Grain, paper texture, slight fading, and soft focus are not always defects. They often act like the tone of a familiar voice. Remove all of it, and the person may still be recognizable, but the feeling changes.
That is why over-cleaning causes trouble in tribute videos. Skin turns waxy. Fabric loses depth. Hair starts to look painted. Once the image begins moving, those changes can feel even more artificial because the model is animating invented detail rather than the authentic texture of the photograph.
Keep the age that adds meaning. Remove the flaws that distract.
A good source image for animation usually balances both goals:
| Goal | Better choice |
|---|---|
| Natural movement | Clear subject edges and moderate detail |
| Authentic old-photo feel | Preserved grain and texture |
| Clean final clip | Minor repairs, not total airbrushing |
One habit helps more than it seems. Save separate versions of the photo as you work: the original scan, the cleaned copy, and the version prepared for animation. If the final clip starts to feel synthetic, you can return to an earlier file with more natural texture and try again.
That extra patience often leads to the result families want most. A moving portrait that feels alive, familiar, and true to the memory.
Example Workflow From Faded Print to Moving Tribute
A family finds a faded birthday print from decades ago. It shows a child leaning toward a cake while relatives smile in the background. The only digital version on hand is a washed-out copy from an old email, and it looks rough when enlarged.
A simple rescue path that works
They begin with the physical print instead of the emailed file. A fresh scan gives them a stronger base to work from. If you're starting there too, this walkthrough on how to scan old photos is a helpful companion.
Next, they inspect the new scan at full zoom. The faces are visible, but the image still feels a bit soft for motion. Rather than cropping aggressively, they keep the composition wide enough to preserve pixels around the child, the cake, and the surrounding details that make the memory feel lived-in.
Then they run the scan through an AI upscaler. Not to make it look brand new. Just to strengthen edge detail, improve the subject's features, and give the file enough substance for animation. After that, they do a very light cleanup, removing dust and leaving the photo's original texture intact.
The best tribute results usually come from respectful improvement, not reinvention.
Once animated with a subtle push-in and gentle facial movement, the photo changes character. It no longer feels like a frozen artifact. It feels present. The child's expression carries more clearly. The room feels warmer. The image still looks like an old family photo, but now it breathes.
That's the desired outcome. Not perfection. Connection.
Conclusion Bringing Your Memories Back to Life
A low resolution photo can feel like a dead end, especially when the image means the most to you. It isn't. In most cases, the warning is telling you something practical about the file, not something final about the memory.
When you check the dimensions, understand how resolution works, and choose the right rescue method, an unusable image often becomes a strong candidate for print, video, or a tribute clip. The goal isn't to erase the age of the photo. It's to give that moment enough clarity to be seen, shared, and felt again.
If you're ready to turn one treasured photo into a short moving keepsake, Photo for Video makes it simple. Upload a favorite image, describe the motion and mood you want, and create a polished tribute clip that keeps the feeling of the original photo intact.