Low Resolution to High Resolution: AI Photo Animation 2026
Turn low resolution to high resolution photos for animation. Master AI upscaling, prepping scans, & preserving texture in our complete 2026 guide.
You're probably holding a photo that matters more than its quality suggests. It might be a faded print from a wedding album, a soft little scan from a drugstore machine, or a phone photo of a framed portrait taken in a hurry before a memorial slideshow had to be finished. The picture isn't perfect, but the moment is.
That's where people get stuck. They want to move a photo from low resolution to high resolution so it can be animated cleanly, but they also know what can go wrong. A grandmother's skin turns waxy. A suit fabric becomes mush. The grain that made the image feel real disappears, and the result looks less like a memory than a synthetic remake.
That tension is real. Community data collected in a heritage-photo context found that 68% of users prioritize natural grain preservation over sharpness, while 90% of tutorials push aggressive AI upscaling that erases vintage details (grain preservation findings for family-photo workflows). For tribute work, that gap matters. The point isn't to make an old photo look new. It's to make it feel alive without stripping away its age, texture, and dignity.
Table of Contents
- From Precious Scan to Animated Memory
- Preparing Your Photo for Enhancement
- Choosing the Right AI Upscaler and Settings
- Refining the Upscaled Image for Motion
- Exporting for Animation with Photo for Video
- Troubleshooting Common Upscaling Problems
From Precious Scan to Animated Memory
A treasured family photo usually arrives with problems baked in. The print has faded. The scan is small. Someone photographed the print under room light, so there's glare on one cheek and a soft blur across the collar. Yet the emotional weight is intact, which is why purely technical advice often feels wrong for this kind of job.
Photo restoration for animation asks a different question than standard restoration. It's not only “How sharp can this become?” It's also “What made this image feel true in the first place?” A memorial portrait often needs softness in the right places. A birthday tribute may benefit from visible film grain because that texture carries time inside it.
The conflict between detail and character
The mistake I see most often is treating every old photo like a damaged file that must be cleaned to modern standards. That approach can remove the very signals our brains read as authentic. Fine grain, gentle falloff in focus, and modest tonal unevenness can all contribute to emotional believability.
Practical rule: If a flaw pulls attention away from the person, fix it. If it helps the photo feel like itself, protect it.
That distinction matters even more before animation. Motion exaggerates retouching mistakes. Skin that looked merely over-smoothed in a still can look plastic once the face begins to move. Overbuilt eyelashes or invented hair strands can feel uncanny in a tribute video, especially when viewers know the original face by heart.
A better way to think about low resolution to high resolution
The best low resolution to high resolution workflow for old family images is conservative at the start and selective at the end. Instead of forcing detail everywhere, preserve the photo's emotional center. Usually that means face, eyes, mouth, hands, and any object with story value, such as a wedding ring, military pin, bouquet, or handwritten sign in the frame.
A good result often looks less dramatic in a side-by-side comparison than an aggressive AI pass. But once animated, it holds together better. The movement feels gentler. The subject still looks like the person your family remembers.
That's the standard worth aiming for. Not maximum sharpness. Maximum recognition.
Preparing Your Photo for Enhancement
Preparation decides more than the upscaler does. If the source file is crooked, dirty, clipped in the highlights, or compressed from years of messaging apps, the model has to guess too much. Better inputs produce calmer, more believable outputs.
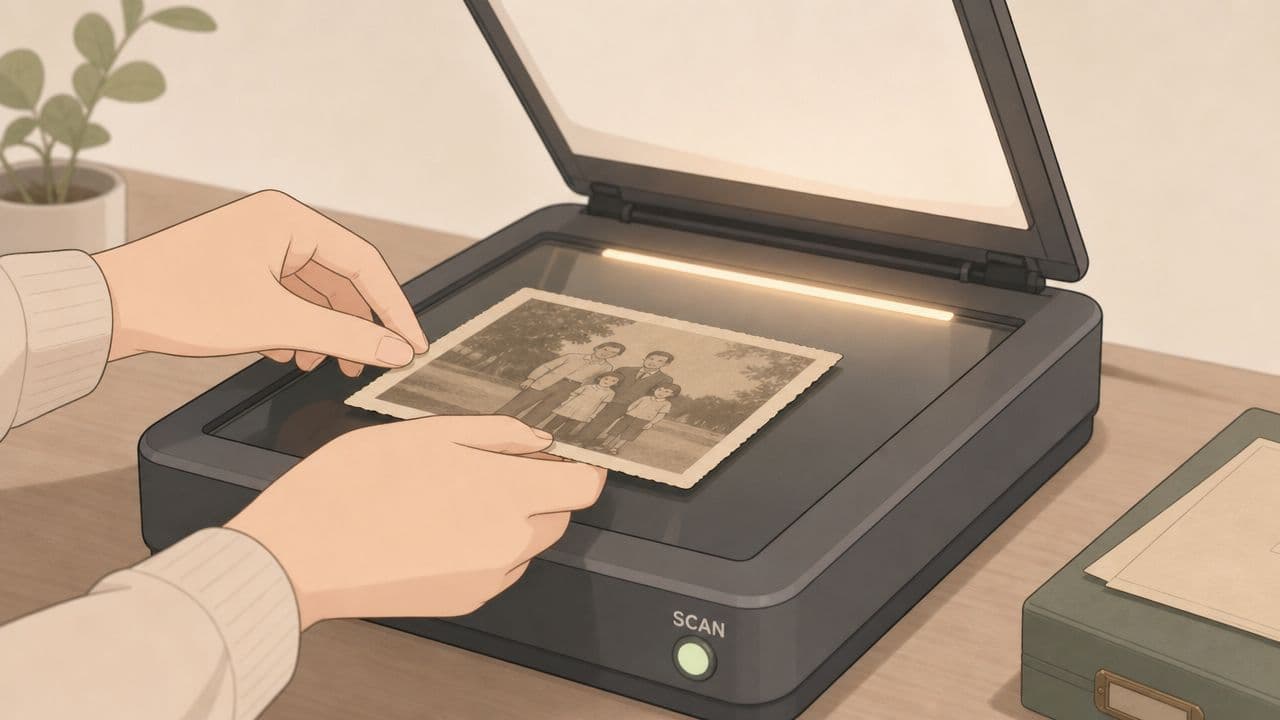
For printed photographs, a flatbed scan usually gives you a steadier starting point than snapping a quick phone photo. If you need a practical walkthrough, this guide on how to scan old photos is a useful companion.
Start with the cleanest capture you can get
Before any AI touches the image, do the small physical and digital steps that reduce confusion.
- Dust the print gently: Remove loose dust from the photo and scanner glass. Tiny specks can become fake facial marks after enhancement.
- Scan the full border first: Don't crop too tightly on the first pass. Borders, paper edges, and tone transitions can help you judge what's original and what's damage.
- Keep the file as unprocessed as possible: Avoid scanner presets that add automatic sharpening, heavy contrast, or “photo enhancement.”
- Save a master copy: Keep the untouched scan. You'll want something to return to if the restoration goes too far.
If the image only exists as a digital file, work from the earliest version you can find. Avoid the version pulled from a social app or old slideshow export if a larger original exists somewhere on a drive, email attachment, or cloud backup.
Clean damage, not history
Old photos usually contain two kinds of imperfections. One group distracts. The other gives the image character.
Distracting damage includes fresh fingerprints, scanner dust, creases across eyes, harsh color casts from a phone capture, and obvious compression blocks. Character includes film grain, slightly uneven focus from the original lens, paper texture, and mild tonal softness.
A gentle prep pass usually includes:
- Straighten the horizon or portrait posture so the subject doesn't lean unnaturally in motion.
- Crop with restraint so hands, shoulders, hair, and meaningful objects still have breathing room.
- Correct only major color problems such as orange indoor casts or green scanner drift.
- Remove obvious surface distractions like dust spots in the sky or a scratch through the face.
- Leave micro-texture alone unless it clearly reads as damage.
Old photos don't need to look sterile. They need to look respected.
A light tonal adjustment also helps. Open shadows carefully if the face is buried, but don't flatten the image. Tribute photos often benefit from natural contrast because it keeps the subject dimensional once movement is added.
A simple prep checklist
Use this before you upscale:
| Check | What you're looking for |
|---|---|
| Alignment | Eyes and shoulders sit naturally, no accidental tilt |
| Crop | Enough room for subtle motion without cutting off features |
| Surface cleanup | Dust, glare, and scratches reduced, not overpainted |
| Color | Skin tones feel plausible, not overly warm or gray |
| Texture | Grain and paper feel preserved |
One warning matters here. Don't sharpen early. Don't run strong noise reduction early either. Both steps can erase the fragile texture that tells the upscaler what kind of photo it's interpreting. Once that texture is gone, getting it back convincingly is much harder.
Choosing the Right AI Upscaler and Settings
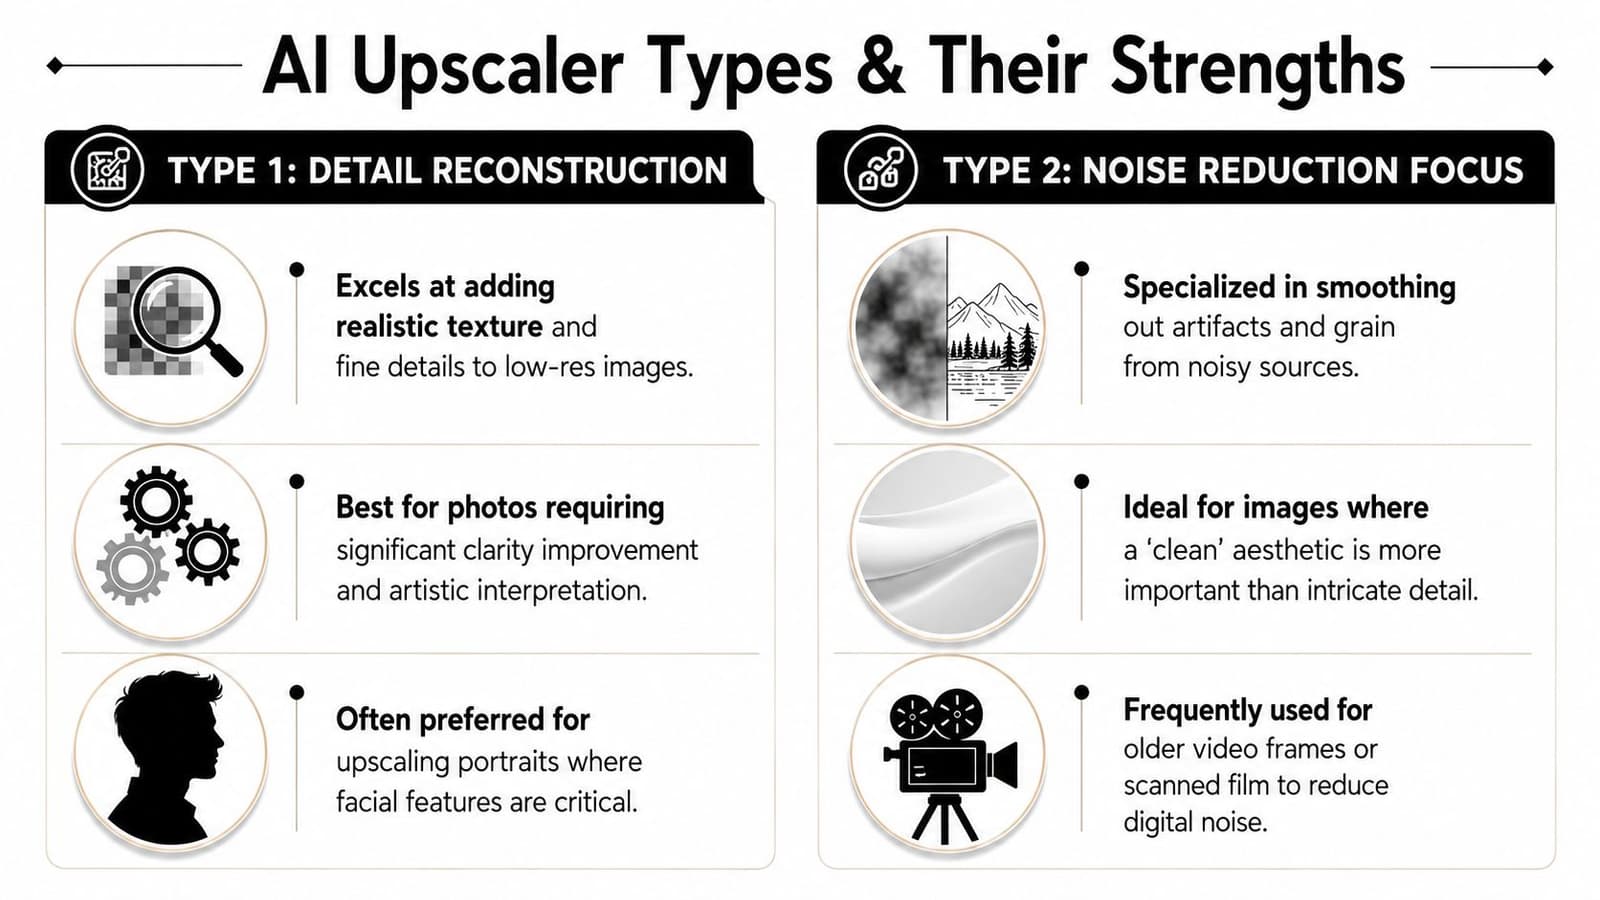
Not every upscaler is trying to solve the same problem. Some rebuild texture aggressively. Some suppress noise and compression. Some try to rescue faces. The right choice depends on what kind of failure you're dealing with, not on which tool looks most dramatic in a marketing demo.
A simple way to sort them is by behavior: detail reconstruction, face recovery, and cleanup-focused enhancement.
If you're deciding what output quality to aim for before upscaling, this article on how to get a high-resolution photo helps frame the target.
What each type does well
A general-purpose upscaler is often the safest first pass for old family images. It tends to improve edge clarity and overall structure without forcing every area into a hyper-detailed look. That makes it useful for portraits where clothes, background, and skin all need to stay in balance.
Face-enhancement tools can be helpful when the face is tiny or soft, but they're easy to overuse. If the subject's features are already visible, a dedicated face model may replace likeness with a generic “pretty” face. For tribute work, that's a bad trade.
Cleanup-focused models are better when the original problem is digital mess rather than optical softness. Think noisy phone captures of old prints, screenshots, messenger-compressed images, or frames pulled from older video.
| Upscaler type | Best use | Main risk |
|---|---|---|
| General detail model | Soft scans, small prints, balanced portraits | Can invent texture in fabric or hair |
| Face-focused model | Tiny faces, distant subjects, weak eye definition | Can change age, likeness, or expression |
| Noise-reduction model | Compression, digital grain, messy phone captures | Can make skin and paper texture look plastic |
Settings that help old family photos
A frequently overused slider is denoising. Old paper photos often contain grain, scan texture, and tonal variation that an AI tool mistakes for noise. If you wipe all of that away, the image may look cleaner but also less human.
Use a lighter hand with these controls:
- Denoise: Keep it lower when the source has film grain or paper texture you want to preserve.
- Sharpen: Add only enough to define eyes, lips, collars, and edges that matter in motion.
- Face recovery: Turn it on only if the face is clearly unresolved. If the person already looks like themselves, leave it alone.
- Upscale factor: Start modestly. A 2x pass is often easier to control than jumping straight to the largest setting.
- Artifact suppression: Useful for blocky digital files, risky for soft vintage prints.
One practical habit helps a lot. Preview at face level, not full frame. Many tools look impressive zoomed out, but the truth shows up around eyelids, teeth, nostrils, and hairlines.
If the eyes look right and the skin still has life in it, you're probably close.
A short visual walkthrough can help when you want to compare tool behavior before committing to a workflow.
When GAN style models help
Some of the most convincing super-resolution results come from models built around GANs, especially where realism matters more than strict pixel matching. In image reconstruction, GANs such as SRGAN use a perceptual loss factor that combines content and adversarial losses, helping them achieve higher perceptual quality and stronger feature representation than older methods (SRGAN and perceptual loss in low-resolution image reconstruction).
That sounds technical, but the practical takeaway is simple. Older methods often make images bigger. Better GAN-based methods try to make them believable.
That said, “believable” doesn't always mean “faithful.” For family photos, faithfulness wins. Use GAN-style upscalers when the image needs reconstructed texture, but keep your eye on identity. A little invented detail can help. Too much, and the person stops looking like your person.
Refining the Upscaled Image for Motion
An upscaled still image is rarely ready for animation straight out of the model. It's close, but not finished. Motion exposes weak retouching faster than a still does, so patience yields results.
The first review should happen at two zoom levels. Check the whole frame for tonal balance and edge consistency. Then inspect the face closely, especially eyes, teeth, brows, and the contour where hair meets skin.
Check the face before anything else
Most AI failures gather in predictable places. Skin gets too smooth. Eyelashes become spiky. Irises sharpen unevenly. Teeth turn bright and disconnected from the mouth. Clothing patterns can also ripple or become painterly.
Use a simple editor for local fixes rather than rerunning the whole image repeatedly. Local corrections usually preserve more character.
- Waxy skin: Reduce clarity or blend back a little of the original texture in the face area.
- Odd eyes: Borrow from the less damaged eye if one side enhanced better than the other.
- Pattern distortion: Soften troublesome fabric or wallpaper slightly so it doesn't shimmer in motion.
- Halos around the subject: Clean the edge with a soft mask so the outline feels natural.
If you need extra edge definition, use selective sharpening rather than global sharpening. A portrait can tolerate a crisper eye line or lapel edge. It usually can't tolerate a uniformly sharpened forehead and cheek.
For targeted cleanup methods, this guide on how to sharpen an image is useful when you want to sharpen only what helps.
Put texture back where the model removed it
This is the step that separates technical restoration from emotional restoration. If the image has become too clean, add back a whisper of texture. Not fake grit. Not a dramatic overlay. Just enough fine grain to reconnect surfaces and stop skin from looking airbrushed.
You can do this selectively. Faces may need less. Backgrounds, jackets, paper backdrops, and darker shadows often benefit more. The goal is continuity. Everything in the frame should feel like it belongs to the same original photograph.
A family photo can be slightly soft and still feel true. It can't feel synthetic and still feel tender.
Also check how the image reads at the size it will be seen. An artifact that jumps out at full zoom may vanish in a tribute montage. On the other hand, a fake eye highlight that seems minor in editing can become distracting once the face begins to move slowly across the screen.
A restrained final pass usually wins. Small local repairs. Mild texture recovery. Then stop.
Exporting for Animation with Photo for Video
Export is where many careful restorations lose quality again. A beautiful working file gets flattened into a low-quality JPEG, the color shifts, or the image is sent at a size that forces another unnecessary round of resizing. For animation, the handoff file needs to be clean, stable, and large enough to support motion without overprocessing.

Best export choices for tribute animation
If transparency isn't needed, a high-quality JPEG is usually practical and easy to manage. PNG is a good choice when you want less compression and a steadier handoff, especially after detailed retouching. Either can work well if exported cleanly from the final restored file.
A few habits keep the image stable:
- Use your final corrected version: Don't export from an earlier upscale pass by accident.
- Stick to a standard color space: sRGB is usually the safest handoff for screen-based viewing.
- Avoid repeated saves: Each recompression step can soften edges and create new artifacts.
- Name versions clearly: Keep source, restored, upscaled, and export files separate.
Why target dimensions matter
For modern image workflows, size matters because many generated images still begin relatively small. Standard generative models often output at 1024×1024 pixels, which creates a resolution gap that usually calls for a 2x or 4x upscale for professional use in video or high-quality displays (resolution gap and generate-then-enhance workflow).
In practical tribute work, that means aiming for a file with enough room for subtle movement, reframing, and output compression without stressing the image. A clean export around 2048px or 4096px on the long side is often a comfortable destination when the source can support it. The smaller of those sizes is usually easier to keep natural. The larger one can help when the edit needs extra push-in or delivery on larger displays.
Don't choose the biggest file just because it exists. Choose the biggest file that still looks like the original person. That's the threshold.
Troubleshooting Common Upscaling Problems
Sometimes the upscaler technically succeeds and emotionally fails. The file is larger. The edges are cleaner. But the person no longer looks right. That's not a small issue in family work. Recognition beats impressiveness every time.
What to fix and what to leave alone
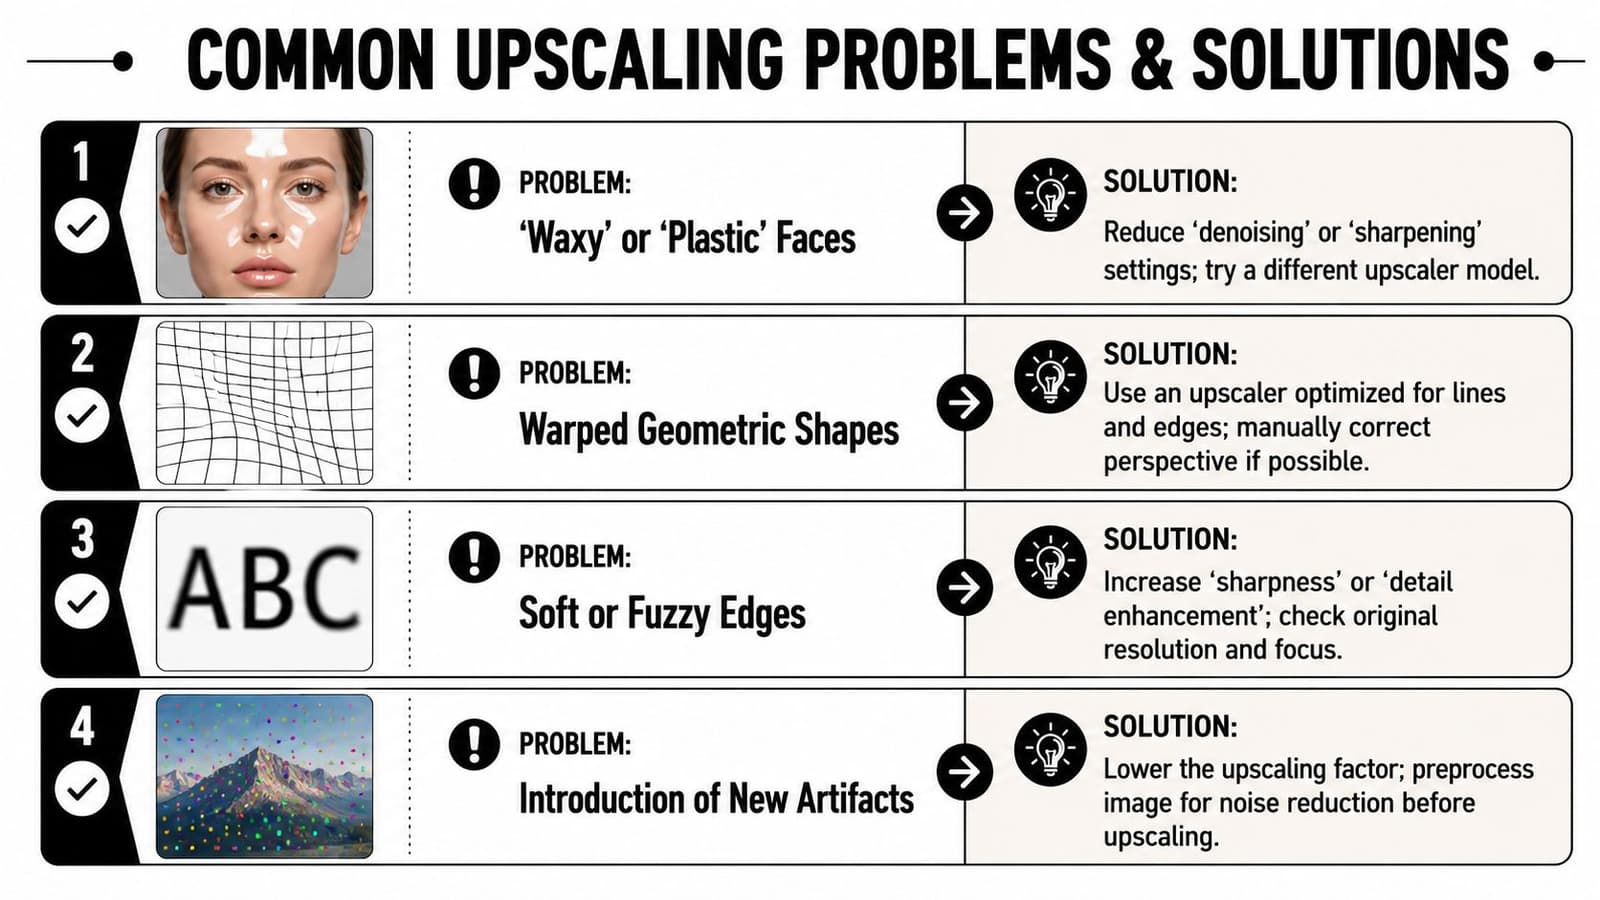
A few common failures show up again and again:
- Plastic skin: Usually caused by too much denoising or a face model that smoothed away age and pore structure.
- Warped details: Clothing weaves, jewelry, eyeglass rims, and wallpaper patterns can bend or melt.
- Soft edges after enlargement: The file got bigger, but not clearer. This often means the source didn't contain enough usable information for the chosen settings.
- New artifacts: Speckles, swirls, false hair strands, and synthetic textures appear where the model had to guess.
A useful response isn't always “try harder.” Sometimes it's “back off.” Lower the upscale factor. Use a milder model. Keep the original texture. Repair only the parts that distract.
When not to upscale
This is the question more guides should answer. Some images should not be pushed very far at all, especially if they're headed into motion. Community reports in video-focused discussions found that 42% of users saw visible pixelation or “swirly” artifacts after upscaling low-res phone captures for video projects, and 95% of guides omitted that risk (community discussion of upscaling artifacts in video use).
That lines up with real-world experience. A softly restored original can animate more gracefully than an aggressively “improved” one. Slow camera movement, gentle parallax, and careful tone work often carry a memory better than forced detail does.
If enhancement changes the person more than it helps the picture, stop enhancing.
This is especially true for memorial montages. Families don't judge those clips like lab tests. They respond to expression, familiarity, and feeling. If a lighter touch preserves those better, that lighter touch is the correct professional choice.
If you want to turn a restored photo into a short moving keepsake, Photo for Video makes that last step simple. You upload one treasured image, describe the motion and tone you want, and get a polished clip designed for birthdays, memorials, anniversaries, and family tributes. It's a strong fit when you want gentle movement that respects the original texture instead of overpowering it.