Mixing Songs Together for Tribute Videos: Steps That Work
Learn how to start mixing songs together for memorial, birthday and keepsake videos: transitions, tempo limits, loudness levels and export settings.

You've chosen the photos, found the songs your family associates with them, and reached the awkward part: the music change. The next chorus starts before the previous singer finishes, the bass suddenly gets louder, and the transition sounds pasted together even though the beats line up.
Mixing songs together for a tribute video isn't primarily a DJ exercise. It's an editing job: protect the words, preserve the character of each recording, and choose a handoff that suits the pictures. Beatmatching helps only when it serves those priorities.
Table of Contents
- Choose and Prepare Songs Before You Blend
- When Tempo Matching Starts to Sound Wrong
- Pick a Transition Style Before You Edit
- How to Align and Crossfade Two Songs
- Level and EQ Each Blend So It Stays Smooth
- Place Transitions Around Lyrics and Key Moments
- Export the Montage and Confirm Rights Before Posting
Choose and Prepare Songs Before You Blend
Prepare song sections, not an entire playlist. A familiar recording may belong in the tribute without needing its opening verse, repeated chorus, or extended ending.
-
Choose by lyrical meaning. Write down the line that belongs with each visual moment, then identify a usable passage around it. Listen beyond the hook: a cheerful chorus can follow a verse whose meaning doesn't fit the occasion.
-
Find stems when available. Stems are separate files for elements such as vocals, drums, bass, and other instruments. A vocal stem lets you remove a competing singer without silencing the accompaniment; with a stereo recording, you'll need to work around everything already mixed into it.
-
Mark useful entrances and exits. Label the intro, chorus, passages without vocals, and outro in Audacity, REAPER, or your video editor. Keep extra audio around each candidate section so you can adjust the edit without importing the song again.
-
Check the actual files. Listen for clipped peaks, hiss, warbling, and abrupt endings before building the montage. Replace a damaged download where possible; aggressive noise reduction can turn a warm family recording into metallic, watery audio.
Make the trimming decisions before arranging
Say you're combining an older ballad, a modern pop chorus, and a closing section with no vocals. Keep the ballad's recognizable opening and its meaningful refrain, discard the repeated verse, then enter the pop song at a clean pickup rather than halfway through a sentence.
Use the closing section beneath the final photographs and dedication. A brief recognizable introduction can establish a song more efficiently than a full verse, leaving room for the images rather than forcing them to fill time.
For the visual setup, the guide to adding music to photos can help you organize the picture-and-audio workflow.
Before opening the editing session, check:
- Source format: Stems or a complete stereo mix.
- Usable passage: A marked entrance, meaningful middle, and workable exit.
- Audio condition: No unresolved clipping or distracting damage.
- File organization: A named folder for each song's original file and prepared version.
When Tempo Matching Starts to Sound Wrong
The familiar advice to choose songs within roughly ±5 BPM, discussed in DJ.Studio's audio-quality guide, doesn't tell you whether the resulting stretch will sound natural. An acceptable change on a drum loop can damage an exposed singer.
Time-stretching changes duration without intentionally changing pitch. Key-lock processing performs a related job during tempo adjustment, but neither guarantees that the original texture survives.
Listen for a vowel that develops a watery edge, a piano note that seems to wobble, or cymbals that lose their crisp attack. Reverb tails can become grainy even while the beat grid looks perfect. The processing algorithm, the recording, the direction of the adjustment, and the playback system all affect what you hear.
Use a listening guide, not a percentage guarantee
The following table deliberately uses audible outcomes rather than universal percentage limits. A fixed cutoff would suggest a reliability that different songs and stretching engines don't provide.
Tempo and key gaps and what to do with them
| Tempo or key gap | Likely result | Action |
|---|---|---|
| Small tempo adjustment | May remain transparent, especially in percussion-led material | Stretch provisionally and align downbeats |
| More noticeable tempo adjustment | Sustained vocals and cymbals can expose processing | Compare the processed vocal and cymbals against the original |
| Half-time or double-time match | The underlying pulse can relate without changing playback speed | Align the appropriate rhythmic grid without stretching |
| Key difference requiring vocal pitch-shifting | The singer's tone may become less natural | Keep the original key and change the transition style |
Half-time and double-time relationships are useful because the software's BPM label isn't the groove itself. A slower song can share a practical pulse relationship with a faster recording even when their displayed tempo values look far apart. Count the accents and listen to the phrasing before forcing either file to change speed.
Test the exposed material first
Start with the lead vocal, not the drums. Alternate between the original and processed passage at comparable listening levels, paying attention to sustained words and breaths.
Then isolate your attention on cymbals, snare attacks, and any solo instrument. A transition can sound passable in a dense chorus but reveal unstable attacks when the arrangement thins out.
Use this decision sequence:
- Vocal stays natural: Continue testing the overlap.
- Percussion loses definition: Try a different stretch mode or reduce the adjustment.
- Either remains damaged: Shorten the overlap, use a breakdown, or abandon continuous beat alignment.
- Harmony requires obvious vocal manipulation: Preserve the recording and choose a less exposed handoff.
Don't pitch-shift just because a key-analysis display suggests compatibility afterward. Automated key labels are starting points, and a corrected label doesn't prove that the singer still sounds convincing.
A perfect beatmatch that blurs an important lyric is worse than a clean cut that leaves the words intact.
Pick a Transition Style Before You Edit
Choose the transition technique before dragging clips together. The useful question isn't whether you can synchronize the songs. It's whether the handoff contains material that should overlap.
A cut requires little shared musical information. A sustained blend requires compatible rhythm, harmony, arrangement, and space for the listener to follow what matters.
Transition styles compared for montage work
| Transition style | Best for | Two vocals in the handoff | Tempo tolerance |
|---|---|---|---|
| Hard cut on a phrase end | Sharp photo changes that land on an intentional musical boundary | Safe when the cut removes overlap | Any gap, provided the change feels deliberate |
| Short equal-power crossfade | Harmonically compatible passages with a clear lead voice | Risky when both singers remain audible | Wider gaps can work when percussion isn't exposed |
| Instrumental bridge | Montages joining vocal songs | Solved by keeping the bridge free of competing lyrics | Broad tolerance |
| Breakdown handoff | Celebration reels with a natural drop in arrangement | Safe if the selected breakdown has no lead vocal | Useful when the beat temporarily disappears |
| Long beatmatched blend | Upbeat, instrumental-heavy montages | Poor when both lead vocals remain prominent | Requires a compatible pulse and acceptable processing |
Let the vocal arrangement make the decision
A crossfade isn't automatically gentler than a cut. When different singers deliver different sentences simultaneously, the listener has to choose which voice to follow. Lowering both tracks often leaves an indistinct jumble rather than a tasteful transition.
If both handoff passages contain lead vocals, choose a cut or a bridge with no sung lines. If either passage has no vocals, audition a crossfade. If neither contains exposed lyrics and the rhythms cooperate, a longer blend becomes a reasonable option.
A bridge without vocals can come from the incoming song's intro, the outgoing song's accompaniment stem, or another appropriately licensed passage. Keep it musically purposeful; inserting unrelated background music just to hide an edit can create another mood change to solve.
Match the technique to the pictures
A hard cut works well when the picture also changes decisively, such as moving from childhood photographs to an adult celebration. A breakdown handoff suits a moment when the visuals pause or the story changes direction.
For fast visual edits, Clipoven's guide to create smoother cuts for TikTok offers useful picture-transition ideas. Apply them selectively to keepsakes: an effect that suits an energetic reel may distract from a quiet remembrance.
Write the chosen technique beside each song change on your storyboard. Note the outgoing lyric, incoming sound, and associated photo change so you're solving an editorial decision rather than experimenting blindly with overlapping clips.
How to Align and Crossfade Two Songs
Work in a timeline editor that gives you independent track gain, automation, EQ, and a mono monitoring option. REAPER, Adobe Audition, and other multitrack editors provide those controls; a basic video editor may handle simple fades but offer less precise audio repair.
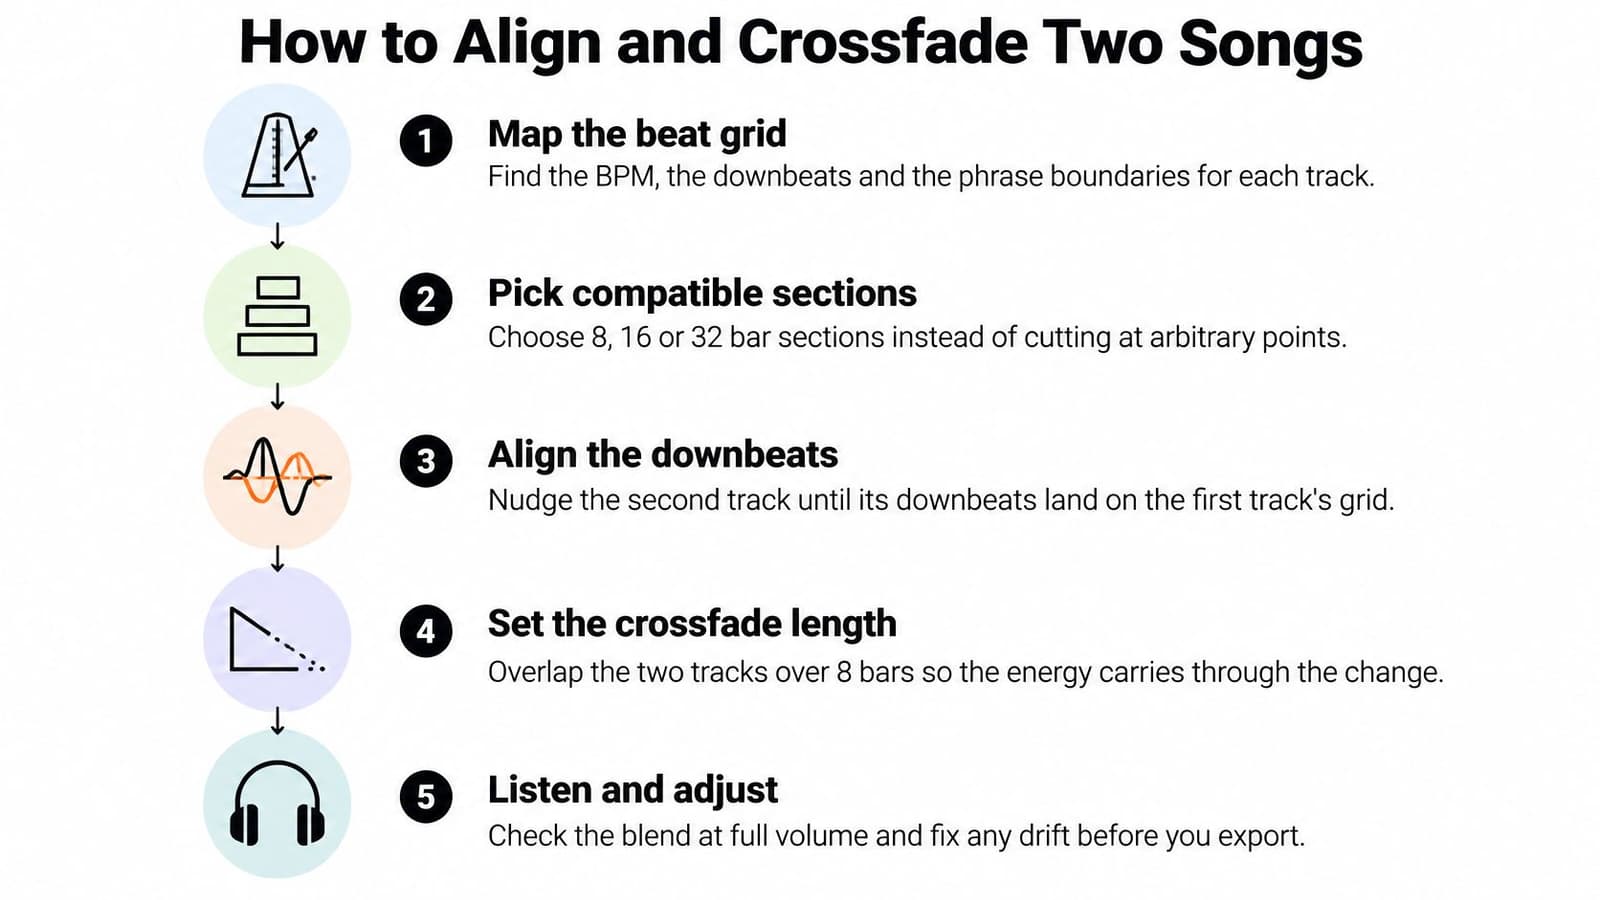
Use this visual overview for the grid-and-alignment portion of the job. Treat its illustrated overlap as an example, not a required fade length.
Build the handoff in the timeline
-
Map the beat grid. Analyze BPM, then listen and tap along to confirm the result rather than accepting the detector automatically. Locate the downbeat, meaning the beginning of the musical bar, and mark phrase boundaries where the arrangement repeats or changes.
-
Choose compatible sections. Match the musical function of the passages: an ending phrase into an introduction usually makes more sense than a chorus chopped into an unrelated verse. Count complete phrases and retain the incoming pickup when it belongs to the melody.
-
Align the downbeats. Place the incoming track beneath the outgoing track and nudge it until the intended accents line up. Preserve pitch if you stretch, and keep an unprocessed copy available so you can compare the handoff without rebuilding it.
-
Audition in mono and on headphones. Listen for flamming kicks, where closely spaced attacks sound like an accidental double hit, and for bass that becomes hollow or unusually swollen. Mono checking exposes cancellation that a wide stereo presentation can disguise.
-
Automate the crossfade. Start with an equal-power curve, then adjust its shape by ear rather than assuming the preset is finished. Keep exposed words out of the overlap and extend the fade only when the arrangement gives it room.
-
Clear space for the incoming bass. Automate a high-pass filter on the incoming track while the outgoing bass still carries the transition. Raise the cutoff only enough to remove competing low-frequency weight, because excessive filtering can make the entrance sound distant.
-
Restore the incoming low end. Lower or bypass that filter as the outgoing bass leaves. Listen through the entire move to make sure the new song becomes full-bodied without a sudden bass surge.
-
Place the change against a visual event. Use a photo replacement, text reveal, or deliberate motion accent as the visual anchor. The guide to syncing audio with video is useful when a musical edit works alone but feels misplaced against the picture.
-
Preview the complete rendered file. Play through the transition with the surrounding photographs, not just a tightly looped audio selection. Encoding and phone playback can reveal clicks, brief gaps, or level changes that weren't obvious inside the session.
Fix the common failure before adding effects
The main pitfall is overlapping full-range mixes. Matching BPM doesn't stop competing kick drums and bass lines from producing muddy attacks, and adding compression afterward can make that congestion more obvious.
Practical rule: Give the low end a clear owner during the handoff instead of letting both recordings carry full bass throughout.
If you hear a click, inspect the clip boundary for a waveform discontinuity. Move the edit toward a zero-crossing and add or reshape a tiny boundary fade; if an unnecessarily long overlap catches an unwanted attack, shorten it.
Don't try to disguise a poor boundary with a wash of reverb. That often leaves the click intact while making the next phrase less intelligible.
For a moving demonstration alongside the timeline work, use the video below.
Level and EQ Each Blend So It Stays Smooth
Measure the sources, balance them with clip gain, and normalize the assembled sequence only after the edits and narration are settled. Matching waveform height or peak-meter readings won't make recordings sound equally loud.
A dense pop master can sound much louder than a spacious acoustic recording even when their highest peaks match. Adjust their perceived relationship at the transition, not just their individual meter readings.
Use measurements to support the listening decision
The EBU R 128 recommendation sets a general integrated Programme Loudness target of -23.0 LUFS, with a typical tolerance of ±1.0 LU when the target can't be achieved exactly. Treat this as a broadcast reference, not an automatic target for every online destination.
Loudness and peak references for montage exports
| Reference | Value or working rule | Why it matters |
|---|---|---|
| Integrated loudness target | Use the broadcast reference above only when appropriate to the destination | Establishes a whole-program benchmark |
| True-peak ceiling | Leave headroom for encoded delivery | Reduces the risk of inter-sample clipping |
| Loudness range | Measure it; don't force a fixed target | Shows whether quiet moments retain contrast |
| Relative gate | Use the meter's standards-compliant integrated measurement mode | Prevents long quiet passages from dominating the reading |
| Clip gain | Set per source before compression | Balances songs without flattening their dynamics |
| Final QC reading | Integrated LUFS and true peak on the rendered MP4 | Checks the file the audience will actually hear |
Check the destination's current delivery requirements and write your chosen target in the project notes. Don't assume every social platform, screening system, or family playback device expects the same master.
Correct balance before compressing
Apply clip gain to bring the selected passages into a sensible relationship. Compress only where an uneven source needs control, and bypass the compressor regularly to check that you haven't removed the expression you wanted to preserve.
Use broad, restrained EQ adjustments when recordings have sharply different tonal balances. A bright modern chorus following a dark archival recording may need a modest tonal compromise, but trying to make them identical can damage both.
Watch these failure points:
- Peak-only matching: Similar peaks can conceal very different perceived loudness.
- Heavy source compression: A quiet remembrance loses impact when every passage is equally dense.
- Uncontrolled overlap gain: Even an equal-power preset needs checking because the recordings may still produce a noticeable swell.
For evaluating subtle tonal changes, DigiDevice's guide to reference headphones for home studio producers can help you choose a monitoring approach. Keep consumer playback checks as well; accurate headphones don't replace listening on the devices relatives will use.
Render the MP4, measure integrated loudness and true peak again, and inspect the loudest short-term passage. Approve the result only when it sounds balanced without requiring the listener to reach for the volume control.
Place Transitions Around Lyrics and Key Moments
A downbeat is a convenient edit point, not an instruction. A musically neat change can still interrupt the sentence that makes a photograph meaningful.
Sound On Sound's discussion of mix mistakes provides useful context for arrangement and buildup decisions. For keepsakes, judge those decisions by what the audience needs to hear and feel.
Mark each storyboard change using these categories.
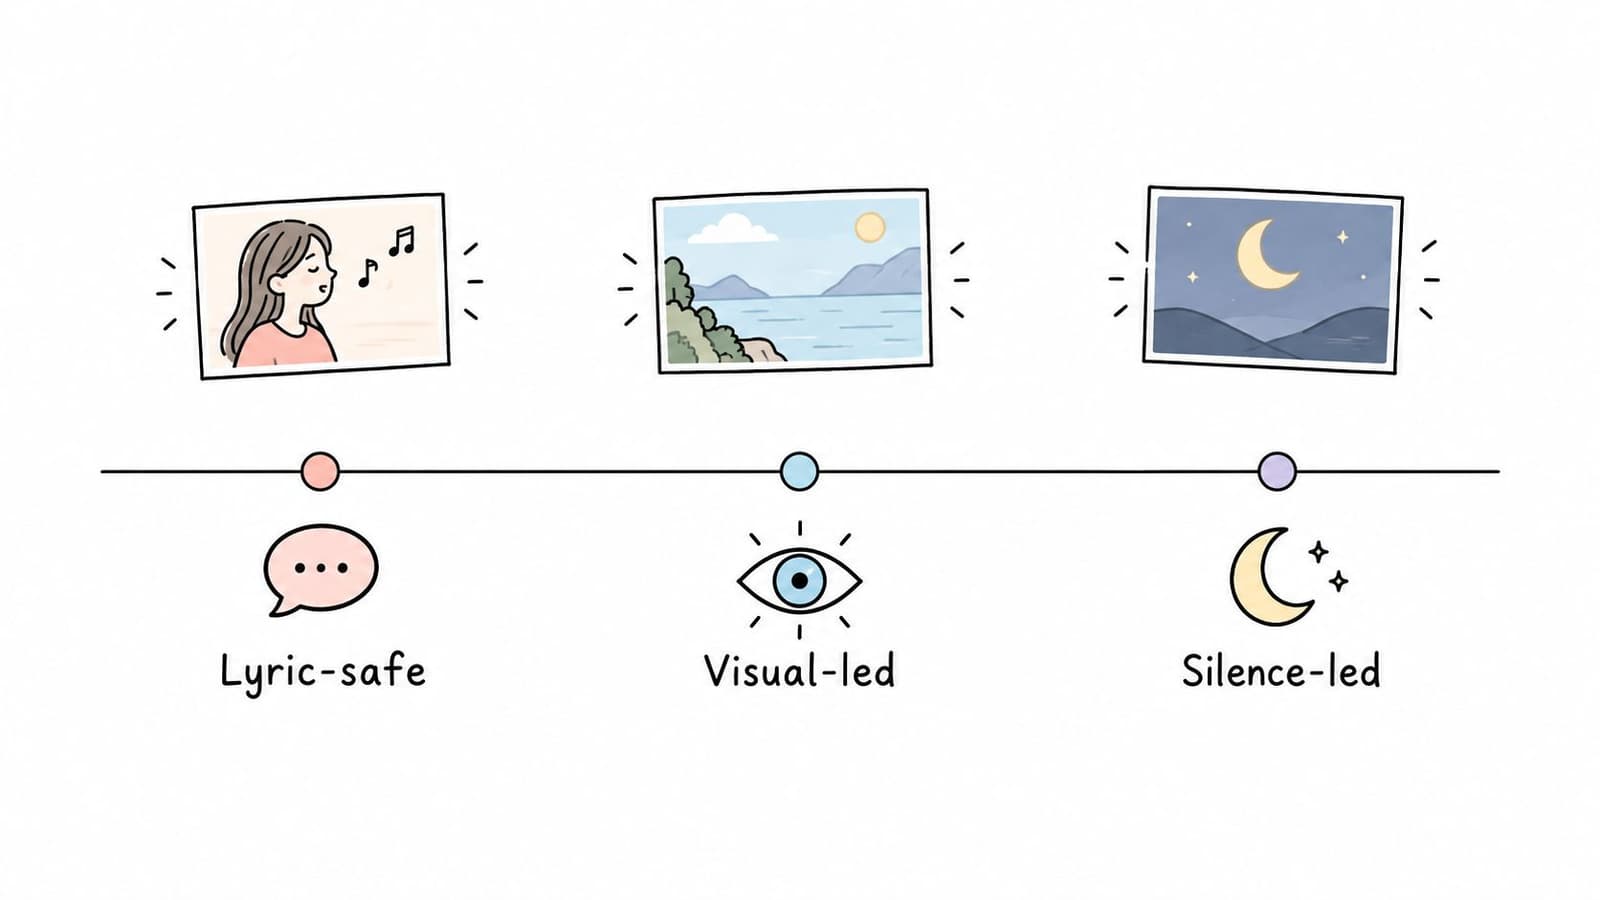
- Lyric-safe: Let the meaningful line finish over a childhood photograph before changing songs. Don't cut the sentence merely because the next image is ready.
- Visual-led: Place the entrance on a reveal or picture change when no important lyric competes with it.
- Silence-led: Let the final word and its decay settle before introducing a memorial name card. Listen for a natural breath rather than applying a fixed pause.
Reserve room for the emotional peak
Don't spend the strongest chorus on the opening photographs unless the story genuinely calls for it. Start with recognition, develop the relationship, and reserve the most emotionally complete moment for the part of the montage that earns it.
Duck music beneath spoken dedications using gain automation that begins before speech. When the mood changes sharply, a backing track without vocals can provide breathing room without asking the audience to follow competing lyrics.
Export the Montage and Confirm Rights Before Posting
Bounce a lossless stereo master, then encode the delivery MP4 using the destination's recommended audio settings. Keep the master so you can make another delivery version without repeatedly compressing an already compressed file.
Play the rendered video on phone speakers, earbuds, and a TV, then recheck true peak after encoding. Remove watermarks where your tool permits it, and approve the exported file rather than relying on the editing preview.
Export and rights checks by use case
| Use case | Audio export | Rights point to verify |
|---|---|---|
| Private family keepsake shared only with relatives | MP4 checked on phone and TV | Confirm the source license; private sharing isn't blanket permission |
| Public social post or reel | MP4 checked on phone speakers | Check platform coverage and track-specific restrictions |
| Memorial service screening in a venue | Export tested on the venue system | Ask who handles screening and public-performance permissions |
| Monetized or ecommerce video | Destination-compatible export | Verify permission for commercial use of the recording and composition |
Keep permission records with the project
This isn't legal advice. Podmuse's guide to sync and master rights for podcasts introduces useful rights terminology, but video use needs its own permissions check.
Confirm every track's license for the exact use and retain the record. For the picture workflow, consult the guide to combining animation and music before assembling the final version.
Photo for Video turns a still family photograph into a gently animated MP4 clip that you can place in your tribute timeline. Visit Photo for Video to create a moving keepsake, then pair it with a carefully chosen musical passage and a handoff that keeps the words clear.