Old Photo Enhancement: A Step-by-Step Guide for 2026
Learn the complete old photo enhancement workflow. Our guide covers scanning, repair, AI colorization, and preparing old photos for beautiful animations.
You're probably here with a photo that matters more than its paper quality suggests. Maybe it's a wedding portrait with silvering at the edges, a childhood snapshot with a crease through someone's face, or the only decent picture of a grandparent you want to include in a memorial or anniversary video.
That's why old photo enhancement deserves more care than a one-click filter. The job isn't to make an old image look newly shot on a phone. It's to preserve the memory, repair what distracts from it, and keep the character that makes it feel real. In practice, the strongest restorations still look historical. They just look better cared for.
I treat the first step as essential. Get the best digital copy you can before you edit anything. For archival work, a dedicated scanner beats a phone capture because the scan becomes the foundation for every later decision. If the file starts soft, compressed, or poorly lit, every AI tool and every manual fix has less to work with. That matters even more if you want to animate the photo later, because motion makes bad restoration choices easier to see.
Table of Contents
- Introduction Bringing Faded Memories Back into Focus
- Start with a High-Quality Digital Scan
- The Art of Manual Photo Repair
- Smart Restoration with AI Enhancement Tools
- Preserve Analog Texture and Authenticity
- Prepare Your Photo for Animation and Archiving
- Conclusion Your Restored Memory Is Ready
Introduction Bringing Faded Memories Back into Focus
The search for old photo enhancement doesn't typically stem from a desire for technical perfection. It begins with the wish to bring a person back into view. The face is there, but faded. The pose is there, but scratched. The feeling is there, but buried under damage.
That emotional part matters because it changes how you edit. If you restore a family photo like a product shot, you'll often push it too far. Skin gets waxy. Contrast gets harsh. Grain disappears. The image becomes clean, but it stops feeling like the photograph everyone remembers.
Old photos carry two kinds of information at once. The subject in the frame, and the age of the object itself.
A strong restoration respects both. You remove the tear crossing a smile. You correct the yellow cast that came from age. But you don't erase every trace of film grain, paper softness, or tonal gentleness if those qualities belong to the memory.
That balance becomes even more important when you want to animate the image later. A still photo can hide overprocessing. Motion exposes it. Faces that look acceptable in a static frame can turn stiff or synthetic once a camera move or subtle facial motion is added. That's why the best workflow starts slowly, with a careful scan, then manual repair, then selective AI help, then a final pass for authenticity.
Start with a High-Quality Digital Scan
A common mistake happens before any restoration begins. Someone spends an hour fixing scratches and faded tones, then realizes the scan was too small, too compressed, or too aggressively auto-corrected to hold up. At that point, every repair starts fighting the file instead of helping the photograph.
Scan quality sets the limits of the whole job. A clean, information-rich scan gives you room to repair damage, preserve paper texture, and prepare the image for animation without turning faces plastic or surfaces unnaturally smooth.
Why the scan matters so much
For printed photographs, start with a flatbed scan at 600 dpi or higher and save it as TIFF if your scanner allows it. That file gives you far more editing latitude than a small JPEG from a phone or printer app. Fine cracks, silvering, paper fibers, and soft edge transitions survive the scan, which matters later if you want the restored image to keep its age instead of looking freshly generated.
Negatives and slides need more resolution than prints. They hold detail in a much smaller area, so a low-resolution capture throws away information you cannot accurately rebuild later. If the end goal includes subtle motion, such as a slow push-in, blinking portrait, or gentle head turn, that missing detail becomes obvious fast.
If you want a practical setup guide before restoration, this walkthrough on how to scan old photos for better restoration results covers the basics well.
Scanner settings that preserve flexibility
Scanner software often tries to be helpful. For restoration work, that help usually gets in the way.
Turn off auto contrast, auto color, dust removal, face enhancement, and similar one-click fixes when possible. Those tools often clip highlights, over-sharpen edges, smear grain, or flatten the quiet tonal softness that gives an old print its character. A neutral scan may look dull at first, but dull is workable. Overprocessed is harder to reverse.
Use these settings as a baseline:
- Save a master file as TIFF: Keep one untouched archival scan before any edits.
- Scan in color, even for black-and-white prints: Old paper staining, selenium shifts, and edge discoloration are easier to judge and correct from a color file.
- Include the full print border: Deckled edges, mount corners, and handwritten marks can help with dating, cropping, and historical context.
- Avoid scanner “cleanup” modes: Manual repair later is slower, but it preserves control over texture and facial detail.
- Use higher resolution for small originals: Wallet prints, contact prints, negatives, and slides benefit from extra capture resolution because every millimeter counts.
The best scan often looks flat, gentle, and slightly boring. That is exactly what a restorer wants.
When a phone capture is good enough
Phone capture has a place, especially with fragile album pages, curled prints under glass, or family collections you need to document quickly during a visit. It is a practical fallback, not a disaster.
Keep the camera parallel to the photo, use even side lighting, and avoid overhead glare. Brace the phone, shoot at the highest resolution available, and do not let the camera app apply heavy filters or portrait effects. Expect more cleanup afterward, especially around perspective, reflections, and edge sharpness.
For a one-of-one family photo, I still recommend making a proper scan when you can. The difference shows up later in small areas people care about most. Eyelashes, uniform fabric, handwriting on the border, and the natural grain that helps an animated restoration still feel like the original photograph.
The Art of Manual Photo Repair
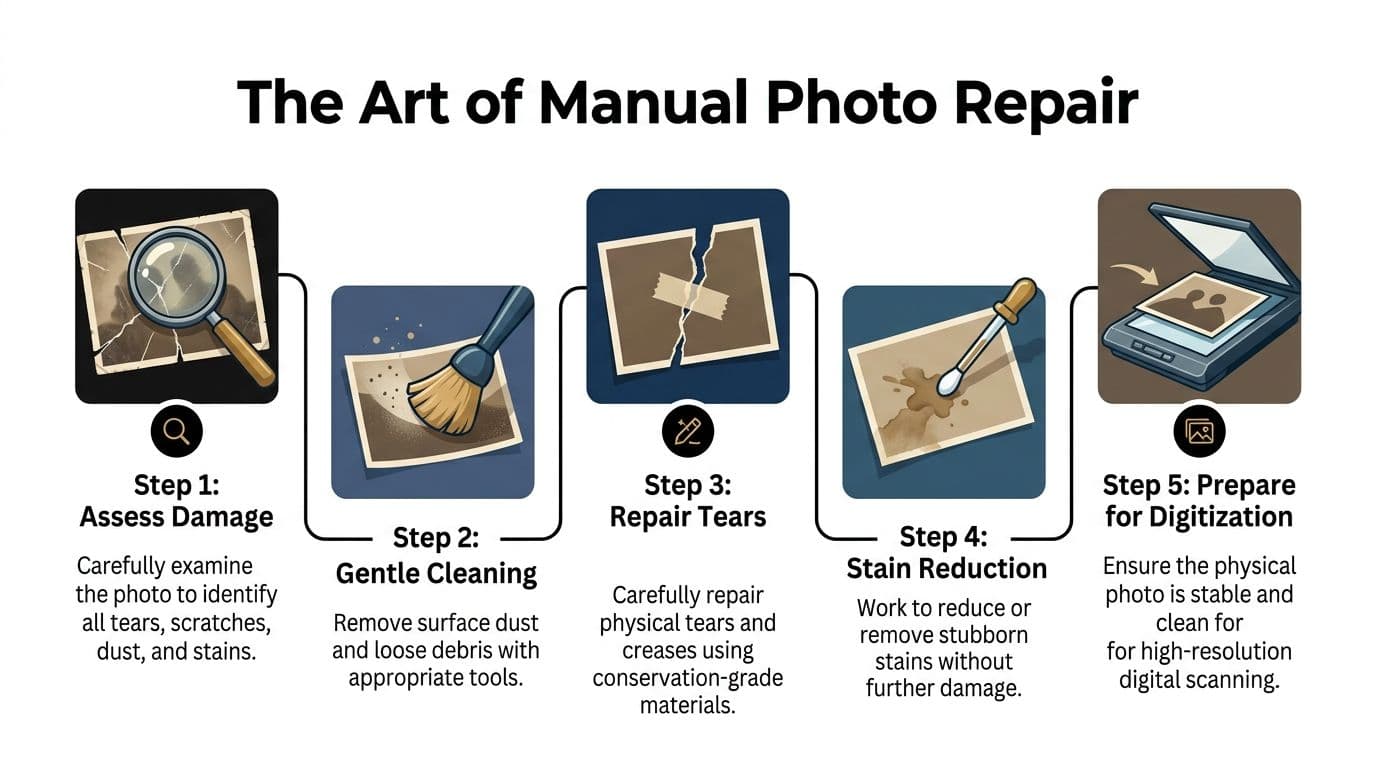
A good manual repair does more than hide damage. It protects the small visual cues that make an old photograph feel real. The nap of a wool coat, the soft grain in a studio backdrop, the slight unevenness in a hand-cut print border. Those details matter twice, once for historical character and again when you later prepare the image for motion.
Fix shape before surface damage
Start by making the photograph sit correctly in the frame. Straighten it, correct skew, and crop with restraint. If the face is subtly tilted because the scan is off, every repair afterward looks less trustworthy, even when the retouching is careful.
Then repair the big structural breaks first. Folds, torn corners, cracked edges, and missing chunks affect how light and texture flow across the image, so they need to be rebuilt before you chase specks and hairline scratches. Color and tonal correction come after the structure is stable. If the scan is tiny or soft, it also helps to understand how to improve a low-resolution photo before detailed retouching, because every repair decision gets harder when the source lacks clear edge information.
Why Clone comes before Healing
Clone establishes structure. Healing blends it.
That order prevents the muddy, smeared look that shows up when healing tools are asked to invent too much. For a crease across a cheek, I rebuild the edge and tone with Clone first, then use Healing in short passes to settle the transition. The same approach works on jacket seams, hairlines, and torn background areas where pattern continuity matters.
A practical sequence looks like this:
- Use Clone Tool for the large break or missing form.
- Use Healing Brush for dust, fine scratches, and minor transition cleanup.
- Check the image at normal viewing size, not only while zoomed in.
Judge the repair at the size people will actually see. A fix that looks perfect at 300 percent can still look artificial in the full portrait.
The mistake people notice first
Repeated texture gives away amateur retouching faster than almost anything else. A copied patch of skin repeats. A fabric weave appears twice. A blurred area spreads across a face and erases the original photographic feel.
The fix is disciplined sampling. Pull from nearby areas with similar brightness and grain. Change brush size often. Rebuild larger damaged areas in small sections so the surface stays irregular in a natural way. Around eyes, lips, lapels, jewelry, and hair, protect the edge first and soften only after the shape reads correctly.
Restraint matters here. Old photos were not born clinically clean, and they should not come back looking plastic. The goal is a repaired photograph that still feels printed, handled, and lived with. That analog texture is part of the memory, and preserving it gives you a stronger foundation if you later animate the image without turning it into a synthetic remake.
Smart Restoration with AI Enhancement Tools
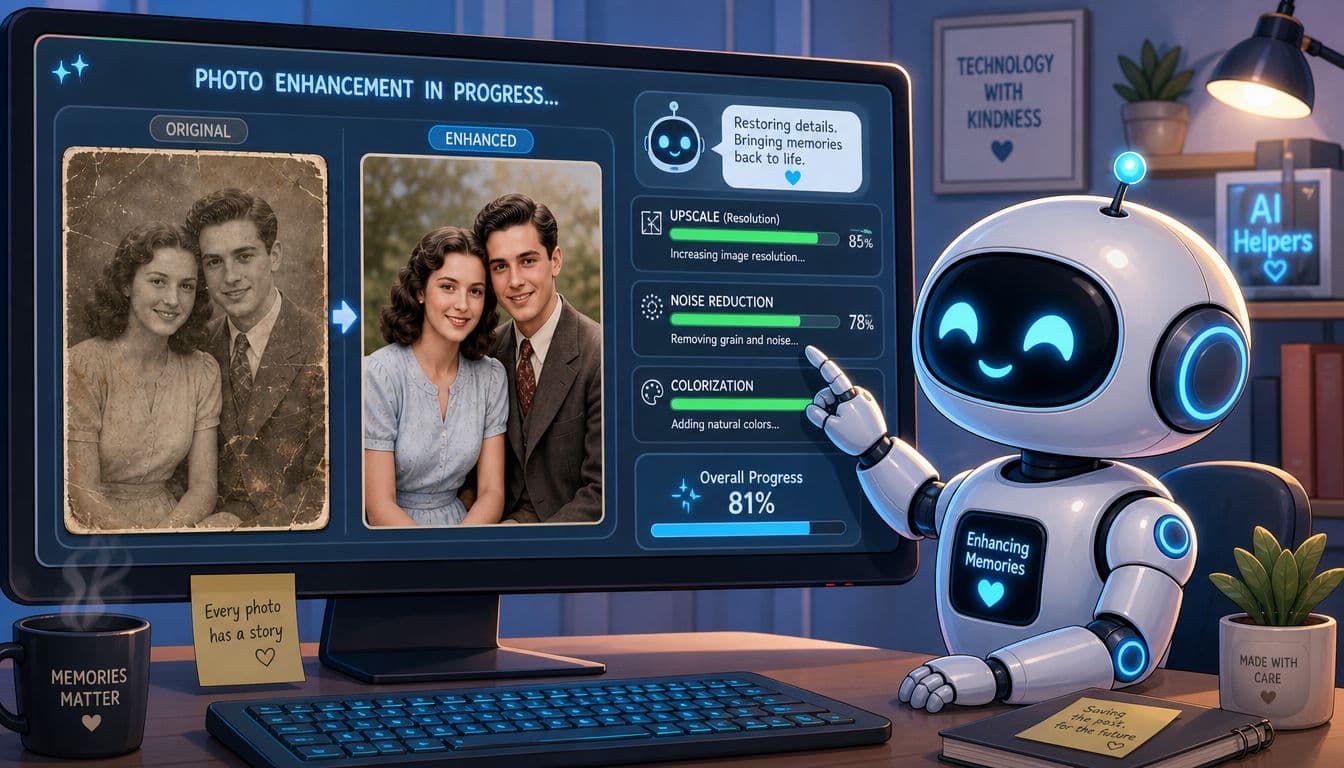
A common turning point comes after the manual cleanup looks solid at 100 percent, but the face still feels a little soft and the print still carries years of fading. That is the moment to bring in AI. Used carefully, it can recover clarity and save time on repetitive correction. Used carelessly, it rewrites features, invents texture, and strips away the age that makes the photograph feel real.
Use AI for its strengths
The best results come from a hybrid workflow. Run AI after the scan is clean and the major tears, dust, and shape problems are already repaired by hand. Then judge the output against the original print, not against the software preview alone.
AI is particularly good at three jobs. It can clarify soft edges, rebuild modest facial definition, and reduce the flat haze that often sits over old scans. It is much less reliable when large areas are missing or when the model has to guess at identity. Eyes drift. Teeth become generic. Fabric patterns turn into invented detail.
If the file starts very small, create a better working file before asking restoration tools to invent detail. This guide to turning low-resolution images into higher-resolution working files helps set realistic expectations before you push enhancement too far.
Keep faces believable
Portraits are where heavy AI processing fails fastest. Family members may not know why a restored face feels wrong, but they notice it immediately. The expression changes by a few percent. The mouth tightens. The eyelids sharpen in a modern way that does not belong to the original print.
I treat face enhancement as a light pass, then compare it side by side with the source. If the person starts looking younger, smoother, or more symmetrical than the original photograph suggests, the setting went too far. A believable restoration should recover presence, not create a new sitter.
Color needs the same restraint. Automatic colorization can be useful for previewing possibilities, but it often pushes skin, lips, and clothing toward tidy modern palettes. For family archives, I would rather keep a black and white image honest than force color that feels guessed.
Later in the process, it helps to watch another restoration workflow in action and compare your instincts against a real edit:
What to check before you accept the result
A polished preview is not the same as a trustworthy restoration. Before exporting, inspect these areas:
| Checkpoint | What good looks like | What bad looks like |
|---|---|---|
| Skin texture | Natural variation remains | Plastic smoothing, waxy cheeks |
| Eyes and teeth | Defined but believable | Brightened into a pasted-on look |
| Tone and contrast | Full range without losing the original mood | Chalky highlights or blocked shadows |
| Background texture | Quiet and consistent | AI-generated swirls or fake detail |
One final check matters if you plan to animate the photo later. Tiny AI mistakes that pass in a still image often become obvious once a face blinks or a camera move begins. Clean edges around eyes, lips, hairlines, and collars give animation tools a much better base. Overprocessed skin and invented texture tend to shimmer, warp, or separate from the original photograph once motion is added.
AI can speed up restoration. Judgment is still what protects the memory.
Preserve Analog Texture and Authenticity
The best old photo enhancement doesn't erase age. It edits age into something legible and dignified. That distinction matters because the emotional power of an old family image often lives in its softness, its grain, and the way time has touched it.
Why perfect often feels wrong
A heavily processed image may look “better” by modern software standards and still feel less true. Faces become too smooth. Contrast gets too aggressive. The original tonal gentleness disappears. The photo stops feeling inherited and starts feeling manufactured.
That's why I often leave a trace of the original texture on purpose. Not damage. Texture. Those are different things.
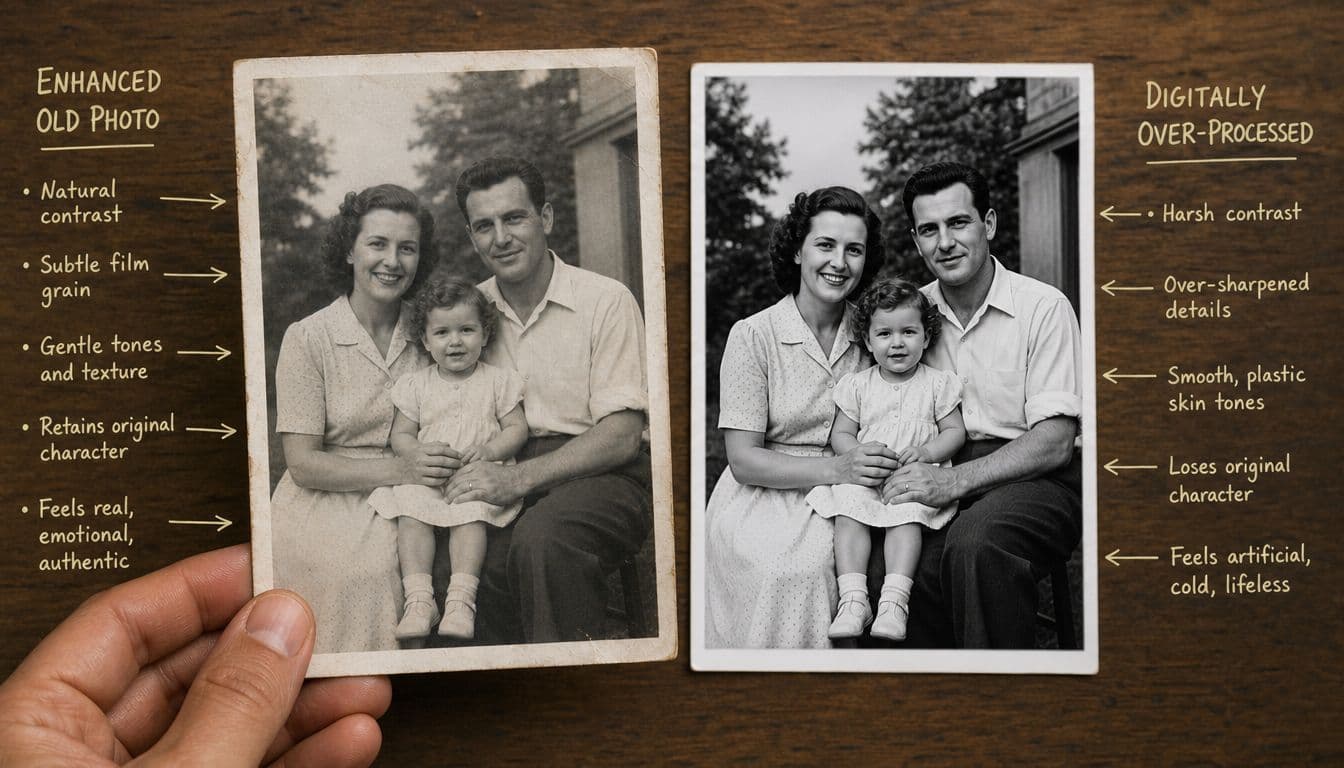
A useful insight from restoration practice is that experts sometimes add grain back after enhancement, with advice such as “add a slight bit of grain... maybe 20,” to avoid an overly digital look in this texture-preservation discussion on YouTube. That idea is easy to dismiss until you compare versions side by side. The cleaner version often feels emptier.
If you want reference ideas for what authentic vintage texture should look like, this guide to vintage film texture in modern image workflows can help train your eye.
A family photo doesn't need to look flawless to feel alive. It needs to look believable.
How to keep the era in the image
Preserving authenticity is mostly about selective restraint:
- Reduce noise where it distracts: Shadows usually tolerate cleanup better than skin and midtone texture.
- Leave some tonal softness: Old prints rarely need aggressive global contrast.
- Treat grain as part of the photograph: If AI strips it away, a subtle return of texture can restore emotional realism.
- Keep period cues: Slight fading, paper softness, and modest imperfection can support the image instead of hurting it.
This matters most in memorial and tribute work. When families respond strongly to a restored photo, it's often because it still feels like the photograph they knew from the album or frame. The restoration clarified the memory without modernizing it out of existence.
Prepare Your Photo for Animation and Archiving
A daughter restores her father's 1940s portrait, and the still image looks excellent on screen. Then she animates it. The skin turns waxy, the hairline shimmers, and the mouth movement draws attention to every shortcut taken during restoration. Animation is unforgiving in that way. It magnifies surfaces, edges, and invented detail.
That is why I treat animation prep as its own finishing pass, not as an export button at the end. A photo that will only be printed can tolerate small compromises. A photo that will blink, turn, or breathe on screen needs cleaner structure and more restraint. The goal is not maximum sharpness. The goal is believable movement that still feels like an old photograph.
What motion reveals that still images hide
The biggest problems usually come from over-repair. Strong face enhancement can erase the tiny tonal transitions that give cheeks, eyelids, and lips their shape. Once motion is added, those areas can slide or stretch in ways that feel synthetic. Evoto makes a similar point in its discussion of old photo restoration for animation-minded workflows. Good animation starts with a restoration that leaves enough real structure in place.

Before exporting, I check the image at 100 percent and look specifically for areas that tend to break once they move:
- Facial transitions: Skin should show gentle tonal change, not airbrushed flatness.
- Hair, collars, and ears: These edges need clear separation without hard cutout borders.
- Eyes and mouth: AI-made lashes, teeth, or lip lines often flicker when animated.
- Shadows: Keep enough depth in the face so motion tools have believable form to work with.
One sentence saves a lot of failed renders. If the restored face already looks slightly artificial as a still, motion will make it more obvious.
Export for sharing, animation, and long-term storage
Keep two digital versions from the start. One is the master file you protect. The other is the copy you send around to relatives, post in tribute videos, or load into animation software. That split prevents avoidable re-compression and gives you a clean file if you want to revisit the restoration later with better tools.
A practical setup looks like this:
| Use | Best file choice | Why |
|---|---|---|
| Archival master | TIFF | Preserves the restored image without JPEG compression loss |
| Easy sharing | JPEG | Small enough for email, messaging, and family group chats |
| Animation source | High-quality export from your restored master | Gives motion tools a cleaner base and reduces visible artifacts |
For archiving, metadata matters too. Add names, dates, location if known, and a short note about the relationship or occasion. Years from now, that information may matter as much as the image itself.
If you still have the physical print, store it in acid-free sleeves or archival boxes and keep it away from heat, moisture, and direct light. Digital restoration protects access. Proper storage protects the original object, including the paper texture, edges, and handwritten marks on the back that often carry family history of their own.
The best result is a restored file that can move gently on screen and an original that still survives as a historical artifact.
Conclusion Your Restored Memory Is Ready
A good restoration doesn't just clean a photograph. It gives the memory room to breathe again. The strongest results come from a careful scan, thoughtful manual repair, restrained AI help, and one final choice that many tutorials skip. Keep the analog texture that makes the image feel like history, not software.
That balance matters whether you're repairing one portrait for a memorial table or digitizing a whole family album. You're not only improving pictures. You're preserving evidence of people, relationships, clothing, places, and moments that may exist nowhere else.
When the work is done well, the photo looks clearer without losing its age. It feels more present without becoming artificial. And if you decide to animate it, the movement has a far better chance of feeling gentle and lifelike instead of processed.
The tools have improved. The core skill is still judgment.
When your restored image is ready, Photo for Video can turn that single still into a short living memory with gentle motion that respects the original texture and mood. It's especially useful for birthdays, memorials, anniversaries, and family tribute edits where a photo shouldn't just look better. It should feel present again.