Photo and Video Editing: Master Core Workflows 2026
Learn the fundamentals of photo and video editing. Our guide explains core workflows to turn treasured photos into beautiful, moving memories. Get started
You're probably here with a photo that matters more than its quality. It might be a faded wedding portrait, a scanned print from a shoebox, or the only decent picture you have of a grandparent. The face is there. The feeling is there. But the file itself is rough. Dust specks, paper grain, blur, low resolution, maybe a crease straight through the middle.
That's where a lot of advice on photo and video editing falls short. Most tutorials assume you're starting with a clean phone photo taken yesterday, not a family image scanned from decades ago. Yet 78% of users in the U.S. and EU report owning at least one digitized family photo from before 1990, and 64% of historical photo animations fail public trust tests due to over-smoothing, according to the Internet Archive finding summarized alongside broader archive-use data. People want motion and storytelling, but they don't want the original memory scrubbed into something glossy and artificial.
This guide takes the slower, more respectful route. You'll learn the difference between editing a single image and shaping a video, how to prepare old photos without erasing their character, how to build gentle motion that feels human, and how to think carefully about privacy and memorial use. The goal isn't to make an old photo look new.
It's to help it stay true while becoming easier to feel again.
Table of Contents
- From a Single Frame to a Living Memory
- Photo Editing vs Video Editing The Core Differences
- The Essential Photo Editing Workflow
- The Art of Video Editing and Storytelling
- How to Animate Photos into Short Video Clips
- Exporting Privacy and Ethical Considerations
- Your Next Steps in Photo and Video Editing
From a Single Frame to a Living Memory
A daughter opens a scan of her grandparents' wedding photo and zooms in. The print is faded. The whites have warmed with age. A crease runs through one side of the frame. Yet the first thing she notices is not the damage. It is her grandmother's expression, half formal and half amused, as if the photographer caught a private moment inside a public ceremony.
That is the main challenge with old family photos. You are not editing a clean digital file. You are caring for an object that has already lived a life in drawers, albums, wallets, and boxes. Its wear is part of the story.
Generic editing advice often misses that point. If you sharpen every edge, smooth every face, and add dramatic motion, the result may look polished but feel unfamiliar. The photo stops resembling a remembered print and starts resembling a modern reconstruction.
Old family photos rarely need perfection. They need careful judgment.
Editing a recent phone photo is usually about maximizing clarity. Editing a scanned print is closer to conservation work. You are repairing distractions and stabilizing tone while protecting the texture that makes the image believable.
That difference matters even more if the photo will be animated for a tribute or memorial video. A small camera move can create presence. Too much movement can make a quiet keepsake feel theatrical. The goal is not to prove what software can do. The goal is to let a still image breathe without stripping away its age.
Why old photos need a different mindset
Scanned prints come with problems that modern photos often do not. Dust, torn corners, silvering, uneven exposure from the scanner bed, and soft focus from the original print all stack together. Some of those flaws distract from the subject. Some are part of the photograph's character.
The hard part is knowing which is which.
A bent corner that pulls your eye away can be repaired. Fine grain usually should stay. A stain across a face changes the meaning of the image, so removing it helps the viewer return to the person. Slight paper softness may be worth keeping because it still feels true to the print you held in your hand.
What respectful editing looks like
In practice, respectful editing usually means three choices:
- Repair the damage that interrupts attention. Remove dust, scratches, scanner streaks, and marks that compete with the subject.
- Preserve the age that supports credibility. Keep natural grain, gentle softness, and the tonal character of the original print where possible.
- Animate with restraint. Use slow pans, subtle zooms, or light parallax only when they support memory and mood.
This approach can feel slower at first. It asks for patience instead of aggressive correction. But for family tributes, patience is often what protects the emotional truth of the image.
If generic tutorials have felt slightly wrong for your project, your instinct was probably right. Old scanned photos ask for restoration choices, not just visual improvements. They carry memory in the surface, and good editing respects that surface while helping the story come through.
Photo Editing vs Video Editing The Core Differences
Photo editing and video editing sit next to each other in most apps, but they ask you to think in different ways.
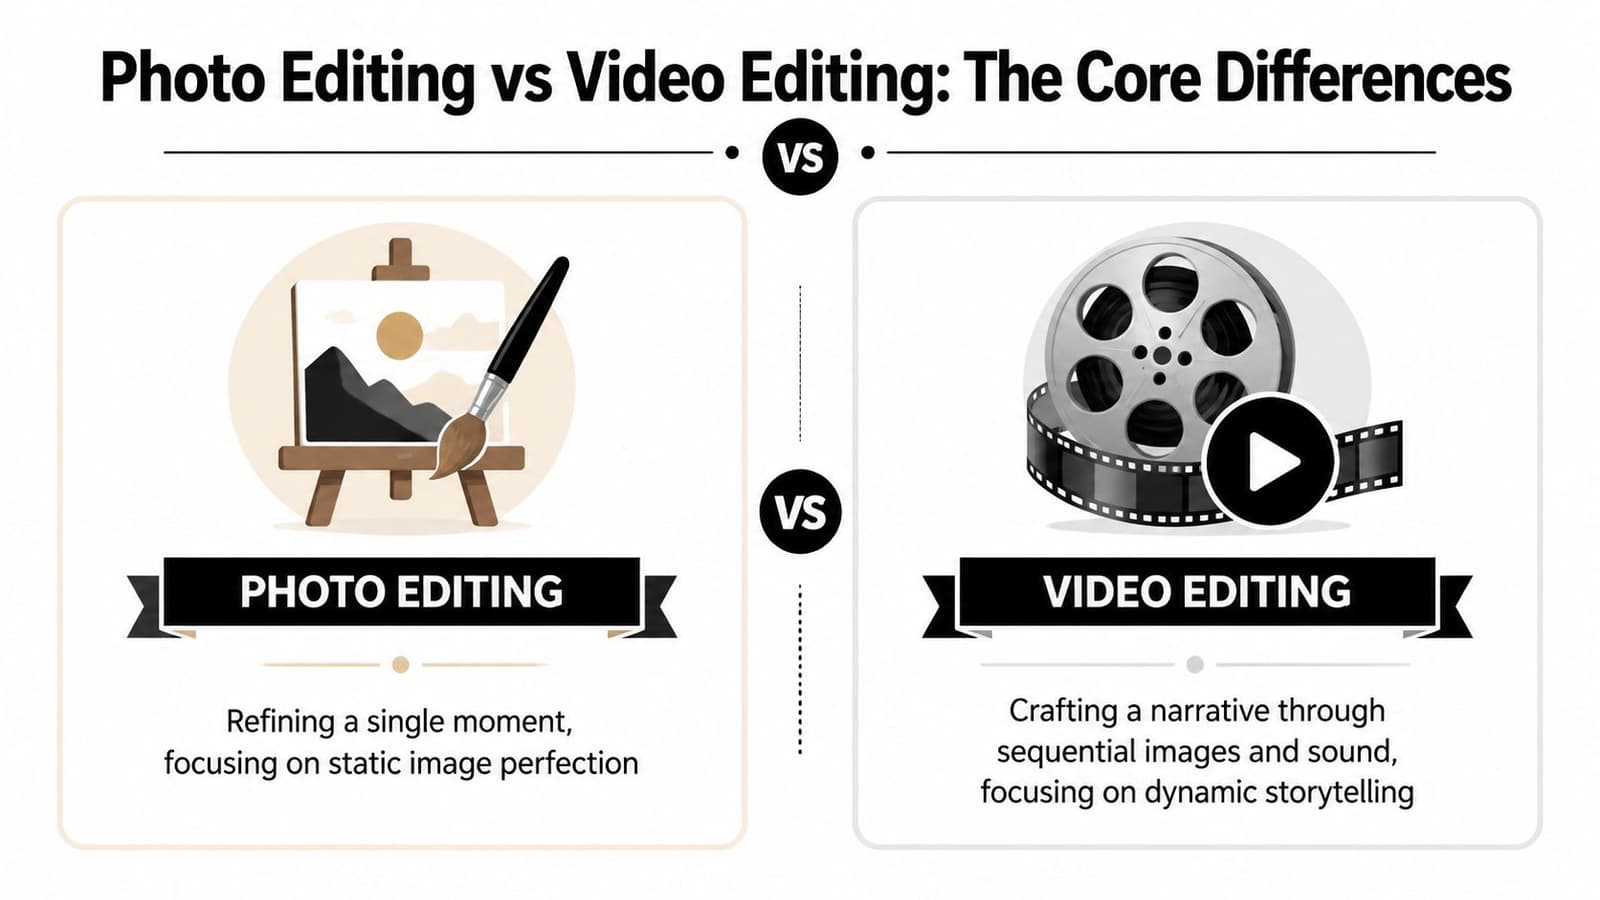
Photo editing is like restoring a painting. You stand in front of one frame and ask, “How do I make this single image clearer, more balanced, and more faithful to what it should feel like?” Video editing is like arranging a small stage performance. You're no longer responsible for one picture alone. You're responsible for time, order, rhythm, sound, and how one moment leads into the next.
What changes when time enters the equation
A photo is judged all at once. A viewer can study it for as long as they want. That means your job is to improve light, color, detail, and distractions inside one composition.
A video unfolds. Even a simple tribute reel made from still images asks different questions:
| Focus | Photo editing | Video editing |
|---|---|---|
| Main goal | Refine one image | Shape a sequence |
| Primary tools | Exposure, color, retouching, texture | Timeline, cuts, pacing, transitions, audio |
| Viewer experience | Instant impression | Emotional flow over time |
| Common mistake | Overprocessing details | Using effects that interrupt the story |
Different skills, different instincts
People often get confused because many programs include both photo and video features. But the decision-making is different.
With photos, you often zoom in and work locally. You notice scratches on a cheek, a blown-out highlight, or a color cast. With video, you zoom out mentally. You ask whether a moment arrives too early, stays too long, or clashes with the music.
Practical rule: Edit the photo until it can stand on its own. Edit the video until each image supports the one before and after it.
Why this difference matters for family projects
If you're making a memorial reel or anniversary montage, the order matters as much as the individual image quality. A slightly imperfect photo can still feel powerful in a well-paced sequence. A beautifully restored image can feel cold if it's dropped into a video with rushed transitions or mismatched music.
That's why good photo and video editing usually happens in two passes:
- Prepare each image carefully
- Assemble the story with intention
When readers struggle, it's often because they try to solve both problems at once. They animate before restoring. They add music before choosing image order. Separating the tasks makes the process calmer and the result stronger.
The Essential Photo Editing Workflow
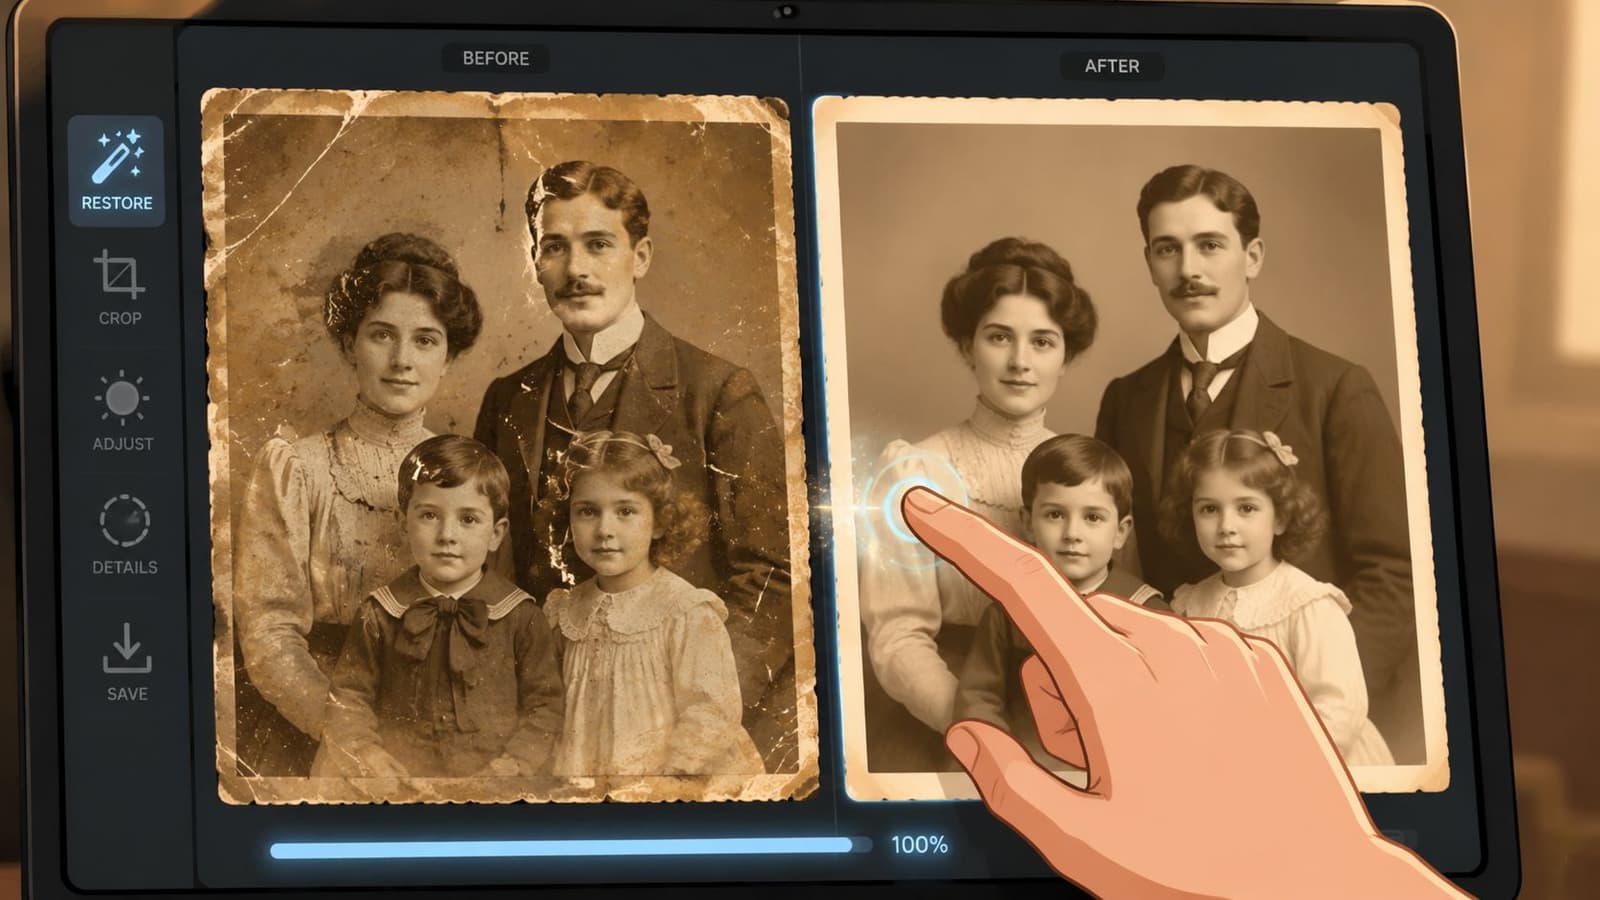
Old family photos ask for a gentler workflow than modern phone pictures. A scanned print is not just an image file. It is a record of paper, chemistry, age, storage, and handling. If you edit in the wrong order, you can erase the very qualities that make it feel real.
Start with repair, not style
Begin with cleanup in Lightroom, Photoshop, or any editor that gives you healing and spot-removal tools.
Focus on damage caused by the print or scan. Dust, lint, crease marks, scratches, and small stains usually distract from the memory rather than add to it. A soft jawline, film grain, slight blur, or a smile line often belongs to the original photograph and deserves a second thought before you remove it.
A simple test helps. If the flaw came from age, storage, or scanning, fix it. If it came from the person, the lens, or the printing process of that era, treat it as part of the photo's character until you have a clear reason to change it.
Fix light before you fix color
Light works like the foundation under paint. If the exposure is off, color corrections become harder to judge and easier to overdo.
Check these in order:
- Exposure: Is the photo too dim or faded?
- Contrast: Can the subject stand out without making faces look harsh?
- Highlights and shadows: Are bright areas losing detail? Are dark areas blocking up?
- Black and white points: Does the image have depth, or does it feel flat?
Scanned prints usually respond better to small corrections than dramatic ones. Many older photos were always a little soft. Pushing contrast too far can make them feel brittle and digital.
If the image still feels fuzzy after tonal correction, sharpen carefully and late in the process. This guide to sharpening an image without making it look brittle is useful when you need to decide whether the picture needs true sharpening or better tonal separation.
Protect the analog texture
This is the step many guides skip, and it matters most for tributes, memorial reels, and family slideshows.
An old scan often contains two kinds of imperfection at once. One kind is accidental, like dust or a fold mark. The other is native to the original object, like paper grain, film softness, or the slight unevenness of an aged print. Good restoration removes the first kind without scrubbing away the second.
That balance is emotional as much as technical. If you smooth every pore, flatten every grain pattern, and brighten every shadow, the result may look newer, but it can stop feeling like your family photo. It starts to resemble an imitation of the memory instead of the memory's original container.
Use texture controls with restraint. Noise reduction can help if a scan is harsh or blotchy, but too much can create waxy skin and plastic surfaces. Clarity, texture, and dehaze should be treated like seasoning, not repair tools. Add a little, zoom out, and ask whether the photograph still feels printed, handled, and lived with.
If a restored photo looks cleaner but less believable, the missing piece is often texture.
A practical workflow looks like this:
- Repair surface damage
- Balance exposure and contrast
- Correct color or tone
- Refine texture last
That last stage is easy to rush. For old family images, it often decides whether the result feels respectfully restored or subtly rewritten.
The Art of Video Editing and Storytelling
A family tribute often starts with a folder full of scans, phone clips, and a few short videos from different years. On their own, they are meaningful. In sequence, they can become a story people feel in their chest. That shift comes from editing choices that create rhythm, context, and room to remember.
For older photos, storytelling has an extra challenge. You are not only arranging moments. You are also deciding how long to stay with a faded smile, a soft-focus snapshot, or a slightly crooked scan before the next memory arrives. The timing matters because these imperfect images carry part of the memory in their texture.
Build the emotional arc before you polish anything
Start with a rough timeline and place your material in an order that feels human, not just tidy. Leave transitions, music cues, and motion refinements for later. First, figure out what the sequence is trying to say.
Three structures usually work well for family projects:
- Chronological: early years to later years
- Thematic: home life, friendships, work, holidays, quiet everyday scenes
- Single-event focus: one wedding, memorial, anniversary, or reunion
A rough cut helps you notice patterns that are hard to see in a photo folder. Several close-up portraits in a row can make the piece feel visually flat. Too many damaged or low-contrast scans back to back can slow the energy, even when the images matter greatly.
One simple fix is contrast by placement. Follow a tight portrait with a wider group shot. Follow a heavily worn print with a clearer image or a short video clip. The sequence starts to breathe.
If you're shaping a longer family montage, this guide on making a compilation video can help you organize material into sections that hold attention.
Use motion and cuts to support the memory
Video storytelling depends on change over time. With personal archives, that change is often small. A gentle push inward on a face. A pause before a cut to a different decade. A shorter hold on a duplicate moment so the viewer does not feel stuck.
Subtle movement works well for scanned photos because it respects what the image already is. A printed photo has its own physical character. If you add aggressive zooms, flashy wipes, or fast spins, the effect can overpower the original object and pull attention away from the person in it.
A good rule is simple. Every transition should answer a question like, "Why are we leaving this image now?" or "Why are we arriving at this one next?" If there is no clear answer, a plain cut is often stronger than an effect.
Editors sometimes worry that simple cuts will feel unfinished. In memory pieces, simple usually feels sincere.
Let audio carry context, not drama
Audio shapes how viewers interpret the same sequence of images. Music can make a set of ordinary snapshots feel warm, grieving, playful, or reflective within seconds. Voice-over can add names, dates, and family stories that the photos cannot explain on their own.
Use audio in layers, but give each layer a job.
| Audio layer | Best use | Common mistake |
|---|---|---|
| Music | Sets the emotional temperature | Picking a track that pushes harder than the images do |
| Voice-over | Adds family context and intimacy | Explaining every photo instead of letting some moments stay quiet |
| Ambient effects | Adds light realism to movement and scene changes | Making effects so noticeable that they distract from the people |
Old scans benefit from restraint here too. A worn black-and-white portrait does not need cinematic impact to feel powerful. Often it needs space. A short pause, a steady piece of music, and one well-placed sentence can do more than a crowded soundtrack.
If viewers start noticing the editing more than the people, the story has lost focus.
Strong storytelling in video editing usually looks modest on the surface. It is a matter of timing, order, and emotional trust. Hold a little longer on the photo that lets everyone recognize her expression. Cut sooner from the image that repeats information. Keep some of the analog softness in view so the piece still feels connected to the prints your family held in their hands.
How to Animate Photos into Short Video Clips
Animating a single photo used to mean obvious parallax tricks, fake head tilts, or canned slideshow effects. Today, the better approach is smaller and more believable. The goal is not to make a still image perform. The goal is to create the impression that the moment is gently continuing.

Choose the right kind of photo
Not every image is equally suited to motion. A strong candidate usually has a clear subject, readable face or posture, and enough background information for a camera move to feel natural.
Photos that often work well:
- Portraits with breathing room: A person framed with some space around them
- Moments with implied motion: Someone dancing, laughing, looking out a window
- Scenes with depth: Foreground subject, middle ground, and background separation
Harder images include crowded group shots, heavily damaged scans, and images where the face is tiny. Those can still be used in video, but they may work better as static moments inside a larger sequence.
Write motion prompts like camera notes
Many people freeze when asked to write a prompt. They think they need poetic language or technical jargon. You don't. Short, clear camera direction is usually enough.
Think in three parts:
- What should move
- How the camera should move
- What tone the result should have
Examples in plain language:
- “Gentle push in on her face, soft natural movement, warm nostalgic tone”
- “Slow camera drift from left to right, preserve old photo texture, respectful memorial mood”
- “Subtle movement in clothing and posture, slight zoom in, calm family keepsake feel”
Notice what these prompts avoid. They don't ask for dramatic action. They don't force smiles or exaggerated gestures. They describe motion the way an editor or camera operator might.
A practical walkthrough of photo-to-video AI workflows can help if you want examples of how simple wording changes the feel of the result.
Check the result like an editor, not a spectator
Once you generate a short clip, don't ask only, “Is this impressive?” Ask, “Does this still feel like the same memory?”
Look for these signs of a strong result:
- The face remains recognizable
- Texture still looks like a photo, not wax
- Movement is small enough to feel plausible
- The emotional tone matches the occasion
And watch for warning signs:
- Over-smoothed skin or paper
- Odd eye or mouth behavior
- Backgrounds that warp or pulse
- Motion that feels theatrical in a memorial context
This example shows the basic idea in action:
A short animated clip doesn't need to do much. If it helps someone feel the original image more vividly for a few seconds, it has done enough.
Exporting Privacy and Ethical Considerations

A tribute video can feel finished the moment the faces look right, the pacing feels calm, and the music lands where it should. But one more layer still matters. You need to decide how the file will be shared, how much detail it should keep, and whether everyone in the photo would be comfortable with where it ends up.
Export for the way the memory will be viewed
Exporting is packaging. The edit is the photo album you assembled. The export is the box you place it in so other people can open it without trouble.
For family tributes, memorial slideshows, and short social clips, MP4 is usually the safest choice because it plays well on phones, laptops, TVs, and event screens. The better question is not just which format to pick, but where the video will live after it leaves your editor.
A few examples help:
- Phone sharing: Vertical or square framing often reads better on small screens.
- Memorial service screens: Wide framing is usually easier to display correctly.
- Social posts: Shorter exports and platform-friendly dimensions reduce awkward cropping.
- Family archives: Save one high-quality master file, then make separate copies for sharing.
Old scanned photos need extra care here. Fine paper grain, soft focus, and light surface wear can disappear during heavy compression. If the file gets squeezed too much, the image may lose the very texture that makes it feel real and historical. For tribute work, that texture is often part of the memory.
Export a short test first.
A test export helps you catch problems that are easy to miss on the editing timeline, especially with animated scans and restored family photos. Text may sit too close to the edge. Subtle zooms may feel stronger on a phone than on a large screen. Film grain or paper texture may break apart into blotchy noise if the settings are too aggressive.
Privacy starts before you click upload
Online editing and animation tools can save time, but they also ask for something personal. They ask you to hand over an image that may include children, deceased relatives, private homes, handwritten notes, or moments your family has never shared publicly.
That makes privacy part of the editing process, not an afterthought.
Before uploading, check a tool's policies on file retention, deletion, and account access. If the service keeps uploads for training, stores them longer than you expect, or makes deletion hard to confirm, that matters. A family photo is not just another asset. It is closer to a document from your private archive.
Export settings affect clarity. Data handling affects dignity.
If a photo feels too sensitive to send to a cloud service, keep that step local. Many editors choose online tools for convenience, then use desktop software for final assembly and export when the material is more personal.
Ethics matter most when the image carries grief
Animating an old photo can be beautiful. It can also feel unsettling if the motion changes the person too much, smooths away their age, or turns a quiet portrait into something performative.
That tension shows up often in memorial work. Family members may agree that they want to honor someone, but disagree on how much movement feels respectful. A slight head turn or gentle camera push may feel tender. A broad smile, dramatic blink, or cinematic effect may feel like the software is speaking louder than the memory.
A simple review helps:
- Match the motion to the original photo: Formal portraits usually call for restrained movement.
- Preserve analog character: Keep some grain, paper texture, or softness if it belongs to the original scan.
- Check with close family first: A private share can prevent public discomfort later.
- Avoid effects that add emotion the photo did not contain: The goal is interpretation with care, not rewriting the moment.
- Consider the audience and setting: What feels right at a family gathering may feel too exposed on a public feed.
Good judgment shows up in small choices. Keeping a crease that tells the story of a worn print. Avoiding face reshaping that makes a grandparent look unfamiliar. Exporting a private version for family and a separate public version with less identifying detail.
Tasteful editing protects the person in the image, not just the image itself.
Your Next Steps in Photo and Video Editing
The heart of photo and video editing isn't software mastery. It's learning how to make deliberate choices. You clean what distracts, keep what carries history, and add only the movement or structure that helps the memory land more clearly.
That's especially true with old family photos. Their value rarely comes from technical perfection. It comes from presence. A soft expression, a familiar posture, a room that no longer exists. Good editing protects those details instead of flattening them into something generic.
If you want to practice without feeling overwhelmed, start with one small project. Pick a photo that matters, not one that's perfect.
Try one of these:
- Animate a wedding portrait for an anniversary post: Use a slow push-in and keep the texture soft.
- Create a short tribute from a grandparent's scanned photo: Let the movement stay minimal and pair it with simple music.
- Build a birthday reel from three family images: Mix one animated clip with two stills for contrast.
- Turn a product photo into a motion post: Use the same principles of gentle camera movement and clean pacing.
- Restore one damaged image before doing anything else: Learn the difference between repair and overprocessing.
A simple path for your first project
If you're unsure where to begin, keep the sequence basic:
- Choose one meaningful image
- Clean obvious damage
- Balance light and color
- Preserve grain and texture
- Add subtle motion or place it in a short sequence
- Export for the place it will be viewed
That's enough to build confidence.
You don't need to become a full-time editor to make something moving. You need a clear eye, a bit of patience, and a willingness to protect the feeling inside the image while you improve the file around it.
If you're ready to turn a treasured still into a short, natural-looking keepsake, Photo for Video offers a simple way to create a polished MP4 clip from a single image. It's built for family tributes, anniversaries, birthdays, and memorial projects, with guided motion prompts, texture-conscious results, and privacy-first handling that auto-deletes uploads and generations after 7 days.